Protect Your HVAC from an Earthquake in Southern California

When it comes to living in SoCal, earthquakes become a commonplace occurrence, not just a random act of nature. Seismic activity can do some serious damage to your home. This also includes any heavy equipment in your home, like a furnace and condenser. Here is what to expect and how to protect your HVAC from an earthquake in Southern California.

How an Earthquake Can Damage Your HVAC System

Most homeowners focus on how to protect the things inside their home from an earthquake. Many don’t even consider something like their HVAC system.

Here are the most common ways an earthquake in Southern California can hurt your HVAC:

  • Movement – An earthquake can knock even the heaviest of all condensers off its concrete pad. During this movement, several things can break inside the unit. This includes the fan, fan motor, coils, and any electrical wiring. The same theory applies to your furnace. Even though its in your attic, it can move from its set location.
  • Exterior Damage – Most exterior damage happens from debris falling onto the gas line, electrical wiring, or refrigerant line. It’s important to take exterior damage seriously because it could pose a health risk to you and your family.

What to Look for After an Earthquake in Southern California

No matter how big or how small the quake is, you need to check it out and assess the damage. Even small quakes can cause a significant break in a fuel or refrigerant line.

The first thing you should do is look at the outside of your unit. Are there any visible scrapes or dents? This could indicate that something fell on your system and damaged a part inside.

Now it’s time to check the water and condensate drain lines. You run the risk of major water damage if those lines are cracked or broken.

You’ll also want to look at any visible ductwork. Ducts are flexible metal tubes that are unfortunately a little delicate. Even with proper restraints and belting, the shaking can cause cracks and breaks.

Be Mindful of Potential Gas Leaks

Next, look at the gas line. This is perhaps the most important thing to look at. If you notice any visible damage to the gas line, immediately turn off the gas in your home.

Even the smallest of leaks can cause your home to fill with carbon monoxide. When your home filles with this noxious substance, it can have major health complications for your entire family.

Carbon monoxide is colorless and odorless. It cannot be detected with the naked eye. Instead, inspect the gas line for any cracks or tears and make sure the batteries in your carbon monoxide detector are up to date.

An Ounce of Prevention is Better Than a Pound of Cure

The good thing is that there are actions you can take to help minimize the likelihood of damage to your HVAC system. Some of our favorites are:

  • Vibration Isolators – During earthquakes, condensers and furnaces experience the most damage from shaking. Vibration isolators are small springs that can be installed under the condenser. The springs absorb some of the vibration and shock so that it’s not all concentrated on your system. Vibration isolators can also be installed in the fan if your unit it large enough.
  • Restraint Brackets – These are brackets that go on the corners of your condenser and furnace. They help absorb some of the shock of a quake and help support the vibration isolators.
  • Flex-Line Piping – Oftentimes, the lines that transport gas and refrigerant are stiff. This makes it easier for them to break during a quake. Flex-line piping is a pipe insert that absorbs some of the shock from an earthquake. Just like the vibration isolators, this will help stop some of the damage caused by a quake.

Protect Your Home, Protect Yourself

While most homeowner’s policies cover HVAC damages after a storm, many don’t cover earthquakes.

When it’s time to renew your policy, take some time to go over your earthquake coverage options. Either ask your insurance agent if they can offer you any earthquake coverage or check out the California Department of Insurance.

There are three things you’ll want to look for in an earthquake insurance plan.

  1. Dwelling Coverage – This coverage is usually for your main house only but will cover your HVAC system and any damages made to the home itself.
  2. Personal Property Coverage – This coverage goes to any belongings in the home. Negotiate how much you can have covered with an insurance agent.
  3. Additional Living Expenses – If your home needs to undergo repairs and you need to rent a hotel, this clause will help pay for those expenses.

Need someone to look at your system after a quake? Call the experts at A-Avis.

DIY HVAC Projects You Should Never Try at Home

Being handy at home is something nearly all homeowners enjoy. However, it’s important to know when to call in the pros. It’s not pretty when our techs are called in to fix attempted DIY HVAC projects.

While there may be a ton of YouTube videos telling you exactly what to do, that will never compare to the level of experience, professional knowhow, and specialized tools a certified HVAC technician will have.

For effective AC repair and service, you need to call in a professional.

Reasons You Shouldn’t Try to DIY HVAC Repairs

Carbon Monoxide

The biggest reason the average homeowner shouldn’t try any DIY HVAC projects is because working with heating and cooling systems can be incredibly dangerous because of the potential for carbon monoxide exposure.

Any sort of badly repaired line or gas leak can cause carbon monoxide to fill your home. This could put you, and your family, at extreme risk.

Electrical Danger

Another thing that can cause gratuitous bodily harm is high voltage electricity – just like the electric work used in your HVAC system.

HVAC systems have electrical wiring that should only be handled by a professional who’s had extensive training. The last thing we want is a client hurting themselves over a tune-up or small fix.

Issues with Insurance and Warranties

Most home insurance policies and company warranties will not cover any DIY HVAC work. A badly done DIY job can void your system warranty.

Most of these polices have language saying repairs must be done by a trained and licensed professional. Doing the fixes yourself can cost money in the long run and even make it hard for your to find new homeowners insurance.

DIY HVAC Repairs that Usually Go Wrong

Changing the Thermostat

Changing the thermostat sounds easy enough, right? Unfortuantely, that answer is wrong. Especially when it comes to a smart thermostat.

We’ve seen a lot of customers purchase a smart thermostat, try to install it and realize it just doesn’t work. An easy answer for this is that their HVAC equipment might be too old and can’t properly communicate with the advanced thermostat.

Another issue we see is electric. Thermostats need to be wired correctly or they won’t work. When a professional HVAC tech comes to your home to install a thermostat, they also make sure the wiring isn’t damaged or frayed. Then the easy part if just programming your new thermostat.

Blocking Room Vents

For some reason people think that by closing the vents to a room they don’t use will help save energy and lower their bills.

This “quick fix” can actually end up costing you a lot in the long run. A closed vent means the HVAC system is still producing enough air to cool your home, but now that air has nowhere to go.

In turn, this extra air just creates more pressure in your system which can raise your utility bills and even put a hole in your ductwork.

Cleaning the Outdoor Condenser

Even though your condenser looks like a big, tough piece of machinery, the coil inside is actually quite delicate.

We’ve seen homeowners think that they can just spray down the outside of the unit to get it nice and clean. Instead, when you spray a hose at it from the outside, you run the risk of twisting and bending the coils. Essentially rendering them useless.

What you Can Do

Clean Around the Condenser

Your condenser is the only part of your HVAC system that’s exposed to the elements all year long. While you don’t need to put a cover over your unit when it’s not in use. Cleaning around it is great.

At Service Champions, our technicians are constantly cleaning leaves, dirt, and other garden debris out of condensers. For a DIY HVAC project, we recommend regularly cleaning around your condenser to prevent any foreign objects from getting in.

Change the Air Filter

Changing the air filter in your HVAC system is easier than most would think. The hardest part is accessing an attic unit.

Our Service Champions techs recommend changing the air filter at least twice every year. Once in the spring before furnace season, and once in the fall before AC season.

We also recommend checking your air filter periodically if you live in a home with lots of shedding pets, live close to a construction site, and after fire season.

Battery Checks

Things like thermostats and carbon monoxide detectors are amazing safety tools and should be treated as such. One of the best things you can do for these tools is to check their batteries once every few months.

A thermostat is only good if it continues to work. The same can be said for a carbon monoxide detector.

Why the Air Conditioner May Give You a Sore Throat

Heating and air conditioning are such a part of everyday life that we usually don’t give them a second thought—until something goes wrong, or we experience discomfort of any kind. If you’re feeling a little choked up, there are three main reasons why an air conditioner can give you a sore throat.

Dry air, dirty air, allergies, and sore throats happen, and when they do, sometimes the first suspect is the air conditioning. While this isn’t true for everyone, there are times when a sore throat or other body reactions can be triggered by the air conditioner.

Improper Installation

A general reason why air conditioning may be to blame for a sore throat, or any type of discomfort, is improper installation. Faulty technical work, negligence, or accidents result not only in poor air conditioning but create areas that can foster lower sanitation and overall health.

When an air conditioner is installed in a bad location, it can degrade faster. This damage can be attributed to an excessive amount of UV rays, low amount of insulation, or improper air circulation.

A professional HVAC technician and installer makes sure the system is in a place that receives proper air flow.

Leaky Ductwork

Over time and with use, small leaks and punctures can appear in your ductwork. Ductwork is responsible for transporting air to the HVAC system, then distributing temperature-treated air to the home. These small leaks can lead to contaminates, such as dust and allergens, getting into your HVAC System.

Leaks and punctures within the central air system, duct work, and filter allow for dirt, dust and other irritants to contaminate the internal anatomy of the furnace and air conditioner as well as the indoor air supply. The dirt continues to build up over time, hurting the system efficiency and degrading air quality.

Lack of AC Maintenance

The air supply inside of the home is recycled again and again with each air conditioning cycle, traveling through the central air system and throughout the house. Homeowners who tend to skip out on AC maintenance can forfeit the benefits that come with a regular tune-up.

One of the biggest contributors to an AC induced sore throat is a dirty air filter. Air filters serve two important roles. First, they keep dust from clogging important components of your HVAC system. And second, they trap indoor air pollutants.

Air filters that are too full or haven’t been changed force your HVAC system to work harder to push air through the clogged filter. Additionally, your indoor air will stay polluted because the filter can’t pull dust, dander, allergens, and other contaminates from your air.

For those particularly sensitive to indoor air quality, several air-cleaning systems are available with the help of your HVAC contractor.

Closed Vent Control

Closed vents prohibit the interaction between indoor and outdoor air. This seals the house from the outside and the same air cycles around the home. Air that has been trapped indoors for prolonged periods of time grow stagnant, breed bacteria and collect dust.

Try opening the vents of the central air system to allow the exchange of outdoor air with indoor air. This allows for a new supply of healthier air for central air conditioning.

It’s also a good idea to open your windows from time to time and let fresh air in. This will help with keeping your air from getting stale.

What You Can do to Combat an AC Induced Sore Throat

Fortunately, there are a few things you can do when the air conditioner starts to give you a sore throat. Our tried and true methods for combating this are:

  • Schedule Regular Tune-Ups: The best thing you can do for your home and HVAC system is to schedule two tune-ups per year. Once in the spring before you start using the AC and once in the fall before it’s time to turn on the furnace.

    During a tune-up, our techs will clean everything in your system, making sure there is no buildup of dust or other debris.

  • Routinely Check the Air Filter: The air filter is responsible for trapping indoor air contaminates. When it’s too full, you could be breathing dirty air.
  • Keep Yourself Hydrated: Central air conditioners can dry out your air. Make sure you’re staying hydrated any time you’re home.
  • Frequently Dust and Vacuum: Some homes have more dust than others. A great way to keep that dust at bay is to routinely dust and vacuum your home.

When the Air Conditioner Isn’t to Blame

If your HVAC contractor cannot find any faults within the central air system, you can adjust some personal habits to help alleviate pain and discomfort.

Consider adding a humidifier to restore moisture in the air supply. When the central air system runs for great lengths of time, water is zapped out of the air. Your HVAC contractor can help you find the right humidifier for your home and lifestyle needs.

Always remember to keep hydrated to help wash out irritants breathed in.

Four Common Misunderstandings About How Your AC Works and How to Use It

Common Misunderstandings About How Your AC Works

At A-Avis, our techs help so many homeowners they have a trained eye for detecting problems common to Southern California air conditioning systems.

Far too often we see problems left unattended for so long they pose a greater threat later down the line. This compromises the system’s performance altogether or even the health of people living in the home.

We believe in empowering clients to make the right choices for their home and central air system. Because of this we’re sharing common misunderstandings about how your AC works.

Problem #1: Homeowners let the heat load get too high

It’s a common habit in Southern California to close the windows and doors for more than three to four hours at a time during peak heat periods. However, this results in no home ventilation.

While homeowners are out, the indoor home temperature can rise considerably. For example, it can be 95° outside and by the time you arrive home the indoor temperature has risen to 88°.

This is an uncomfortable temperature for most families. Turning on the air conditioner is the logical solution, most people set it in between 73° and 75°. Unfortunately, even if the air conditioning never turns off, it may take hours to lower indoor room temperature (as a whole) from 88° to 75°.

When the home gets too hot and the AC must work overtime, the system:

When the home gets too hot and the AC has to work overtime, it:

  • Stresses out the air conditioning system, adding strainItemized Image of a Central Air Conditioning System
  • Expends extra energy
  • Costs more to cool the home now and maintain later

Solution:

When you know you’ll be out of the house during peak heat hours, leave the air conditioner on to a reasonable temperature (78° to 80°). This allows your AC to run at a sustainable level so that you can adjust the thermostat to a comfortable 75 without stressing out your air conditioner.

Another solution would be to invest in a smart thermostat. This way you can control the temperature from your phone. Leaving the house? Set a higher temperature! On your way home from the store? Lower your temperature from your phone so you’re walking in to a nice, cool home.

Problem #2: A lower number on the thermostat does not mean cooler air

Central air systems work by cooling air 15° to 20° at a time. For example, if the indoor air temperature is 80°, the AC system takes that supply of air and subtracts 15° to 20° of heat before releasing it back into the home air supply. Because it mixes with the other 80° air that has not been conditioned yet, the air is somewhat cooler, but not necessarily the temperature that was set on your thermostat. It takes time for the indoor air to reach temperature equilibrium.


However, if you believe the mixing of temperature treated air and the indoor air supply is not the reason for poorly conditioned air there, may be a greater issue. Though air is still conditioned, it is less efficient, forcing the system to work twice as hard to cool the same amount of air.

Solution:

If your air is not cooling air in 15° to 20° increments, a maintenance call is required to restore proper function and efficiency levels.

Problem #3: Homeowners ignore filter maintenance

A regularly scheduled maintenance call usually eliminates issues with poor or dirty air filtration. From stuffed filters to debris buildup over the evaporator coils, keeping your central air system clean benefits the system itself and the cleanliness of the air inside of your home.

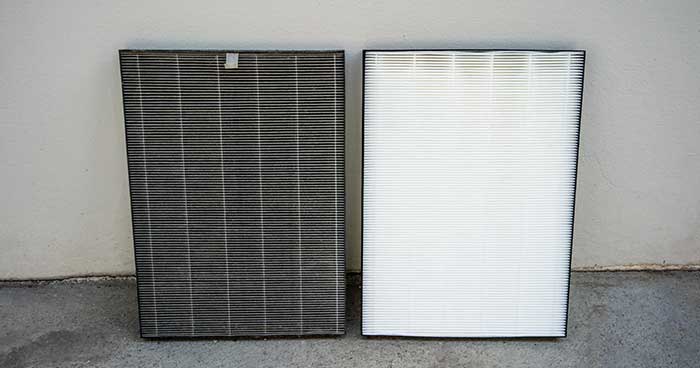
How Often Should I Change my HEPA Filter

When air filters are not cleaned or replaced it adds excess strain to the AC. This happens because less air gets through the filter and less air is conditioned. This can also cause the evaporator coils to ice up while the system overheats.

Refrigerant, an essential part of the cooling process, flows through the evaporator coil. This coil is made of hollow tubes that are cooled by the refrigerant. This colder temperature triggers the heat transfer process. Meaning any heat from the indoor air is transferred to the evaporator coil and refrigerant.

Something as simple as a dirty filter can stop this process because less room temperature air passes over the coils which in turn ice up.

Likewise, poor air flow due to dirty filters can result in the system overheating and shutting down. This is because a central air system needs a heat source to function, and restricted air flow means the same amount of energy is used for less and less air.

Dirty or overfull air filters are the number one reason a system shuts down.

Solution:

Have your preferred HVAC technician visit to service your AC system. Be sure to replace filters and have the evaporator coils and drip pans cleaned. These areas collect water and are prone to microbiological growth.

Problem #4: The AC system is not an open system

Most homeowners tend to think their air conditioning system is an open system. This is not the case. Contrary to popular belief, there is no need to refill your refrigerant supply.

In a perfect world, a properly installed system would incur no damage and would never need to be refilled. The idea being that refrigerant is recycled with every use.

Unfortunately, we don’t live in a perfect world and refrigerant leaks happen.

Refrigerant is a harmful substance and should only be handled by an HVAC professional. It can also damage the ozone layer.

Because of these two issues, it’s important you call someone immediately if you suspect a refrigerant leak.

When there is a leak in your refrigerant supply, the system is less efficient because it does not have enough cooling power to work with. If your AC system previously cooled indoor air in 20° increments, it now may be cooling in 10° increments; the air conditioner works harder to treat the same amount of air.

Solution:

Have your preferred HVAC technician repair the leak, refill refrigerant and recalibrate.

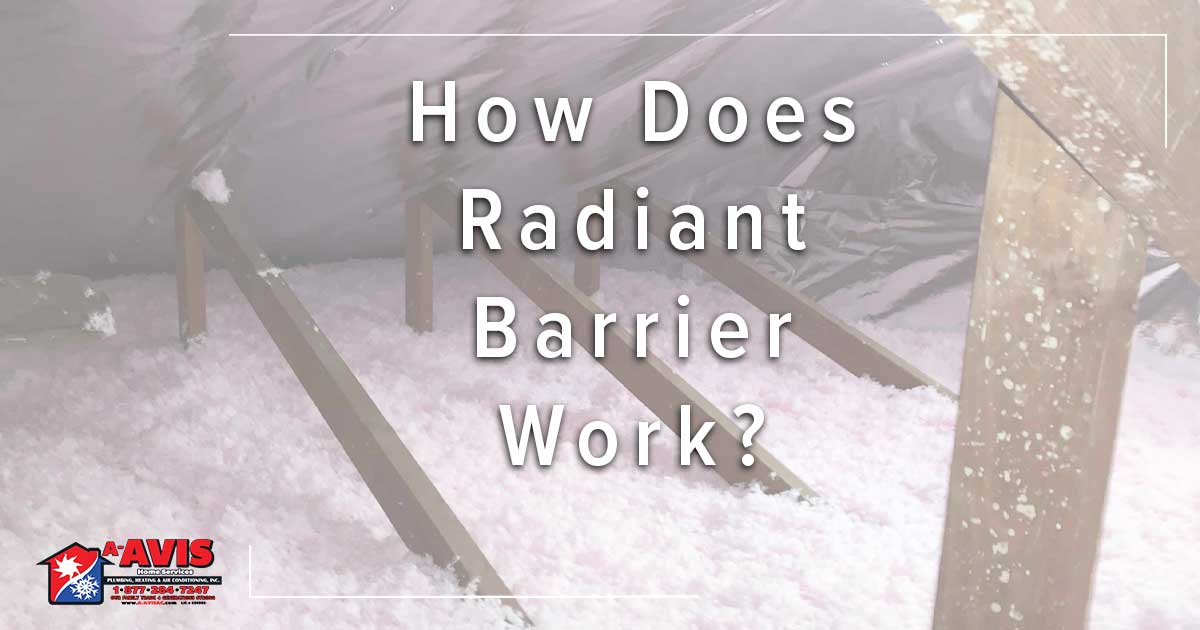
How Does Radiant Barrier Work?

We’re always looking for ways to make our homes as energy efficient as possible. A solution that sometimes goes overlooked is radiant barrier. This insulation method is pretty much tin foil. We can see your quizzical expression, and today we’re telling you how radiant barrier works.

What is Radiant Heat?

During the summer months, your attic takes a beating from the sun. For example, on a hot summer day even though it’s 95° outside, your attic can reach a temperature of 150°.

The reason your attic gets so hot without actual sun exposure is because of radiant heat. UV rays from the sun will make your attic so hot it starts to radiate its own heat. All without actually being touched by something that’s physically hot.

Think of your car in the sun. When parked in an area without shade, the inside of your car gets warmer faster than the outside temperature.

This extreme heat can do damage to anything stored in your attic and even your HVAC system. Additionally, the high temperature can be felt in your insulation, which transfers that heat to your home. Making your HVAC system run harder to cool your home.

How do Radiant Barrier Work?

Going back to the car example, when you put a shade over your windshield or park under a tree, these things block the heat from the sun. There’s a remarkable temperature difference between the interior heat of a shaded and non-shaded car.

This same rule applies to your home. Radiant barrier acts as a mirror in a way. It bounces heat and UV rays away from your home. The heat will try to transfer from the sun to your roof, shingles, and eventually your attic.

When installed properly, radiant barrier will stop heat from getting in. Think of an insulated stainless steel cup. The science that keeps your drink cold throughout the day can do the same for your home.

What is Radiant Barrier Made From?

Radiant barrier is a reflective surfaces that create a gap between your home and the sun. They’re usually made from an industrial grade tin foil. Similar to the tin foil blankets found in emergency survival kits.

A radiant barrier is made from an industrial grade foil that reflects heat rays back into the atmosphere.

We don’t recommend getting the tin foil in your kitchen and taping it all over your attic, this will do absolutely nothing and just waste a bunch of time and perfectly good tin foil.

Your options are to either call in a professional, like the ones at A-Avis. Or work closely with someone well versed in the language of home improvement.

What are the Benefits?

With the right conditions, radiant barrier can have great perks. This insulation will be the most beneficial for homes with HVAC systems and ductwork in the attic.

Radiant barriers block heat transfer in a natural way so you save money and decrease your carbon footprint.

When your HVAC system and ductwork are in the attic, the extreme heat from the sun can degrade your system and force it to work much harder than it needs to. With radiant barrier, you’re elongating the life of you HVAC system.

Additionally, you can save between 5% and 10% on your energy bill. Which also makes your carbon footprint a bit smaller.

Radiant barrier can be a great, cost effective, way to help keep your home cool, lengthen the life of your HVAC system, and be more energy efficient.

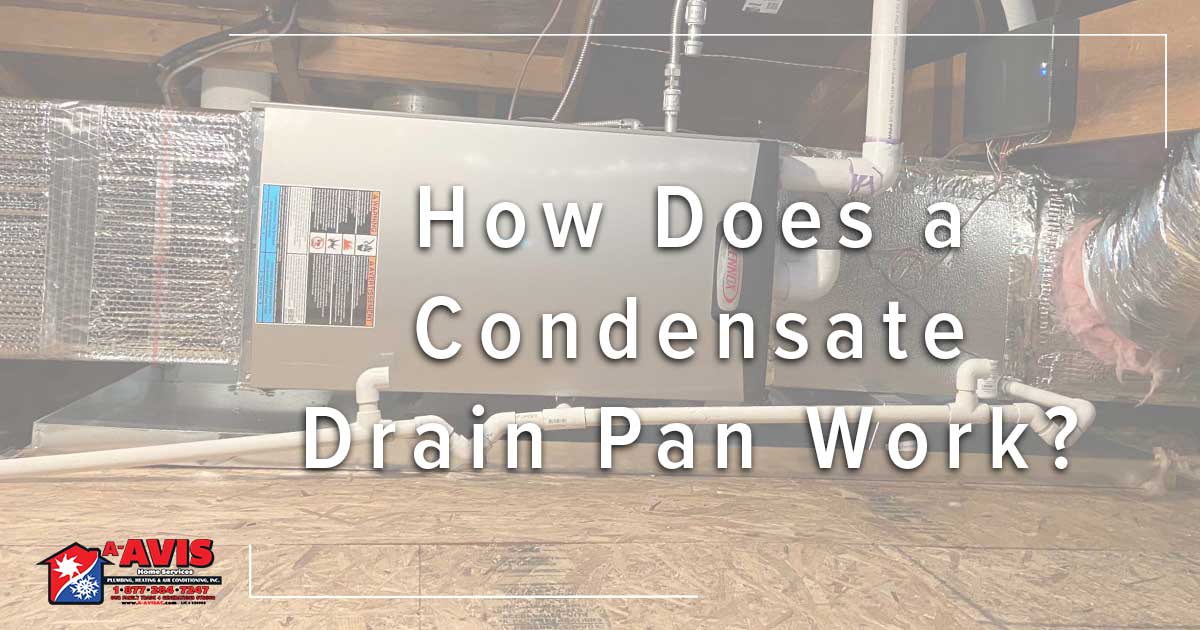
How Does a Condensate Drain Pan Work?

The condensate drain pan is an important part of the entire central air system. This little tray protects your home from damage and protects the furnace from microbiological growth and failure. Perhaps most importantly, it protects your home from any type of water-related safety issues.

Southern California homeowners who want to keep their home and air healthy and clean should also care for their condensate drain pans.

What does a Condensate Drain Pan Do?

The primary purpose of the condensate drain pan is to collect excess water that comes from the air conditioning process. But where does this water come from?

When the thermostat is set to cool, the evaporator coil, part of the central air system and found in the furnace, fills with compressed refrigerant. This A-shaped coil drops to very low temperatures and get very cold.

Moist, warm air from inside the home enters the HVAC system from air ducts. It then passes through the air filter and into the open center of the evaporator coil.

This is where a heat transfer takes place. Moisture and heat are pulled from the air. The now cool air is then pushed through the air ducts and into the house.

As the heat transfer goes on, condensation creates excess water. It’s similar to a glass of ice water on a hot day. After a few moments in a warm environment, the glass is covered in beads of water. In the same way, tiny water droplets collect along your evaporator coil. Water slips down the sides of the evaporator coil and right into the condensate pan fitted below.

This process continues until the air conditioning is turned off. The condensate drain pain is installed to safely collect any water that drips off the evaporator coil. Then, a condensate line in the pan moves water out of the home, emptying to the sewage system or another external location.

Where is the condensate drain pan located?          

The condensate drain pan is part of the evaporator coil. The evaporator coil is a box of tightly wound wires that sits around the furnace. Its exact location depends on the type of furnace installation in your home.

Vertical furnace installation or application

  • Vertical furnace installations are in the upright position. Typically, the furnace is installed in the furnace closet or garage. With these furnaces, the evaporator coil sits on top of the furnace. The condensate drain line is right beneath the evaporator coil.

Horizontal furnace installation or application

  • Horizontal furnace installations have the central air system lie on its side. The furnace is installed in the attic and placed in this position because of space constraints in the attic. Air flows side to side rather than up and down. The evaporator coil sits beside the furnace with the air ducts in the attic.

Why does the horizontal application have a second drain pan?

For attic furnaces, there is a second condensate drain pan. This is an added layer of protection from water damage.

In most HVAC systems, the entire central air system is lying on its side. In the event of condensate drain pan failure, water does not drip in one general location. Instead, water drips from the entire central air system. Additionally, overflow of water results in damage to the ceiling, drywall, and wood. To protect the home from water damage, a secondary condensate drain pan is fitted beneath the entire appliance. This is similar to placing a pan beneath the car during an oil change. This added barrier protects the floor from stains and other damages.

This secondary condensate drain pan also has its own drain line. It is connected directly from the pan to an external location, usually traveling out the window. It is highly visible. Homeowners should notice when the central air system reverts to this water removal method. It means that the standard method has been compromised. An HVAC specialist should be called in order to make timely repairs.

How does the condensate drain pan get damaged?

Unfortunately, there are times when the condensate drain pan can fail.

In the past, condensate drain pans were built of metal. Then, HVAC specialists discovered that water created rust that ate at the metal creating holes and leaks. Since then, condensate drain pans have been made of plastic.

The newer, plastic condensate drain pans are durable, lasting between five to 10 years. However, they are a part of the evaporator coil system and cannot be replaced independently.

What damages the condensate drain pan?

The condensate drain pan is meant to collect excess water generated during the air conditioning process. However, during the cold winter months, many homeowners only use the furnace. Because the condensate drain pan is located either directly above or directly below the furnace, the drain pain gets a blast of hot air with each heating cycle. The constant battery of heat sucks out the moisture of these plastic pans. Eventually, it leads to cracks.

A cracked pan is unable to hold water. When air conditioning season starts in the spring, water slips through the cracks of the pan, and can pool at the bottom or trickle throughout the furnace interior.

The drain itself can also clog. This can result from a dirty air filter, foreign obstruction, or simply old age. When this happens, water never makes it through the condensate drain line. Instead, water backups and fills the condensate drain pan. Unfortunately, these pans are not designed to carry large amounts of water. They’re quite shallow and built to hold water for a short amount of time. When they work correctly, water is constantly cycling through the condensate line. In the event of an overflow from a clog, water drips backward toward the furnace.

A clogged condensate line, a cracked condensate drain pan, or a soggy furnace can lead to many unwanted issues. This includes:

  • Microbiological growth
  • Safety hazards
  • Low indoor air quality
  • Internal buildup
  • AC repairs
  • Higher energy expenditure
  • Smelly air
  • Water damage to the home

Homeowners who find water pooling anywhere around their central air system should contact their HVAC specialist. Quickly finding repairs saves time, money and trouble that could avoid more permanent and serious damages.

Care for Your Condensate Drain Pan with the Experts at A-Avis

A-Avis is the best HVAC provider for Riverside and San Bernardino Counties. Our technicians lead in superior technical care for furnaces and air conditioners.

Homeowners of Southern California rely on our expertise and experience for exceptional HVAC service and genuine customer care. Your satisfaction is guaranteed.

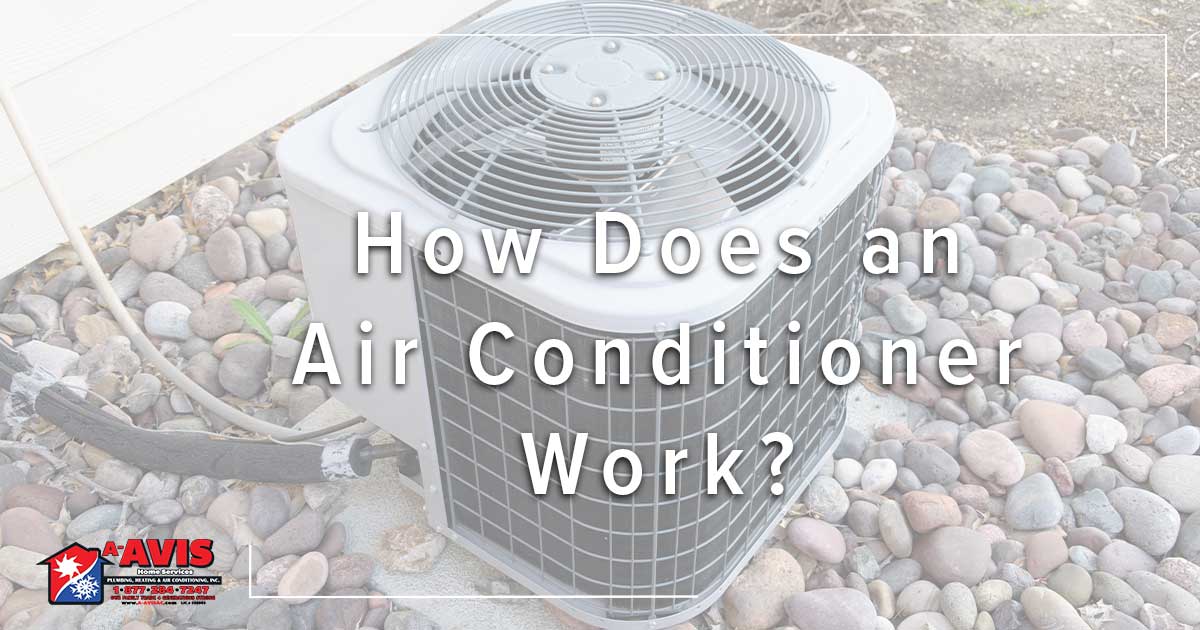
How Does an Air Conditioner Work?

The first modern air conditioner was introduced in 1902 by a young man named William Carrier. Back then, the air conditioner was used to offset humidity. Though the job has changed, the technicalities have stayed the same. For those wondering how an air conditioner works, we’re explaining everything below.

AC Basics

Carrier’s first AC system used a fan and steam coils. The steam coils were filled with cold water and the fan blew ambient air over said coils. As the air travelled over the cold coils, any excess humidity would condensate on the coils and produce nice, somewhat cool air.

While the machines look incredibly different, they way the function is essentially the same. Think of your air conditioner as a refrigerator. However, instead of a stainless steel box, the walls of your home keep the cool air in.

Key AC Parts

Every central air conditioning unit has 6 main parts. While it takes more than these key parts to make the system function at its highest level, no HVAC system could successfully do its job without these pieces.

  1. Thermostat – Your thermostat is the remote control of the entire HVAC system. It won’t start the cooling process until the thermostat tells it do so.
  2. Evaporator – The evaporator is a set of metal coils that use refrigerant to extract heat and humidity from the air.
  3. Blower – A blower circulates air over the evaporator and then disperses the temperature treated air through your home.
  4. Condenser – The condenser is another set of coils, only this set releases heat into the air outside your home.
  5. Compressor – Refrigerant is what pulls the heat out of air. The compressor moves refrigerant between in the indoor evaporator coils and outdoor condenser.
  6. Fan – The fan in the outdoor condenser has two jobs. It pulls warm outdoor air in to be treated. And it expels heat into the outdoor atmosphere.

How it All Works

The central air system is broken into two parts. One inside the house and one outside the house. Both these parts rely on refrigerant to keep your home cool.

One of the things we say a lot is that a central air system recycles air. When you turn on your HVAC system and set it to AC, the first thing it does is to pull air that’s already in your home into the HVAC system.

The warm air is pulled in by a vent and sent to your furnace. There it blows over the evaporator coil. The evaporator coil converts liquid refrigerant to gas. This refrigerant gas pulls heat and humidity from the warm air that flows over it.

After, the cool air is sent into your home. Then the refrigerant, now an incredibly hot vapor, is transported outside to the condenser. Refrigerant travels between the furnace and the condenser by way of the compressor.

As the hot vapor—full of heat and humidity from your treated air—flows from the evaporator coil to the condenser, it is exposed to the outdoor air. The ambient outdoor air pulls heat from the refrigerant, which changes the refrigerant from a vapor or gas back to a liquid.

When the refrigerant converts back to a liquid, it’s cool again and ready to repeat the process. This cycle continues until your home is at the temperature specified on your thermostat.

Types of Air Conditioners

When it comes to air conditioning options, most homeowners have a few they can choose from. We’re not here to tell you which one is best, it all depends on your individual situation. Here are the 4 most common types of air conditioners:

  • Central Air Conditioning – this is the most common type of cooling system we see in Southern California. It has two units and uses the process we described above. This is the most effective system for cooling a whole home. You have the option of zoning your home and switching to heat when the season turns.
  • Mini-Split System – The mini-split, or “ductless” system is found in older homes, smaller homes, hotels, or apartments. It operates the same way as central air conditioning but does not rely on ductwork for air distribution. The evaporator coil is in a single unit located inside your home.
  • Window Units – The window units are small air conditioners that are installed on a windowsill. They are typically used to cool a single room or studio apartment. We don’t recommend them for larger spaces.
  • Portable Air Conditioners – The portable air conditioner is similar to a window unit except it can be moved from room to room. These standalone units are usually on wheels and can be moved throughout a very small space.

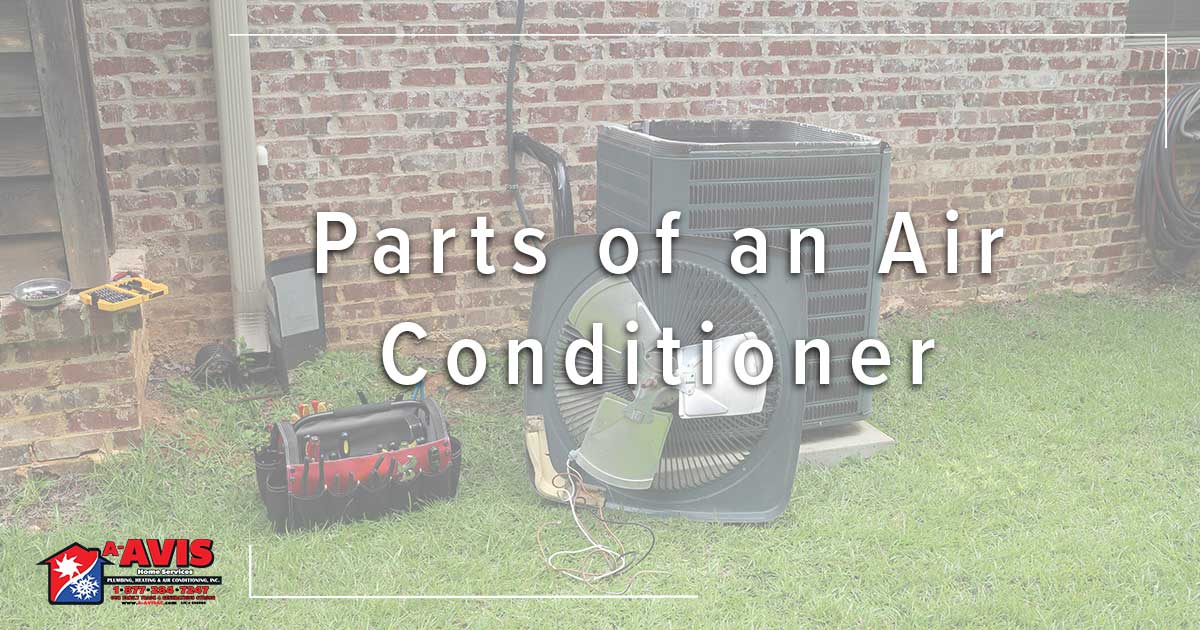
Parts of an Air Conditioner

It’s easy to take an air conditioner for granted during a Southern California summer. Even here we’re guilty of doing it. While your HVC system may just look like a big box that goes on and off, the truth is it’s full of intricate parts that all play a role in your overall comfort and safety. If you’ve ever wondered what they are, here are the parts of an air conditioner and what they do.

Any central HVAC system contains two major parts. The outdoor unit, called a condenser and an indoor unit called a furnace. Though the furnace is most associated with heat, it plays a major role in the cooling process as well.

Indoor Unit

The indoor half of your HVAC system does most of the work throughout the year. Don’t get us wrong, the condenser is crucial for cold air, but the furnace is used during all seasons.

We’ve talked about the parts of a furnace and what they do, now it’s time to see how a furnace works to make cool air.

Thermostat

Without the thermostat, your system wouldn’t even turn on. This is why it’s so important to have a thermostat that is up to date and works with your system.

To start any sort of air cycle—whether it’s heating or cooling—you’ll first turn on the thermostat. By doing so, you’re telling the HVAC system whether you want to heat or cool your home, and what temperature setting you want.

Evaporator Coil

Before we get into what an evaporator is, we’re telling you about refrigerant. Refrigerant is considered a “working fluid” that absorbs heat from the air. Without refrigerant, we wouldn’t have cool air.

Refrigerant is pumped from the outdoor condenser to the evaporator coil which lives in the furnace. The evaporator coil cools the refrigerant so it can absorb heat and humidity from any air flowing through your HVAC system.

To cool your home, the HVAC system will use warm air that’s already inside your home. When this air is pulled into the system, it moves over the evaporator coil. By cooling the refrigerant, the evaporator coil pulls any heat and humidity from the air.

Thus, with the help of the blower, it sends cool air back into your home.

Expansion Valve

Now that you know refrigerant needs to flow into the evaporator coil, we can tell you about the expansion valve.

The expansion valve is located in the refrigerant line, close to the evaporator coil. And it controls how much refrigerant is released into the coil. The expansion valve allows the system to work more efficiently.

When the evaporator coil gets too much refrigerant, the refrigerant can collect at the bottom of the input line. When the evaporator coil receives too little refrigerant, it’s forced to work harder to produce the same amount of air.

The expansion vale ensures your evaporator coils receives the perfect amount of refrigerant.

Blower

The blower is an essential part of your HVAC system. Without it, the treated air would have nowhere to go.

The blower produces air movement. It sends treated air back into your home and provides you with nice, cool air.

Blower Motor

All blowers need a blower motor. The motor makes sure the blower is constantly rotating and doing its job. The blower motor powers the blower to distribute treated air throughout your home.

Filter

The air filter has two very important jobs. First, it keeps dust and other debris from getting into your HVAC system. When enough dust collected on the parts of your system, it could lead to damage.

The second, and perhaps most important, job for a filter is to protect anyone in your home. Depending on the size and material, air filters can block, dust, dander, allergens, and even viral particles from getting into your lungs.

Ductwork

Ducts, or ductwork, are a series of flexible metal tubes that transport temperature treated air from your HVAC system to your home. Ductwork snakes through your basement, attic, and even inside your walls to reach the vents you see dispersed throughout your home.

Ducts are responsible for bringing air into the HVAC system and sending air back into your home.

Damper

The damper is pretty much the air traffic control of your HVAC system. When your system is on, there’s air constantly coming and going. All that air needs to be told where to go.

Dampers will ensure air is sent to the proper duct, so your home is evenly cooled.

Supply and Return vents

All treated air in your home needs an entry and exit point. This is where the supply and return vents come into play.

Return vents bring air in and back to the HVAC system. Supply vents send the treated air back into your home.

Outdoor Unit

Your outdoor AC unit is called a condenser. The condenser is home to 4 major parts that are critical to the home cooling process.

Condenser Coil

Remember the evaporator coil we mentioned above? The condenser coil is the opposite.

What we mean is that refrigerant heats in the condenser and makes the condenser coils very warm. This is done so heat can transfer from the refrigerant to the outdoor air.

The air conditioning process does not cool your air, it pulls heat from your air. That heat needs somewhere to go. The condenser sends all the warmth pack into the atmosphere.

Fan

The coils release heat back into the atmosphere, but that heat needs to go somewhere, right? This is where the fan comes in.

The fan moves extreme heat away from the condenser which helps stop the entire unit from overheating.

Compressor

The refrigerant we talk so much about needs a way to move from the condenser to the furnace and a way to convert from gas to liquid. This is all done in the compressor.

When refrigerant comes to the condenser from the furnace, it’s already hot. The compressor heats the refrigerant even further so it’s warmer than the outdoor air. Heat will transfer from the hot refrigerant to the cooler outdoor air.

The compressor then releases the pressure and sends the refrigerant back up to the evaporator coils where the refrigerant gets so cold that it pulls the heat from the air in your home.

Refrigerant Line

All that refrigerant needs some direction. The refrigerant line connects the condenser and furnace. Essentially allowing refrigerant to move between the two.

Know When It’s Time to Call for Help.

One of the best things you can do for your HVAC system is to get help sooner rather than later. We believe an ounce of prevention is better than a pound of cure. Here are some obvious signs it’s time to call an HVAC professional in for help:

How Much BTU do I Need for an Air Conditioner?

When it comes to investing in a new AC system, there are a lot of numbers to pay attention to. The different EER and SEER ratings matter, as do amperage and voltage levels. However, the most important number you’ll want to know is BTU, which measures the entire cooling capacity of your system. Some homes require a system with a high BTU, others not so much. If you ever find yourself asking, “how much BTU do I need for an air conditioner,” we have some answers below.

What is BTU?

To put it simply, BTU stands for British Thermal Units. This is the measurement used to measure energy. One BTU is the amount of energy required to raise the temperature of one pound of water by one degree Fahrenheit.

Think of it in terms of a calorie. Calories help power our bodies and give them energy. However, too many calories can lead to a sluggish system. You want the optimal number of calories—or BTUs—to power your system, but not to overload it.

Why Does BTU Matter?

BTU matters because it shows how much power the appliance has. The higher the BTU the faster a furnace or AC unit can change the temperature in your home.

There are a few things to consider though. A machine with a high BTU count can quickly temperature treat your home, but you may be looking at a higher bill. Something with a smaller BTU count will get your home to that optimal temperature, but it will take a few extra minutes.

How do I Calculate the Right Size?

There are a huge number of factors that go into determining the right size system and number of BTUs needed in your home. Just like HVAC systems, larger isn’t always better.

It’s important to find a system that works for you, your home, and your lifestyle. Anything can change the number of BTUs you need. Does your home have high ceilings? What about the location of your home? Do you have insulation?

All these will need to be taken into consideration when looking for the right sized system for your home.

What AC Unit is Best for My Home?

They type of AC unit you need depends on the type of home you’re living in. For studio dwellers, or people who rent a room, we recommend a portable AC unit.

Homeowners have more options. Our two favorites are the central home system and the ductless, or mini-split system.

Both these options have two components, an indoor unit and outdoor unit. Central AC systems are great for homeowners why may only have a furnace in place. It can add to your existing ductwork.

We recommend mini-split systems for homes that are new, or incredibly old. Both these homes usually do not have existing ductwork. Which makes the mini-split system your best bet.

Learn More About AC Options from A-Avis

At A-Avis, we believe an ounce of prevention is better than a pound of cure. That’s why we recommend scheduling an AC tune-up every year. During this appointment, one of our HVAC experts will look at every part of your system and give it a professional cleaning. They will also give any advice to keep your unit up and running and will let you know about best options for your home and lifestyle.

To meet your HVAC expert, dial the number at the top of the screen or click here to request an appointment online.

What Temperature Should I Set My AC During the Summer?

It’s somewhat common knowledge that when the summer hits, utility bills can go way up. We blame increased AC use. While there are myths about how to lower your utility bills, we’re here to share the truth. There is an optimal thermostat setting for the summer months. And the temperature setting may surprise you. If you’re wondering, what temperature should I set my AC during the summer, we have the answer.

What’s the Best Temperature?

This is probably going to come as a shock to you. For a balance between comfort and budget, the best temperature to set your thermostat to is 78°.

Before you disregard this and say we’ve let the heat get to our heads, there’s actual science to back this up. Your AC is engineered to detect the outside temperature and create a cooler temperature inside. No matter what setting is on the thermostat, your HVAC system is doing the same amount of work.

To save on bills, and be the most energy efficient, let the AC run at a higher setting. This will cool your home over time.

We know how easy it is to come home on a hot day and just blast your AC at the lowest temperature. However, as we mentioned above this is actually a bad idea.

By setting your thermostat to 78°, you’re allowing the HVAC system to efficiently find a temperature balance that balances the temperature inside with the temperature outside.

Set the Thermostat Higher when You’re Gone.

To really make a dent in your monthly bills, set the thermostat higher while you’re out. We’re talking up to 88°. This advice comes directly from HVAC manufacturers and engineers.

You want to set your thermostat to a temperature that’s closer to the air outside. This setting ensures your home won’t be a sauna or a freezer when you return home.

The process of continually shutting down your system then turning it back on puts unnecessary strain on everything—including your wallet.

Instead, running your system at a higher temperature allows it to run at a lower level, preserving its functions and maintaining it while you’re out of the house.  What’s the point of keeping a house cool if no one is home?

The best way to maintain this cycle is with a programmable thermostat. Set it to raise the temperature when you’re out of the house and lower it when you are home.

Best AC Setting for Sleep?

One question we hear time and time again is how should I adjust my thermostat for sleep? Just like waking hours, there is an optimal temperature your home should be at while you’re sleeping.

Finding the optimal temperature for sleep can be tricky. For example, The Sleep Foundation recommends your bedroom temperature to be between 60° and 67° for the best sleep. However, this can still change from person to person.

You can program your thermostat to start lowering the temperature of your home around bedtime. Or try opening some windows in your bedroom. Fresh air is important for overall health and wellness, and nighttime air will help keep the overall temperature down.

The 60° to 67° recommendation is for adults. Infants and children have different sleep needs and may need a warmer room.

Keep the Humidity in Check

Humidity can make a hot day so much worse. It’s because of how humidity works with your sweat. When you sweat in a dry climate the sweat quickly evaporates. This keeps you cooler.

When you sweat in a humid climate the sweat has a harder time evaporating. Therefore, you’re stuck in a hot, sticky mess.

An air conditioner does more than keep your house cool, it also controls humidity. If your humidity feels off the wall, it may be time to schedule a tune-up. Or it could be time to look into a dehumidifier. Either way, to keep yourself cool, take care of your humidity levels.

Natural Solutions to Keep Cool

In addition to adjusting your thermostat, there are a few natural solutions to keeping your home cooler during the summer months.

If you’re still asking what temperature should I set my AC during the summer, these ideas don’t add to any utility bills and are completely natural and sustainable.

  • Dress for the Temperature – A pair of joggers and a sweatshirt are always cozy. But when it’s summer, time to switch to short sleeves and short pants. You’ll truly feel the benefit of your AC system when you’re dressed for the season.
  • Put Up Blackout Curtains – Get a pair of blackout curtains and make sure they’re drawn when the sun is at its peak. This will help keep cool air in and block the sun’s hot rays.
  • Strategically Open Windows – Open your windows when you first wake up and when you’re settling down for bed. This allows for the circulation of fresh air into your home and brings in the cooler nigh and morning air.
  • Run the Fan – When you turn on your AC for the first time in a season, don’t forget to reverse your ceiling fans. During the summer, ceiling fans should be turning counterclockwise. This creates a refreshing downdraft.
  • Make sure to Weather Seal Your Home – All those little openings around your doors and windows can add up when the weather hits the high 80s. Every summer, take the time to inspect the seals around your windows and doors. Patch up any gaps between the windows or doors and wall.
  • Schedule Regular Tune-Ups – Routine tune-ups are the best way to ensure the longevity and efficiency of your HVAC system. At Service Champions, we recommend two tune-ups a year. Once in the spring and once in the fall.

Want the Best Temperature Solutions? Service Champions is Here

Still wondering what temperature should I set my AC during the summer? The HVAC experts at Service Champions have all the answers you’re looking for. Simply schedule an AC tune-up to and let us peek under the hood of your HVAC system.

Service Champions is the only Diamond Certified plumbing and HVAC provider in Southern California. We serve parts of Los Angeles, Orange, Riverside, and San Bernardino communities. Call the number at the top of the screen or click here to request an appointment online.