Warning Signs of a Slab Leak

If you’ve never heard the term slab leak, buckle up, it’s about to get rough. These leaks are one of the most challenging plumbing issues a homeowner can face. However, this plumbing problem only affects homes build on concrete slabs. For those not in the know, we’re explaining everything, including the warning signs of a slab leak.

What is a Slab Leak?

Slab leaks are something that only happens when your home is built on a concrete slab. They happen when a there is a leak in the water line that runs under your home’s concrete foundation.

A slab leak typically happens when a pipe under the concrete foundation is corroded or has a hole in it. Over time, these types of leaks allow water to inundate your home’s foundation. Water damage can also spread to the soil around it, creating a huge amount of damage.

When left untreated, slab leaks can do major damage to the foundation of your home. Eventually, the foundation can crack and move, causing your floors and walls to crack. In extreme causes, slab leaks have cause entire parts of a home to collapse.

How Common is it to Have a Slab Leak?

Slab leaks occur in concrete foundations.

Unfortuantely, California homeowners need to be on the lookout for slab leaks. Earthquakes can easily break pipes and concrete, both of which lead to leaks.

Older and historic homes also need to be on the look out for these types of leaks. With enough time and use, the commonly used copper pipes can corrode, which will lead to a number of plumbing issues. Slab leaks being one of them.

Five Warning Signs of a Slab Leak

Here are some of the tell tale signs you’re dealing with a slab leak.

Your Floor feels Warm

When the hot water line bursts, many homeowners can feel it through their floor. When the hot water is running, many homeowners can feel warm spots on the floor.

It’s easier to feel warm water spots on floors with carpet or thin linoleum. Tile and hardwood floors make it harder to feel these spots.

No matter what material your floors are, warm spots are something that should be investigated as soon as possible by a professional.

Water Bills are Shooting Up

Slab leaks can make your water bills go up.

When there’s a slab leak water is running 24/7. This will make a noticeable difference in your water bill.

One of the best ways to monitor your plumbing system in general is to keep an eye on your water bills. A sudden increase can indicate a number of plumbing issues.

In addition to slab leaks, a high water bill could indicate:

  • Leaks throughout your plumbing system
  • A fixture in your home (i.e. the toilet) is leaking
  • There’s a faucet that won’t stop dripping
  • There’s a leak in your sprinkler system

Water Pressure is Lower than Normal

Slab leaks can cause low water pressure.

When you have an active leak in your plumbing system, it takes away precious water from your other fixtures. Meaning your shower, faucets, and other plumbing fixtures are not getting the same amount of water they normally do.

This all leads to a lackluster shower or dish cleaning session. When you notice your water pressure has dropped for seemingly no reason, it could be a good indicator you’re dealing with a slab leak.

Carpet or Flooring is Damp

When slab leaks aren’t caught early enough, there’s a very high possibility they can damage your carpet or flooring.

Since these pipes are buried in concrete, there aren’t a lot of places for the water to go. With enough time, the water can collect all the way up and into your home.

Random Puddles in or Outside of the Home

Just like we mentioned above, when a leak is left long enough, the water needs somewhere to go. This can mean finding puddles inside or outside your home.

If you notice water pooling around your foundation on a warm day, this is a very obvious sign it’s time to call a plumber as soon as possible. Slab leaks can also force water to puddle in places like, under your cabinets or around your washing machine.

Slab leaks are something that should absolutely be left to professionals. Call your local plumber immediately if you suspect there is a leak in your concrete foundation.

How to Clean a Garbage Disposal

Cleaning your garbage disposal is a small task that makes a huge difference. One of the most effective ways it can make a difference is by getting rid of any lingering odors that might be wafting through your home. When your sink starts to have some stink lines coming from it, that’s a sure sign you need to clean your garbage disposal.

Tools Needed

One of the great things about garbage disposals is that they can usually clean themselves. The only time you need to worry about cleaning it is when some smells start to linger. However, when it’s that time, you’re going to need a few tools. They are:

  • Rubber Gloves
  • Sink Stopper
  • Abrasive Sided Kitchen Sponge
  • Dish Soap
  • Ice
  • Rock Salt
  • Citrus Peels

How to Clean a Garbage Disposal, Part 1: Scrubbing Instructions

It’s fairly easy to clean your garbage disposal, despite this, there are a few important steps to take.

Step One: Turn off the Power

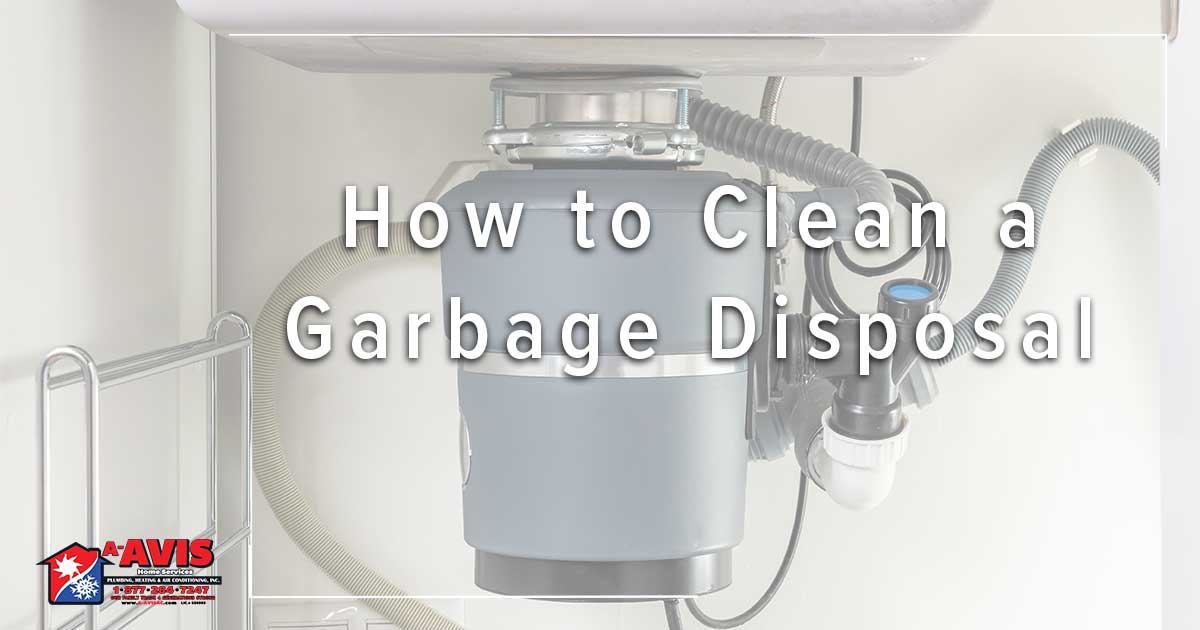
How to clean a garbage disposal, start by turning it off.

This is arguably the most important step when it’s time to clean a garbage disposal. Forgetting this step could lead to a hospital visit instead of a clean sink.

Some garbage disposals can be turned off by unplugging a power switch. For others, you may need to locate the breaker box and disconnect the power there.

Finally, give the on/off switch a little flip to make sure the power is truly off.

Step Two: Clean the Sink Baffle

The rubber stopper at the lip of your disposal is called a sink baffle.

Don’t be baffled by the baffle. It’s the technical name for the rubber splash guard that sits in the mouth of your garbage disposal.

Run your sponge under some water to get it nice and wet. Now, soap up the abrasive side of the sponge and get to scrubbing.

Make sure to scrub between all the folds and creases as well as the underside. A lot of nasty buildup can hide there.

Don’t forget to routinely rinse the sponge.

Step Three: Scrub the Grinding Chamber

You’re not going to scrub the blades themselves; this is what the ice and salt are for. Instead, you’ll be scrubbing the walls of the grinding chamber.

Use the sponge and just start scrubbing from the top. Frequently rinse the sponge and scrub the walls until the sponge isn’t pulling up any disposal sediment.

Step Four: Add the Ice

For this step, simply fill the disposal with ice cubes.

You don’t need to fill it all the way to the top, but it never hurts to put in too much ice.

Step Five: Add the Salt and Run the Disposal

You can clean your garbage disposal with ice.

For this step, measure out a cup of salt. We recommend rock salt instead of traditional table salt.

After you add the salt, run some water. We recommend cold water. When water is too hot it can break up any oils and fats which could lead to a nasty backup.

Cold water is preferred because it keeps any fats and oils clumped together. This lets them travel through your plumbing system without adding to any backups.

How to Clean a Garbage Disposal, Part 2: Deodorizing

Now that you have a nice, clean garbage disposal, the last thing you need to do is deodorize it.

Our favorite way to naturally deodorize a garbage disposal is with citrus peels. Whether it’s orange, lemon, or lime, it doesn’t matter. Just choose the scent you like the most.

Keep in mind, these peels are not to clean your disposal, they just give a nice scent.

Simply grind some of the peels in your now clean disposal. This will eliminate any lingering scents and leave your sink smelling nice and fresh.

How to Deep Clean a Bathroom

Cleaning the bathroom doesn’t need to be a daunting task. For some homeowners, cleaning the bathroom is a breeze, for others, not so much. We all have our preferences for cleaning and organizing. Here is our favorite way to deep clean a bathroom.

Items Needed to Deep Clean a Bathroom

There are a few things you should never be without in your cleaning arsenal. We’re sure you have most of these things on hand, but in case you want to make sure, here are all the things we use when working in the bathroom, or any other room in the house.

  • Toilet Brush
  • Bowl Cleaner
  • Rubber Gloves
  • All-Purpose Cleaning Spray
  • Baking Soda or other Powder Cleaner
  • Glass Cleaner
  • Bleach
  • Clean Rags
  • Paper Towels
  • Vacuum
  • Wet mop or wet Swiffer

How to Deep Clean a Bathroom: Step by Step Instructions

De-Clutter Your Space

The first thing you should do is clear the way for cleaning! Start by taking out any rugs, bathmats, or towels. Put them aside to be washed.

Use this moment to check for anything that can be put away or organized into a drawer, cabinet, or other storage solution. The less stuff you have on the floor and countertops, the less you’ll have to dust.

Start Without Liquids

For many, the first instinct is to grab the cleaner and start spraying everything down. This will usually lead to you doubling your work.

Start by dusting everything, and when we say everything, we mean everything. When you start by dusting, you’re making it so you can clean the dust as you go, instead of chasing after visible dust particles in a clean bathroom.

Start Tall, End Small

When it comes to deep cleaning a bathroom, start dusting at the celling and work your way to the floor.

Our next bit of advice is to begin by dusting at the top of the bathroom. This means any molding you may have, the light fixtures, fan blades, and anything else that may be on the walls.

After you’ve knocked all the dust down, start to clear it from the countertops, fixtures, and anything that may be residing on said countertop.

The last part of your dusting task will be the baseboards and floor. Don’t forget to dust the outside of the toilet. When you’re done, vacuum or sweep everything off the floor.

Spray Down the Glass

Use a microfiber cloth when cleaning glass doors and windows.

Now it’s time to get out the spray cleaner. We always start with the glass cleaner.

Spritz down the mirror, light fixtures, and windows. Give them a wipe down with a microfiber cloth or an old t-shirt. Washcloths and even paper towels can leave residue on your sleek surfaces.

Time for the Fixtures


Don’t put away the glass cleaner yet, you’ll be using it to wipe down the fixtures on your sink, shower, and tub.

Use the same cloth you did on the glass and wipe each fixture until it’s nice and clean. Use a little extra spritz of glass cleaner if you need it. Swap the cloth for a small brush if you have any buildup or mineral deposits on your faucets.

Clean the Countertop

When it comes time to clean the countertop, don't forget to spray down the soap dispenser and other grooming products.

This task can be broken into two parts. First, clean the items on your countertop. Start by wiping down any soap dispensers or cups and move on to any grooming products you keep out. Place them aside while you clean the countertop.

For most countertops, you can use an all-purpose cleaner. The only surface that needs a specific cleaner is granite.

Clean the countertops before the sink or any other porcelain surface. Even though you dry dusted the counter, loose dust can still find its way into the sink, shower, toilet, or tub.

After everything is wiped down, put everything back on the counter.

Scrub the Porcelain

Don't forget to scrub down the tub.

Now is the time when you want to break out the baking soda or other scrubbing agent. One of our favorites is Bar Keepers Friend.

Run a non-abrasive scrubber, like a mesh sponge, under some water to get it a little wet and then scour the sink, toilet, and tub.

Start at the rims of all of these and work your way down. It’s the same principle as dusting. Starting high up will knock any debris or residue down so you clean as you go.

Once everything is scoured clean, give everything a good rinse to wash away any grime or soap residue.

Tackle the Toilet

The toilet might be one of the grossest places to clean, so that’s why we recommend cleaning from the outside in. Spray the outside of the toilet with your all-purpose cleaner. Wipe it all down. Don’t forget to clean behind the toilet. It’s an awkward space that many homeowners forget about.

Next, use your all-purpose cleaner on the seat and lid. Spray and wipe everything down.

Now it’s time for the bowl. Use a toilet specific cleaner and distribute it along the top of the bowl. Then put some baking soda or commercial cleaner into the toilet water. Use a toilet brush to scrub the inside of the bowl.

Flush the toilet to rinse everything and you’re done with the toilet!

Leave the Floors for Last

Finish your deep clean by mopping the floor.

Now that everything else is done, it’s time to clean the floors. Begin with a broom or vacuum. Sweep up any excess dust that may have fallen during the cleaning process.

Next, get that mop wet and clean until the tile looks nice and shiny. Wait for everything to dry, then put down a clean bathmat and hang some clean towels.

How Does Radiant Barrier Work?

We’re always looking for ways to make our homes as energy efficient as possible. A solution that sometimes goes overlooked is radiant barrier. This insulation method is pretty much tin foil. We can see your quizzical expression, and today we’re telling you how radiant barrier works.

What is Radiant Heat?

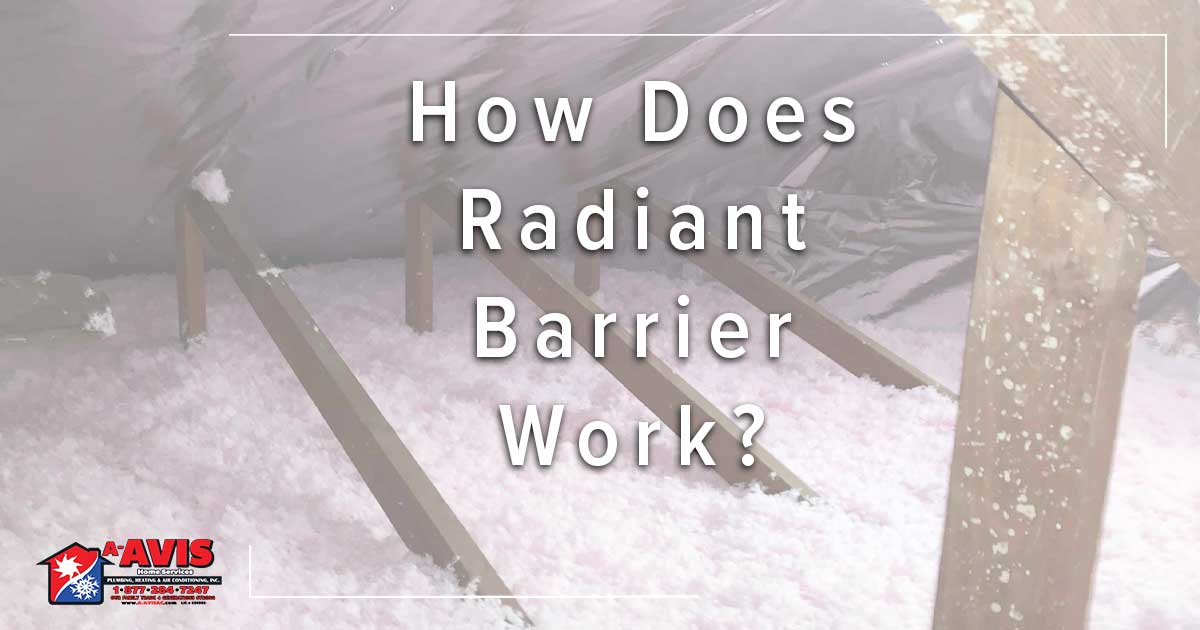
During the summer months, your attic takes a beating from the sun. For example, on a hot summer day even though it’s 95° outside, your attic can reach a temperature of 150°.

The reason your attic gets so hot without actual sun exposure is because of radiant heat. UV rays from the sun will make your attic so hot it starts to radiate its own heat. All without actually being touched by something that’s physically hot.

Think of your car in the sun. When parked in an area without shade, the inside of your car gets warmer faster than the outside temperature.

This extreme heat can do damage to anything stored in your attic and even your HVAC system. Additionally, the high temperature can be felt in your insulation, which transfers that heat to your home. Making your HVAC system run harder to cool your home.

How do Radiant Barrier Work?

Going back to the car example, when you put a shade over your windshield or park under a tree, these things block the heat from the sun. There’s a remarkable temperature difference between the interior heat of a shaded and non-shaded car.

This same rule applies to your home. Radiant barrier acts as a mirror in a way. It bounces heat and UV rays away from your home. The heat will try to transfer from the sun to your roof, shingles, and eventually your attic.

When installed properly, radiant barrier will stop heat from getting in. Think of an insulated stainless steel cup. The science that keeps your drink cold throughout the day can do the same for your home.

What is Radiant Barrier Made From?

Radiant barrier is a reflective surfaces that create a gap between your home and the sun. They’re usually made from an industrial grade tin foil. Similar to the tin foil blankets found in emergency survival kits.

A radiant barrier is made from an industrial grade foil that reflects heat rays back into the atmosphere.

We don’t recommend getting the tin foil in your kitchen and taping it all over your attic, this will do absolutely nothing and just waste a bunch of time and perfectly good tin foil.

Your options are to either call in a professional, like the ones at A-Avis. Or work closely with someone well versed in the language of home improvement.

What are the Benefits?

With the right conditions, radiant barrier can have great perks. This insulation will be the most beneficial for homes with HVAC systems and ductwork in the attic.

Radiant barriers block heat transfer in a natural way so you save money and decrease your carbon footprint.

When your HVAC system and ductwork are in the attic, the extreme heat from the sun can degrade your system and force it to work much harder than it needs to. With radiant barrier, you’re elongating the life of you HVAC system.

Additionally, you can save between 5% and 10% on your energy bill. Which also makes your carbon footprint a bit smaller.

Radiant barrier can be a great, cost effective, way to help keep your home cool, lengthen the life of your HVAC system, and be more energy efficient.

How Does a Condensate Drain Pan Work?

The condensate drain pan is an important part of the entire central air system. This little tray protects your home from damage and protects the furnace from microbiological growth and failure. Perhaps most importantly, it protects your home from any type of water-related safety issues.

Southern California homeowners who want to keep their home and air healthy and clean should also care for their condensate drain pans.

What does a Condensate Drain Pan Do?

The primary purpose of the condensate drain pan is to collect excess water that comes from the air conditioning process. But where does this water come from?

When the thermostat is set to cool, the evaporator coil, part of the central air system and found in the furnace, fills with compressed refrigerant. This A-shaped coil drops to very low temperatures and get very cold.

Moist, warm air from inside the home enters the HVAC system from air ducts. It then passes through the air filter and into the open center of the evaporator coil.

This is where a heat transfer takes place. Moisture and heat are pulled from the air. The now cool air is then pushed through the air ducts and into the house.

As the heat transfer goes on, condensation creates excess water. It’s similar to a glass of ice water on a hot day. After a few moments in a warm environment, the glass is covered in beads of water. In the same way, tiny water droplets collect along your evaporator coil. Water slips down the sides of the evaporator coil and right into the condensate pan fitted below.

This process continues until the air conditioning is turned off. The condensate drain pain is installed to safely collect any water that drips off the evaporator coil. Then, a condensate line in the pan moves water out of the home, emptying to the sewage system or another external location.

Where is the condensate drain pan located?          

The condensate drain pan is part of the evaporator coil. The evaporator coil is a box of tightly wound wires that sits around the furnace. Its exact location depends on the type of furnace installation in your home.

Vertical furnace installation or application

  • Vertical furnace installations are in the upright position. Typically, the furnace is installed in the furnace closet or garage. With these furnaces, the evaporator coil sits on top of the furnace. The condensate drain line is right beneath the evaporator coil.

Horizontal furnace installation or application

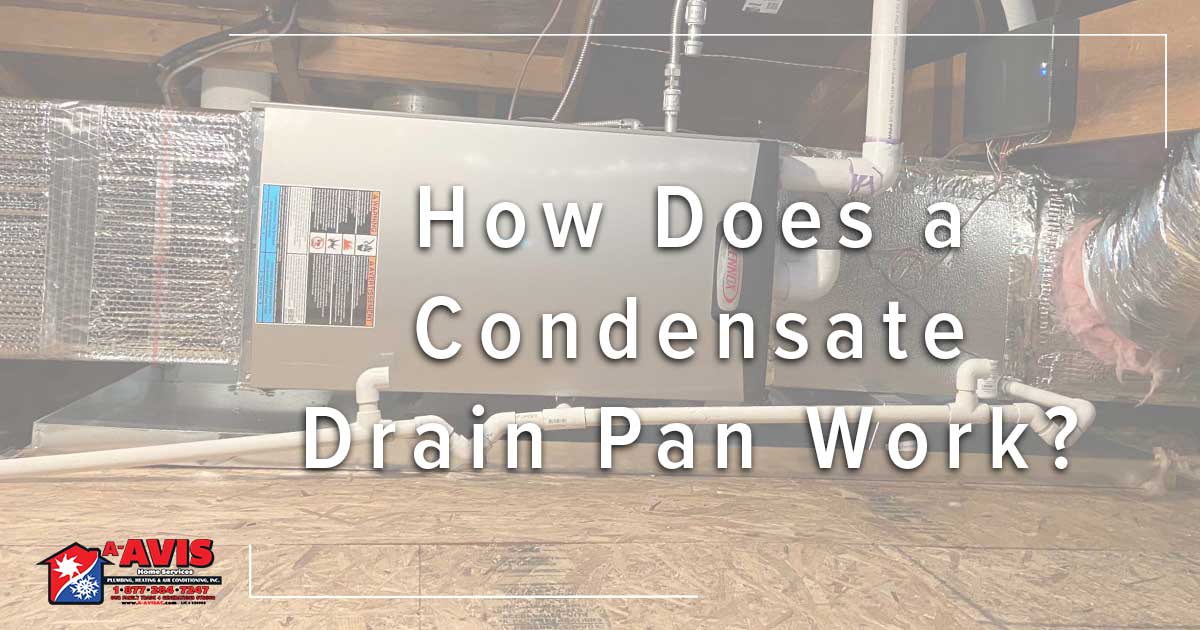
  • Horizontal furnace installations have the central air system lie on its side. The furnace is installed in the attic and placed in this position because of space constraints in the attic. Air flows side to side rather than up and down. The evaporator coil sits beside the furnace with the air ducts in the attic.

Why does the horizontal application have a second drain pan?

For attic furnaces, there is a second condensate drain pan. This is an added layer of protection from water damage.

In most HVAC systems, the entire central air system is lying on its side. In the event of condensate drain pan failure, water does not drip in one general location. Instead, water drips from the entire central air system. Additionally, overflow of water results in damage to the ceiling, drywall, and wood. To protect the home from water damage, a secondary condensate drain pan is fitted beneath the entire appliance. This is similar to placing a pan beneath the car during an oil change. This added barrier protects the floor from stains and other damages.

This secondary condensate drain pan also has its own drain line. It is connected directly from the pan to an external location, usually traveling out the window. It is highly visible. Homeowners should notice when the central air system reverts to this water removal method. It means that the standard method has been compromised. An HVAC specialist should be called in order to make timely repairs.

How does the condensate drain pan get damaged?

Unfortunately, there are times when the condensate drain pan can fail.

In the past, condensate drain pans were built of metal. Then, HVAC specialists discovered that water created rust that ate at the metal creating holes and leaks. Since then, condensate drain pans have been made of plastic.

The newer, plastic condensate drain pans are durable, lasting between five to 10 years. However, they are a part of the evaporator coil system and cannot be replaced independently.

What damages the condensate drain pan?

The condensate drain pan is meant to collect excess water generated during the air conditioning process. However, during the cold winter months, many homeowners only use the furnace. Because the condensate drain pan is located either directly above or directly below the furnace, the drain pain gets a blast of hot air with each heating cycle. The constant battery of heat sucks out the moisture of these plastic pans. Eventually, it leads to cracks.

A cracked pan is unable to hold water. When air conditioning season starts in the spring, water slips through the cracks of the pan, and can pool at the bottom or trickle throughout the furnace interior.

The drain itself can also clog. This can result from a dirty air filter, foreign obstruction, or simply old age. When this happens, water never makes it through the condensate drain line. Instead, water backups and fills the condensate drain pan. Unfortunately, these pans are not designed to carry large amounts of water. They’re quite shallow and built to hold water for a short amount of time. When they work correctly, water is constantly cycling through the condensate line. In the event of an overflow from a clog, water drips backward toward the furnace.

A clogged condensate line, a cracked condensate drain pan, or a soggy furnace can lead to many unwanted issues. This includes:

  • Microbiological growth
  • Safety hazards
  • Low indoor air quality
  • Internal buildup
  • AC repairs
  • Higher energy expenditure
  • Smelly air
  • Water damage to the home

Homeowners who find water pooling anywhere around their central air system should contact their HVAC specialist. Quickly finding repairs saves time, money and trouble that could avoid more permanent and serious damages.

Care for Your Condensate Drain Pan with the Experts at A-Avis

A-Avis is the best HVAC provider for Riverside and San Bernardino Counties. Our technicians lead in superior technical care for furnaces and air conditioners.

Homeowners of Southern California rely on our expertise and experience for exceptional HVAC service and genuine customer care. Your satisfaction is guaranteed.

How Does an Air Conditioner Work?

The first modern air conditioner was introduced in 1902 by a young man named William Carrier. Back then, the air conditioner was used to offset humidity. Though the job has changed, the technicalities have stayed the same. For those wondering how an air conditioner works, we’re explaining everything below.

AC Basics

Carrier’s first AC system used a fan and steam coils. The steam coils were filled with cold water and the fan blew ambient air over said coils. As the air travelled over the cold coils, any excess humidity would condensate on the coils and produce nice, somewhat cool air.

While the machines look incredibly different, they way the function is essentially the same. Think of your air conditioner as a refrigerator. However, instead of a stainless steel box, the walls of your home keep the cool air in.

Key AC Parts

Every central air conditioning unit has 6 main parts. While it takes more than these key parts to make the system function at its highest level, no HVAC system could successfully do its job without these pieces.

  1. Thermostat – Your thermostat is the remote control of the entire HVAC system. It won’t start the cooling process until the thermostat tells it do so.
  2. Evaporator – The evaporator is a set of metal coils that use refrigerant to extract heat and humidity from the air.
  3. Blower – A blower circulates air over the evaporator and then disperses the temperature treated air through your home.
  4. Condenser – The condenser is another set of coils, only this set releases heat into the air outside your home.
  5. Compressor – Refrigerant is what pulls the heat out of air. The compressor moves refrigerant between in the indoor evaporator coils and outdoor condenser.
  6. Fan – The fan in the outdoor condenser has two jobs. It pulls warm outdoor air in to be treated. And it expels heat into the outdoor atmosphere.

How it All Works

The central air system is broken into two parts. One inside the house and one outside the house. Both these parts rely on refrigerant to keep your home cool.

One of the things we say a lot is that a central air system recycles air. When you turn on your HVAC system and set it to AC, the first thing it does is to pull air that’s already in your home into the HVAC system.

The warm air is pulled in by a vent and sent to your furnace. There it blows over the evaporator coil. The evaporator coil converts liquid refrigerant to gas. This refrigerant gas pulls heat and humidity from the warm air that flows over it.

After, the cool air is sent into your home. Then the refrigerant, now an incredibly hot vapor, is transported outside to the condenser. Refrigerant travels between the furnace and the condenser by way of the compressor.

As the hot vapor—full of heat and humidity from your treated air—flows from the evaporator coil to the condenser, it is exposed to the outdoor air. The ambient outdoor air pulls heat from the refrigerant, which changes the refrigerant from a vapor or gas back to a liquid.

When the refrigerant converts back to a liquid, it’s cool again and ready to repeat the process. This cycle continues until your home is at the temperature specified on your thermostat.

Types of Air Conditioners

When it comes to air conditioning options, most homeowners have a few they can choose from. We’re not here to tell you which one is best, it all depends on your individual situation. Here are the 4 most common types of air conditioners:

  • Central Air Conditioning – this is the most common type of cooling system we see in Southern California. It has two units and uses the process we described above. This is the most effective system for cooling a whole home. You have the option of zoning your home and switching to heat when the season turns.
  • Mini-Split System – The mini-split, or “ductless” system is found in older homes, smaller homes, hotels, or apartments. It operates the same way as central air conditioning but does not rely on ductwork for air distribution. The evaporator coil is in a single unit located inside your home.
  • Window Units – The window units are small air conditioners that are installed on a windowsill. They are typically used to cool a single room or studio apartment. We don’t recommend them for larger spaces.
  • Portable Air Conditioners – The portable air conditioner is similar to a window unit except it can be moved from room to room. These standalone units are usually on wheels and can be moved throughout a very small space.

How to Clean a Showerhead

Almost nothing feels better than a powerful stream of warm water during a shower. We all know that feeling and if you’re anything like us, you want to have that experience every time you step under the showerhead.

We’ve written before about the problems caused by hard water. Unfortunately, without proper care, hard water can make your shower experience not so nice. Here is our guide for how to clean a showerhead.

How do Showerheads Get Dirty?

We briefly mentioned it above, but hard water is usually the main culprit when it comes to crud on your showerhead. Hard water filled with calcium, magnesium, and lime is a thorn in the side of every Southern California homeowner.

After hard water passes through your showerhead, it leaves behind mineral deposits. Over time, these deposits leave scale and buildup that not only look bad, but they can also clog your showerhead.

How Often Should I Clean the Showerhead?

The most annoying thing about the mineral deposits that clog your showerhead is that they get in the way of the nice waterflow you’ve come to expect with a good shower.

There’s no set or specific timeframe in which you should clean your showerhead. We just say to clean it when you notice a change in waterflow. For some households, that’s every other month, for others, ever few weeks.

It all depends on how hard the water in your area is, how often you use the shower, and how many people are in your household.

How to Clean Your Showerhead

The best way to clean a showerhead is with supplies you probably have in your pantry. All you need is white vinegar, plastic foot storage back, rubber band, a washcloth, and an old toothbrush.

  1. The first step is to pour at least a cup of vinegar into the plastic food storage bag. For larger showerheads, you’ll need more than a cup of vinegar and a larger bag. The bag should fit over your showerhead.
  2. Dip the showerhead into the bag and secure the bag to the shower arm. This is when you can adjust the amount of vinegar in the plastic bag. Add more if needed and take out anything that’s spilling over.Secure the bag with a rubber band, masking tape, or a zip tie.
  3. Next, just let the showerhead soak. Since the vinegar needs to stay a room temperature, it takes a bit longer than usual. Sit down and watch a movie or a few episodes of your favorite TV show.The exception to this is if you have a brass, gold or nickel coated showerhead. Leave the bag of vinegar on for only 30 minutes. Anything longer can damage the finish.
  4. After the proper amount of time has elapsed, take off the bag. Use the washcloth and gently wipe down the showerhead. Lightly scrub water openings with an old toothbrush dipped in vinegar.
  5. Once everything is wiped down, turn on the shower for a few minutes. Let the warm water rinse away the vinegar and any remaining debris.

For an easy way to maintain your showerhead between cleanings, keep a spray bottle filled with a 50/50 solution of white vinegar and water. Quickly spray the showerhead after every use.

What You Should Not Use

While it’s fairly easy to source the supplies needed to clean a showerhead, there are some household items you should never use.

The first thing that comes to mind is bleach. You should never use bleach to clean a showerhead. Contrary to what you may think, bleach increases bacteria growth on your showerhead.

Another thing you shouldn’t use is a premade chemical cleaner. It’s easy to find something in the cleaning aisle at your local grocery store, but we can guarantee that harsh chemicals have the potential to damage your showerhead.

The final thing we advise against is the use of hard brushes. Course brushes can scratch the finish of your showerhead and leave it a streaky mess.

Parts of an Air Conditioner

It’s easy to take an air conditioner for granted during a Southern California summer. Even here we’re guilty of doing it. While your HVC system may just look like a big box that goes on and off, the truth is it’s full of intricate parts that all play a role in your overall comfort and safety. If you’ve ever wondered what they are, here are the parts of an air conditioner and what they do.

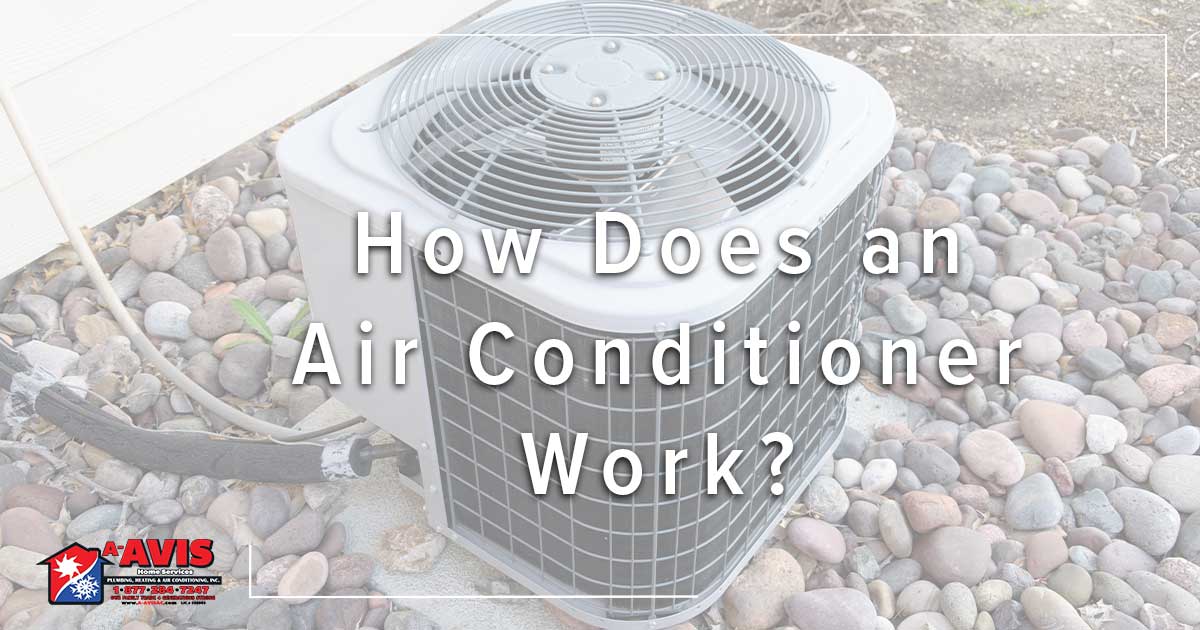
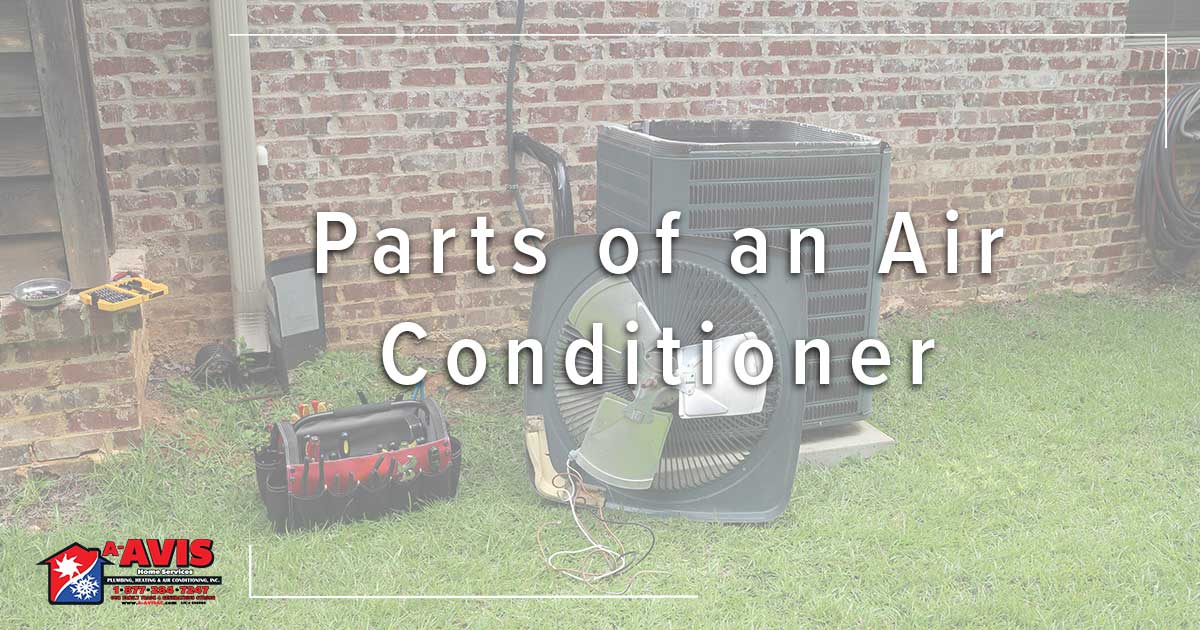
Any central HVAC system contains two major parts. The outdoor unit, called a condenser and an indoor unit called a furnace. Though the furnace is most associated with heat, it plays a major role in the cooling process as well.

Indoor Unit

The indoor half of your HVAC system does most of the work throughout the year. Don’t get us wrong, the condenser is crucial for cold air, but the furnace is used during all seasons.

We’ve talked about the parts of a furnace and what they do, now it’s time to see how a furnace works to make cool air.

Thermostat

Without the thermostat, your system wouldn’t even turn on. This is why it’s so important to have a thermostat that is up to date and works with your system.

To start any sort of air cycle—whether it’s heating or cooling—you’ll first turn on the thermostat. By doing so, you’re telling the HVAC system whether you want to heat or cool your home, and what temperature setting you want.

Evaporator Coil

Before we get into what an evaporator is, we’re telling you about refrigerant. Refrigerant is considered a “working fluid” that absorbs heat from the air. Without refrigerant, we wouldn’t have cool air.

Refrigerant is pumped from the outdoor condenser to the evaporator coil which lives in the furnace. The evaporator coil cools the refrigerant so it can absorb heat and humidity from any air flowing through your HVAC system.

To cool your home, the HVAC system will use warm air that’s already inside your home. When this air is pulled into the system, it moves over the evaporator coil. By cooling the refrigerant, the evaporator coil pulls any heat and humidity from the air.

Thus, with the help of the blower, it sends cool air back into your home.

Expansion Valve

Now that you know refrigerant needs to flow into the evaporator coil, we can tell you about the expansion valve.

The expansion valve is located in the refrigerant line, close to the evaporator coil. And it controls how much refrigerant is released into the coil. The expansion valve allows the system to work more efficiently.

When the evaporator coil gets too much refrigerant, the refrigerant can collect at the bottom of the input line. When the evaporator coil receives too little refrigerant, it’s forced to work harder to produce the same amount of air.

The expansion vale ensures your evaporator coils receives the perfect amount of refrigerant.

Blower

The blower is an essential part of your HVAC system. Without it, the treated air would have nowhere to go.

The blower produces air movement. It sends treated air back into your home and provides you with nice, cool air.

Blower Motor

All blowers need a blower motor. The motor makes sure the blower is constantly rotating and doing its job. The blower motor powers the blower to distribute treated air throughout your home.

Filter

The air filter has two very important jobs. First, it keeps dust and other debris from getting into your HVAC system. When enough dust collected on the parts of your system, it could lead to damage.

The second, and perhaps most important, job for a filter is to protect anyone in your home. Depending on the size and material, air filters can block, dust, dander, allergens, and even viral particles from getting into your lungs.

Ductwork

Ducts, or ductwork, are a series of flexible metal tubes that transport temperature treated air from your HVAC system to your home. Ductwork snakes through your basement, attic, and even inside your walls to reach the vents you see dispersed throughout your home.

Ducts are responsible for bringing air into the HVAC system and sending air back into your home.

Damper

The damper is pretty much the air traffic control of your HVAC system. When your system is on, there’s air constantly coming and going. All that air needs to be told where to go.

Dampers will ensure air is sent to the proper duct, so your home is evenly cooled.

Supply and Return vents

All treated air in your home needs an entry and exit point. This is where the supply and return vents come into play.

Return vents bring air in and back to the HVAC system. Supply vents send the treated air back into your home.

Outdoor Unit

Your outdoor AC unit is called a condenser. The condenser is home to 4 major parts that are critical to the home cooling process.

Condenser Coil

Remember the evaporator coil we mentioned above? The condenser coil is the opposite.

What we mean is that refrigerant heats in the condenser and makes the condenser coils very warm. This is done so heat can transfer from the refrigerant to the outdoor air.

The air conditioning process does not cool your air, it pulls heat from your air. That heat needs somewhere to go. The condenser sends all the warmth pack into the atmosphere.

Fan

The coils release heat back into the atmosphere, but that heat needs to go somewhere, right? This is where the fan comes in.

The fan moves extreme heat away from the condenser which helps stop the entire unit from overheating.

Compressor

The refrigerant we talk so much about needs a way to move from the condenser to the furnace and a way to convert from gas to liquid. This is all done in the compressor.

When refrigerant comes to the condenser from the furnace, it’s already hot. The compressor heats the refrigerant even further so it’s warmer than the outdoor air. Heat will transfer from the hot refrigerant to the cooler outdoor air.

The compressor then releases the pressure and sends the refrigerant back up to the evaporator coils where the refrigerant gets so cold that it pulls the heat from the air in your home.

Refrigerant Line

All that refrigerant needs some direction. The refrigerant line connects the condenser and furnace. Essentially allowing refrigerant to move between the two.

Know When It’s Time to Call for Help.

One of the best things you can do for your HVAC system is to get help sooner rather than later. We believe an ounce of prevention is better than a pound of cure. Here are some obvious signs it’s time to call an HVAC professional in for help:

How to Remove a Sink Stopper

There are certain things that seem a lot easier than they truly are. Removing the sink stopper in your bathroom is one of them.

Yes, there are those lucky people who have the type of stopper that just pops out and pops back in, but for the rest of us, it can be a challenge.

Below is everything you need to know about removing a sink stopper.

Types of Sink Stoppers

Not all sink stoppers were created equally. There are some subtle, and not so subtle, differences between types of stoppers.

The 3 common types of sink stoppers are:

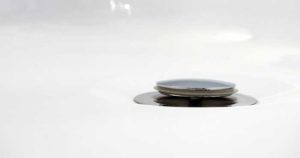
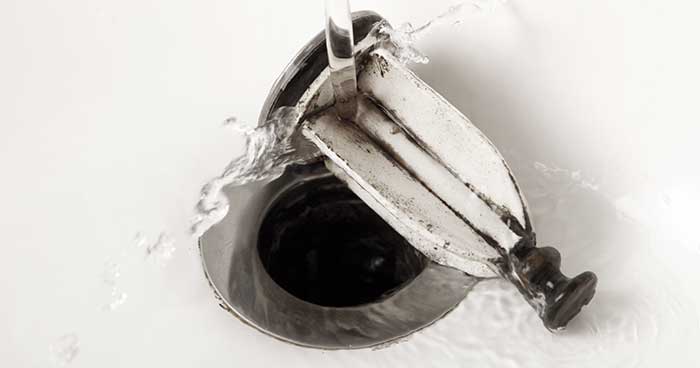
  1. Pop-Up – Pop-up sink stoppers move up and down. They are generally controlled with a lift handle. When pulled down, they seal the sink, so nothing gets down the drain. When pushed up, the sink is open.
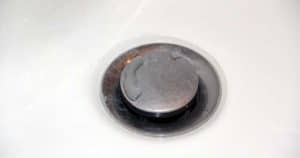
  2. Lift-And-Turn – A lift and turn stopper can be identified by the knob in the center. Simply turn the knob to seal the drain.
  3. Push-And-Pull – Though this stopper looks almost exactly like a pop-up, it acts like a lift-and-turn. The only difference is that that you push this stopper up and down to either open or close the drain.

How to Remove a Sink Stopper – Step by Step

When it comes to removing a sink stopper, there are a few steps you need to take in order to get everything right.

  1. Try to Remove the Stopper by Hand
    • If you don’t know what type of sink stopper you have, try to lift the stopper and turn it. For some, like the lift-and-turn or push-and-pull, this is the best removal method.
  2. Can’t Pull it Out? Find the Pivot Rod.
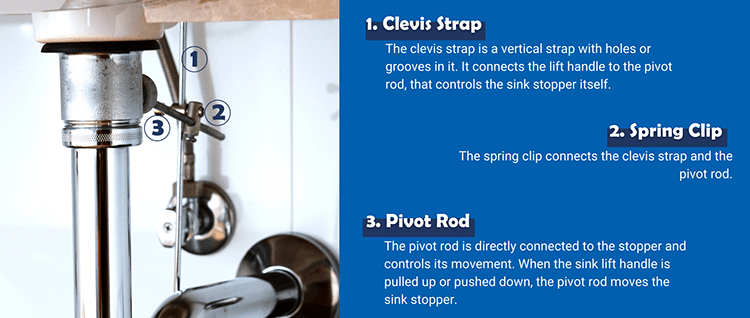
    • Pop-up sink stoppers have three parts that control its movement. The clevis strip, the spring clip, and the pivot rod.The clevis strip acts as an extension of the lift handle and connects to the pivot rod with the spring clip.

      To remove the sink stopper, you need to locate the clevis strip, pivot rod, and spring clip.

  3. Remove the Pivot Rod
    • After you’ve located the clevis strip and pivot rod, remove the spring clip. Be sure to place the spring clip somewhere you won’t forget. You’ll need to put it back again.Put a bucket under the pipes to catch any water that may fall. After you remove the clip, it’s time to remove the pivot rod.

      The pivot rod has a nut at the end. First try to get the nut out with your hands. The next step will be pliers or a wrench if you can’t get it loose.

  4. Remove the Sink Stopper!
    • With the pivot rod removed, you’ll be able to just pull the stopper out of the sink.After you remove the sink stopper, you’ll probably see it’s covered in a lot of debris. Make sure to clean all this off before putting anything back in place.

      Also, now is the time to clean your drain. We have tips below for our favorite ways to clear small, manageable clogs.

How to Clean a Sink Stopper

When it comes to cleaning, it’s no secret one of our favorite solutions is vinegar. After removing the sink stopper simply soak it in a bowl of vinegar for 15 minutes.

After 15 minutes. Scrub the sink stopper with an old toothbrush or washcloth. Then put everything back together.

How to Put it all Back Together

The best way to put everything back together is to reverse the order in which you took everything apart.

Put the sink stopper in first then the pivot nut and pivot rod. Make sure to tighten the pivot rod. Then reattach the clevis strap to the pivot rod with the spring clip.

After you put everything together, don’t forget to run some water and make sure nothing under the sink is leaking.

Tips for Clearing a Drain

There are many reasons you may want to remove a sink stopper. For most of our homeowners, they do it because they want to clean the drain itself. We recommend doing this while your sink stopper is in its vinegar soak.

Here are some of our favorite natural ways to clear a drain:

  • Baking Soda and Vinegar – This is an easy method to remove small buildups from your bathroom sink. Start by mixing 1/3 cup of baking soda and 1/3 cup of vinegar. When the two mix they will start to immediately fizz. Pour this concoction down the drain. Give it 1 hour to do its work, then flush with boiling water.

  • Baking Soda and Salt – Baking soda and salt are powerful on their own, but when you mix them together magic happens. Mix ½ cup of baking soda and ½ cup of salt, then pour it down the drain. Give the mixture 15 minutes to marinate and then flush it down with boiling water.

We’ll leave you with one of our biggest headaches. Chemical drain cleaners. To put it simply, don’t use them.

Chemical drain cleaners can do serious damage to your pipes, release harmful chemicals into your home, and potentially damage the environment. They’re not worth the trouble.