How to Clean a P-Trap

Small clogs are the universal leveler. No matter how big or small the home, no matter how many people are in the home, every homeowner must deal with a clogged drain at some point or another. While big clogs should be left to the professionals, smaller ones can be handled at home. Here is our surefire way to clean a P-trap.

What is a P-Trap?

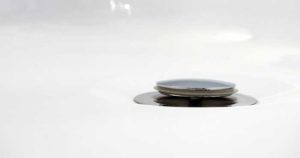
A P-trap is a bend in a plumbing pipe that acts as an air filter for your plumbing system. Any basin that collects water—a sink, toilet, shower, or bathtub—has a P-trap underneath it.

This pipe is in a u-shape and the dip at the bottom of the U creates a gravity barrier and stops noxious, and sometimes dangerous, gasses from passing through.

A gravity barrier, sometimes called a “plumbing trap,” is shaped like a P or U. The sharp drop in the pipe stops any gasses from getting through. A small caveat to this is that the pipe needs to have a small amount of standing water in it.

When someone complains of a bad smell coming from a sink that’s not used too often, chances are it’s because the P-trap dried up.

However, because so much waste goes through the P-trap, things can get stuck. This usually means there is some buildup in the bottom of the trap that’s not allowing for anything to pass through.

Step by Step Instructions: How to Clean a P-Trap

Materials Needed:

  • Bucket – To catch any water, loose materials, or drain debris
  • Wire Brush – To scrub out the pipes
  • Pliers or Adjustable Wrench – To remove the P-trap

Step 1: Turn off the Water Faucet

The first step of this process is to make sure the water faucet is turned off. Despite this step, it’s important to keep in mind that water will be present in the p-trap and this process will be somewhat wet.

This pipe always holds a small amount of water in it, so no matter how long you have the water shut off for, there will be something to drain in the pipe.

After you turn off the water faucet, make sure to put a bucket under the pipe. This will catch any loose water and debris in the trap.

Step 2: Remove the P-Trap

For this next step, you may need either pliers or a wrench. Start by unfastening the nuts that hold the piece of pipe in place.

In most cases, you can dislodge the nuts with your hands. Sometimes, they’re on a little tight and this is when you would use the pliers or wrench.

Keep in mind that water will start to fall out as you loosen the nuts. Make sure all the debris is aligned with the bucket.

When you get the trap loose, dump all excess water into the bucket and move on to step 3.

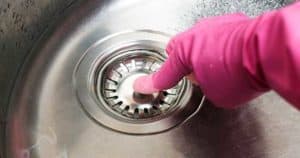
Step 3: Clean the P-Trap

Cleaning the P-trap is a pretty easy task. All you need is a flexible wire brush; similar to the one used for bottles.

Wet the wire brush and push it through the pipe until there is no more debris in the pipe or sticking to the brush. This should be enough to clean out the entire pipe.

You’ll still want to conduct a visual inspection of the P-trap to make sure everything is clean and clear.

Step 4: Put Everything Back Together

After everything is cleaned out, simply put the P-trap back on the way it came off. Make sure the long side of the pipe faces the sink drain.

Use your hands to screw the nuts back into place. Remember to pull out the pliers or wrench again if it needs some extra force to get back into place.

Don’t remove the bucket just yet. You need to make sure everything is working properly.

Test the P-trap by running water in the sink for 15 seconds. Does the water drain without leaking? Great, you can remove the bucket and clean up the area.

Does the pipe leak? You need to either tighten the nuts a little more or use Teflon tape to create a seal between the pipe and nuts.

How Often Should I Clean my P-Trap?

At Service Champions, we recommend cleaning your P-trap four times per year. Or, once every three months.

Additionally, it’s advised to clean your sink and drain every few months as well. A little bit of prevention can help keep the plumber away.

Need something more than a small P-trap cleaning? The plumbing experts at Service Champions can help.

Warning Signs of a Slab Leak

If you’ve never heard the term slab leak, buckle up, it’s about to get rough. These leaks are one of the most challenging plumbing issues a homeowner can face. However, this plumbing problem only affects homes build on concrete slabs. For those not in the know, we’re explaining everything, including the warning signs of a slab leak.

What is a Slab Leak?

Slab leaks are something that only happens when your home is built on a concrete slab. They happen when a there is a leak in the water line that runs under your home’s concrete foundation.

A slab leak typically happens when a pipe under the concrete foundation is corroded or has a hole in it. Over time, these types of leaks allow water to inundate your home’s foundation. Water damage can also spread to the soil around it, creating a huge amount of damage.

When left untreated, slab leaks can do major damage to the foundation of your home. Eventually, the foundation can crack and move, causing your floors and walls to crack. In extreme causes, slab leaks have cause entire parts of a home to collapse.

How Common is it to Have a Slab Leak?

Slab leaks occur in concrete foundations.

Unfortuantely, California homeowners need to be on the lookout for slab leaks. Earthquakes can easily break pipes and concrete, both of which lead to leaks.

Older and historic homes also need to be on the look out for these types of leaks. With enough time and use, the commonly used copper pipes can corrode, which will lead to a number of plumbing issues. Slab leaks being one of them.

Five Warning Signs of a Slab Leak

Here are some of the tell tale signs you’re dealing with a slab leak.

Your Floor feels Warm

When the hot water line bursts, many homeowners can feel it through their floor. When the hot water is running, many homeowners can feel warm spots on the floor.

It’s easier to feel warm water spots on floors with carpet or thin linoleum. Tile and hardwood floors make it harder to feel these spots.

No matter what material your floors are, warm spots are something that should be investigated as soon as possible by a professional.

Water Bills are Shooting Up

Slab leaks can make your water bills go up.

When there’s a slab leak water is running 24/7. This will make a noticeable difference in your water bill.

One of the best ways to monitor your plumbing system in general is to keep an eye on your water bills. A sudden increase can indicate a number of plumbing issues.

In addition to slab leaks, a high water bill could indicate:

  • Leaks throughout your plumbing system
  • A fixture in your home (i.e. the toilet) is leaking
  • There’s a faucet that won’t stop dripping
  • There’s a leak in your sprinkler system

Water Pressure is Lower than Normal

Slab leaks can cause low water pressure.

When you have an active leak in your plumbing system, it takes away precious water from your other fixtures. Meaning your shower, faucets, and other plumbing fixtures are not getting the same amount of water they normally do.

This all leads to a lackluster shower or dish cleaning session. When you notice your water pressure has dropped for seemingly no reason, it could be a good indicator you’re dealing with a slab leak.

Carpet or Flooring is Damp

When slab leaks aren’t caught early enough, there’s a very high possibility they can damage your carpet or flooring.

Since these pipes are buried in concrete, there aren’t a lot of places for the water to go. With enough time, the water can collect all the way up and into your home.

Random Puddles in or Outside of the Home

Just like we mentioned above, when a leak is left long enough, the water needs somewhere to go. This can mean finding puddles inside or outside your home.

If you notice water pooling around your foundation on a warm day, this is a very obvious sign it’s time to call a plumber as soon as possible. Slab leaks can also force water to puddle in places like, under your cabinets or around your washing machine.

Slab leaks are something that should absolutely be left to professionals. Call your local plumber immediately if you suspect there is a leak in your concrete foundation.

How to Clean a Showerhead

Almost nothing feels better than a powerful stream of warm water during a shower. We all know that feeling and if you’re anything like us, you want to have that experience every time you step under the showerhead.

We’ve written before about the problems caused by hard water. Unfortunately, without proper care, hard water can make your shower experience not so nice. Here is our guide for how to clean a showerhead.

How do Showerheads Get Dirty?

We briefly mentioned it above, but hard water is usually the main culprit when it comes to crud on your showerhead. Hard water filled with calcium, magnesium, and lime is a thorn in the side of every Southern California homeowner.

After hard water passes through your showerhead, it leaves behind mineral deposits. Over time, these deposits leave scale and buildup that not only look bad, but they can also clog your showerhead.

How Often Should I Clean the Showerhead?

The most annoying thing about the mineral deposits that clog your showerhead is that they get in the way of the nice waterflow you’ve come to expect with a good shower.

There’s no set or specific timeframe in which you should clean your showerhead. We just say to clean it when you notice a change in waterflow. For some households, that’s every other month, for others, ever few weeks.

It all depends on how hard the water in your area is, how often you use the shower, and how many people are in your household.

How to Clean Your Showerhead

The best way to clean a showerhead is with supplies you probably have in your pantry. All you need is white vinegar, plastic foot storage back, rubber band, a washcloth, and an old toothbrush.

  1. The first step is to pour at least a cup of vinegar into the plastic food storage bag. For larger showerheads, you’ll need more than a cup of vinegar and a larger bag. The bag should fit over your showerhead.
  2. Dip the showerhead into the bag and secure the bag to the shower arm. This is when you can adjust the amount of vinegar in the plastic bag. Add more if needed and take out anything that’s spilling over.Secure the bag with a rubber band, masking tape, or a zip tie.
  3. Next, just let the showerhead soak. Since the vinegar needs to stay a room temperature, it takes a bit longer than usual. Sit down and watch a movie or a few episodes of your favorite TV show.The exception to this is if you have a brass, gold or nickel coated showerhead. Leave the bag of vinegar on for only 30 minutes. Anything longer can damage the finish.
  4. After the proper amount of time has elapsed, take off the bag. Use the washcloth and gently wipe down the showerhead. Lightly scrub water openings with an old toothbrush dipped in vinegar.
  5. Once everything is wiped down, turn on the shower for a few minutes. Let the warm water rinse away the vinegar and any remaining debris.

For an easy way to maintain your showerhead between cleanings, keep a spray bottle filled with a 50/50 solution of white vinegar and water. Quickly spray the showerhead after every use.

What You Should Not Use

While it’s fairly easy to source the supplies needed to clean a showerhead, there are some household items you should never use.

The first thing that comes to mind is bleach. You should never use bleach to clean a showerhead. Contrary to what you may think, bleach increases bacteria growth on your showerhead.

Another thing you shouldn’t use is a premade chemical cleaner. It’s easy to find something in the cleaning aisle at your local grocery store, but we can guarantee that harsh chemicals have the potential to damage your showerhead.

The final thing we advise against is the use of hard brushes. Course brushes can scratch the finish of your showerhead and leave it a streaky mess.

How to Remove a Sink Stopper

There are certain things that seem a lot easier than they truly are. Removing the sink stopper in your bathroom is one of them.

Yes, there are those lucky people who have the type of stopper that just pops out and pops back in, but for the rest of us, it can be a challenge.

Below is everything you need to know about removing a sink stopper.

Types of Sink Stoppers

Not all sink stoppers were created equally. There are some subtle, and not so subtle, differences between types of stoppers.

The 3 common types of sink stoppers are:

  1. Pop-Up – Pop-up sink stoppers move up and down. They are generally controlled with a lift handle. When pulled down, they seal the sink, so nothing gets down the drain. When pushed up, the sink is open.
  2. Lift-And-Turn – A lift and turn stopper can be identified by the knob in the center. Simply turn the knob to seal the drain.
  3. Push-And-Pull – Though this stopper looks almost exactly like a pop-up, it acts like a lift-and-turn. The only difference is that that you push this stopper up and down to either open or close the drain.

How to Remove a Sink Stopper – Step by Step

When it comes to removing a sink stopper, there are a few steps you need to take in order to get everything right.

  1. Try to Remove the Stopper by Hand
    • If you don’t know what type of sink stopper you have, try to lift the stopper and turn it. For some, like the lift-and-turn or push-and-pull, this is the best removal method.
  2. Can’t Pull it Out? Find the Pivot Rod.
    • Pop-up sink stoppers have three parts that control its movement. The clevis strip, the spring clip, and the pivot rod.The clevis strip acts as an extension of the lift handle and connects to the pivot rod with the spring clip.

      To remove the sink stopper, you need to locate the clevis strip, pivot rod, and spring clip.

  3. Remove the Pivot Rod
    • After you’ve located the clevis strip and pivot rod, remove the spring clip. Be sure to place the spring clip somewhere you won’t forget. You’ll need to put it back again.Put a bucket under the pipes to catch any water that may fall. After you remove the clip, it’s time to remove the pivot rod.

      The pivot rod has a nut at the end. First try to get the nut out with your hands. The next step will be pliers or a wrench if you can’t get it loose.

  4. Remove the Sink Stopper!
    • With the pivot rod removed, you’ll be able to just pull the stopper out of the sink.After you remove the sink stopper, you’ll probably see it’s covered in a lot of debris. Make sure to clean all this off before putting anything back in place.

      Also, now is the time to clean your drain. We have tips below for our favorite ways to clear small, manageable clogs.

How to Clean a Sink Stopper

When it comes to cleaning, it’s no secret one of our favorite solutions is vinegar. After removing the sink stopper simply soak it in a bowl of vinegar for 15 minutes.

After 15 minutes. Scrub the sink stopper with an old toothbrush or washcloth. Then put everything back together.

How to Put it all Back Together

The best way to put everything back together is to reverse the order in which you took everything apart.

Put the sink stopper in first then the pivot nut and pivot rod. Make sure to tighten the pivot rod. Then reattach the clevis strap to the pivot rod with the spring clip.

After you put everything together, don’t forget to run some water and make sure nothing under the sink is leaking.

Tips for Clearing a Drain

There are many reasons you may want to remove a sink stopper. For most of our homeowners, they do it because they want to clean the drain itself. We recommend doing this while your sink stopper is in its vinegar soak.

Here are some of our favorite natural ways to clear a drain:

  • Baking Soda and Vinegar – This is an easy method to remove small buildups from your bathroom sink. Start by mixing 1/3 cup of baking soda and 1/3 cup of vinegar. When the two mix they will start to immediately fizz. Pour this concoction down the drain. Give it 1 hour to do its work, then flush with boiling water.

  • Baking Soda and Salt – Baking soda and salt are powerful on their own, but when you mix them together magic happens. Mix ½ cup of baking soda and ½ cup of salt, then pour it down the drain. Give the mixture 15 minutes to marinate and then flush it down with boiling water.

We’ll leave you with one of our biggest headaches. Chemical drain cleaners. To put it simply, don’t use them.

Chemical drain cleaners can do serious damage to your pipes, release harmful chemicals into your home, and potentially damage the environment. They’re not worth the trouble.

How to Change a Showerhead

Want to make a meaningful change to your bathroom without a lot of heavy lifting? You can’t go wrong with the showerhead! It’s an easy thing to fix that can make a big impact on both the form and the function of your bathroom. Don’t feel intimidated, it’s a relatively task. Below are the step by step instructions for how to change a showerhead.

Materials

The first thing you’ll need is a small set of materials, they’re not too expensive and easy to find:

  • New Showerhead
  • Plumbers of Teflon Tape
  • Old Toothbrush
  • Adjustable Wrench
  • Stepstool
  • Washcloth

Step 1 – Remove the Existing Showerhead

Removing the showerhead depends on how long it’s been in your shower. An older showerhead may have some rust and corrosion. For these, we recommend using a wrench to unscrew it.

For newer showerheads, a simple hand screw is enough to get it off.

To start, turn the showerhead itself in a counterclockwise direction until it comes off. If necessary, hold the pipe that connects to the wall with a washcloth. You do not want this pipe to rotate or move.

Step 2 – Clean the Extension Pipe

There’s a big chance the last showerhead has a bunch of buildup underneath it. This is where you use the old toothbrush and washcloth.

Use the toothbrush to breakup any buildup on the inside of the pipe. Then, wipe the inside of the pipe with your washcloth.

Wet the toothbrush and scrub the threading on the outside of the pipe. Remove any existing Teflon tape and scrub underneath it.

Step 3 – Apply the Teflon Tape

Believe it or not, applying Teflon tape is something a lot of homeowners get wrong. Here are the basic steps to using Teflon tape:

  1. Make sure the tape lays flat. You don’t want it to be bunched at all. Start by laying the tape at the end of the pipe. Hold it in place with a finger or thumb.
  2. Wrap the tape counterclockwise around the pipe threads.
  3. Make sure to keep the tape tight and flat.
  4. From start to finish, you should wrap the tape around the pipe end 4 to 6 times.
  5. When you’re at the other end of the pipe, break the tape by pulling it apart. Smooth the loose end over the threads.

You are now ready to move on to step four, installing the new showerhead.

Step 4 – Install the New Showerhead

Before you do anything, read the instructions that come with the showerhead. Some heads do not require a wrench.

When you’re ready, screw the showerhead clockwise in place. When it’s fully secure, hand tighten it one quarter turn.

After it’s on there, tighten the showerhead one last time with your hand. Anything more could result in a cracked connecting nut.

Step 5 – Test and Inspect for Leaks

Next, step back and turn on the shower. It’s common to have a leak or two. Just take off the shower head, readjust the Teflon tape, put the showerhead back on and you should be good to go.

Sometimes, the showerhead can be too tight and that will cause leaks that can’t be fixed.

Now that you know how to change a showerhead, making a change to your bathroom should be easy.

Need Help Changing Your Showerhead? Call A-Avis

Feeling like this is a job left to the pros? Have any questions about your plumbing system? Call the experts at A-Avis!

We offer top of the line service, including our plumbing safety inspection that’s essentially a tune-up for your pipes. Dial the number at the top of the screen or click here to request an appointment online.

What do We Check During a Plumbing Safety Inspection?

A plumbing safety inspection isn’t top of mind for most Southern California homeowners. Most people schedule a plumbing inspection while they’re going through the house purchasing process, or they wait until something has gone wrong. At A-Avis, we like to say an ounce of prevention is worth a pound of cure. That’s why we started doing plumbing safety inspections. Below we outline everything we check during the 11-points of this safety inspection.

Our 11-Point Plumbing Safety Inspection Includes:

Water Heater Safety and Visual Inspection

  • Your water heater is truly the MVP of your household. It helps you bathe, clean, and stay safe. Our plumbers take special care to test and inspect your water heater. First, they’ll conduct a visual inspection to see if there is anything wrong with the outside of the appliance, this includes checking the safety straps and looking for any obvious leaking or sanding water.

    The plumber will then inspect any electrical or gas components. There are serious fire hazards if those are not working. We check for stripped wiring and for mineral buildup from hard water. At A-Avis, we recommend a water heater flush for appliances that are 5-years-old or younger.

Toilet Inspection

  • There are a few things we look for when we inspect your toilets. First, is your toilet stable? When toilets rock from side to side it could be an indicator of a broken or failing seal. When the seal breaks or cracks it can flood your bathroom.

    We’ll then check the toilet handle and flapper. Is the handle working as it should? The flapper is what stops water from constantly running in your toilet. The other thing we check in the toilet tank is the fill valve. A faulty fill valve will lead to water that’s constantly running. A true drain to the environment and your wallet.

    The last things we check during the toilet inspection are the supply line and angle stop. Many toilets’ supply lines are connected to the tank with a plastic nut, which is the angle stop. We check to make sure that the angle stop isn’t cracked or broken.

Main Sewer Line Inspection

  • When our plumbers ask about your home’s cleanout? They’re doing this to check your main sewer line. Our plumbers will first conduct a visual inspection of the cleanout. Next, the plumber will ask you to start running water from taps in the home. This allows us to see how the water is flowing. Next, we’ll feed a camera through the main sewer line to check for any buildup or cracks in your pipes.

Verify Proper Clean Out

  • This one goes along with the main sewer line inspection. We’ll look to see if there are proper vents that lead from your home appliances to the sewer. Without those vents, we can’t properly snake the drain and give it the cleaning it deserves.

Drain Line Inspection

  • During the main sewer line inspection, our plumbers will also run a camera into your drain lines to see if there are any issues that need to be addressed.

Check for Pressurized Plumbing

  • Next on our list is to check the water pressure. All we need is a hose bib. Our plumbers will connect a pressure gage to the hose bib, turn on the water, and get a reading of the pressure. Your water pressure should be between 65 and 75. Anything over 75 can lead to major problems.

Inspect for Proper Ventilation

  • Did you know that any sink, tub, or toilet in your home needs a vent? It’s ok, a lot of unlicensed contractors don’t know this either. Fumes go down the drain with any debris and they need a place to go. Without the proper ventilation, the fumes are just stuck there and will waft back into your home.

Inspect for Proper Plumbing Insulation

  • Any plumbing pipes that are on the outside of your home need to be insulated. Temperatures can be very different from the inside of your home to the outside of your home. We want to make sure any heat treated water stays nice and toasty on its journey from water heater to tap.

Inspect for Gas Leaks

  • Many of the appliances in your home use gas to create heat. The stove, clothing dryer, and water heater are a few examples. Our plumbers will test the gas lines going into the appliances and see if there are any leaks.

Quality Test Tap Water

  • Each one of the plumbers at A-Avis is outfitted with a tap water test kit. They take a sample of water directly from one of your sinks and check it for water hardness and chlorine. There will always be a trace level of chlorine in your water—that’s how the city purifies it—but you just don’t want too much.

Inspect All Shutoff Valves

  • The water shutoff valve is an important safety tool in your home. IF you’re dealing with a leak or flood somewhere, all you need to do is stop the water. Older homes are equipped with a gate valve. This valve works by essentially raising and lowering a gate to stop or start the flow of water. Older ones can be ineffective. Our plumbers will not check a gate valve because of how testy they can be.

Schedule a Plumbing Safety Inspection with A-Avis

Our expert plumbers are trained to look at your plumbing system and see if there are any problems. They will go over every step of this inspection with a fine tooth comb, so you receive an accurate assessment. We proudly serve parts of Riverside and San Bernardino counties. Call the number at the top of of the screen or click here to request an appointment online.

Why Do Plumbers Use a Camera to Inspect Pipes?

Before the development of sewer cameras, there were a lot of ripped up lawns. Without a camera, the only way a plumber could really know what was going on in your pipes was to dig through your yard and inspect the pipe that way. Now, we have cameras.

We Need to Get to the Root of the Problem

Instead of tearing through your lawn, modern plumbers snake a camera through your pipes. Now, your plumber will insert a camera directly into your pipes and can show you exactly where and what the problem is.

The traditional way of looking for a problem in pipes used to take days. Now, our skilled plumbers can find the root of your problem in a matter of minutes. They can also record the inspection and keep footage on hand if you ever want to take a look for yourself. It’s easy to see why plumbers use a camera to inspect pipes.

What Can I Expect During a Camera Inspection?

One of our favorite things about a camera inspection is that it’s quick. As we mentioned above, it used to take hours, even days, to figure out what was clogging your pipes. Now we can do it in a matter of minutes.

When a plumber comes to conduct a camera inspection, the first thing they will ask is where they can find your main sewer line cleanout. Once this is located, the plumber will open the cap and then insert the camera into the pipe. The camera itself is very small and at the end of a flexible cable. That flexible cable can move through the tight bends and curves in your plumbing system.

As the plumber feeds the camera cable through your pipes, they can see everything on a video screen. This allows them to conduct an inspection in real time. Which will give you answers and options in minutes. Also, if you think something is lost in the drain, it could be found with a camera inspection.

Signs Your Plumbing Needs a Camera Inspection

Your plumbing system is a complex maze of pipes. Without a camera, it’s incredibly hard to understand what’s going on in there. Because the average person can’t just pop open their plumbing and take a look, here are some signs you should schedule a camera inspection:

  • More than one sink is slowly draining – It’s very easy to figure out the problem when only one sink in your home is backed up. However, this changes when two or more drains are backing up at the same time. This could be an indicator of problems in your main sewer line.
  • The smell of sewage is coming from your pipes – The smell of sewage coming from your drain can be an issue specific to that line. The difference is when you smell sewage in your yard or coming from multiple drains at once. This could indicate something is broken in your main sewer line.
  • There’s a patch of lush, green grass – Is there a spot in your lawn that looks brighter and greener than the rest? Unfortunately, that’s not your green thumb talking. Chances are your pipes are broken and leaking water in a specific spot.
  • Your water pressure is inconsistent – Leaks in your plumbing or sewer lines can cause a significant drop in your water pressure. You should call a plumber and schedule an inspection when your water pressure takes a surprising dip.

For the Best Inspection in Southern California, Call A-Avis

At A-Avis, we take the health and safety of your home very seriously. When we conduct a plumbing safety inspection, we make sure to run a camera through your drains and main sewer line. Since an ounce of prevention is better than a pound of cure, we want to catch any small problem before it becomes a big headache. We proudly serve parts of Riverside and San Bernardino counites. Dial the number at the top of the screen to speak with our friendly call center representatives or click here to book an appointment online.

Why Your Plumbing Is Making Startling Sounds

You turn off a faucet somewhere in your home, and then you hear a sudden and surprising knocking sound from your plumbing. Perhaps you hear it at other times as well in your house—a sound that’s almost like a ghostly bump, or someone striking the pipes of your plumbing with a hammer. The sound can make you jump, and it should—it’s a phenomenon called water hammer, and it can mean trouble for your plumbing unless you schedule service with a Rialto, CA plumber to find our why it’s occurring and how to fix it.
Continue reading “Why Your Plumbing Is Making Startling Sounds”

Ways You Can Help Your Home’s Pipes Last Longer

One of the jobs our plumbers do is whole-house repiping. This is a major undertaking because it removes all the old pipes in a house and replaces them with new material. This is the best way to upgrade an older home with deteriorating older pipes made from cast iron or galvanized steel. Once these pipes are replaced with copper and plastic pipes, the home will enjoy a better plumbing system overall.

But there are steps you can take now that will help your home’s pipes live longer and put replacements far in the future. Some are simple habits. Others require working with a professional plumber. Count on us for whatever plumbing assistance you need.
Continue reading “Ways You Can Help Your Home’s Pipes Last Longer”