There are certain things that seem a lot easier than they truly are. Removing the sink stopper in your bathroom is one of them.
Yes, there are those lucky people who have the type of stopper that just pops out and pops back in, but for the rest of us, it can be a challenge.
Below is everything you need to know about removing a sink stopper.
Types of Sink Stoppers
Not all sink stoppers were created equally. There are some subtle, and not so subtle, differences between types of stoppers.
The 3 common types of sink stoppers are:
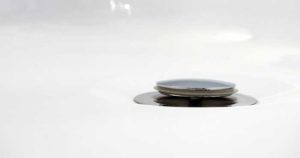
- Pop-Up – Pop-up sink stoppers move up and down. They are generally controlled with a lift handle. When pulled down, they seal the sink, so nothing gets down the drain. When pushed up, the sink is open.

- Lift-And-Turn – A lift and turn stopper can be identified by the knob in the center. Simply turn the knob to seal the drain.
- Push-And-Pull – Though this stopper looks almost exactly like a pop-up, it acts like a lift-and-turn. The only difference is that that you push this stopper up and down to either open or close the drain.
How to Remove a Sink Stopper – Step by Step
When it comes to removing a sink stopper, there are a few steps you need to take in order to get everything right.
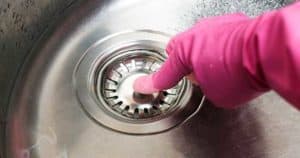
- Try to Remove the Stopper by Hand
- If you don’t know what type of sink stopper you have, try to lift the stopper and turn it. For some, like the lift-and-turn or push-and-pull, this is the best removal method.
- Can’t Pull it Out? Find the Pivot Rod.
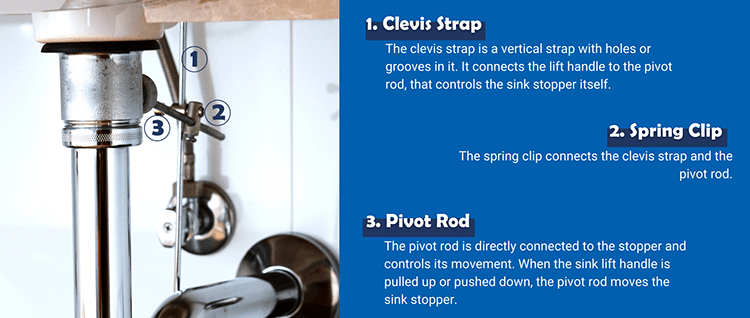
- Pop-up sink stoppers have three parts that control its movement. The clevis strip, the spring clip, and the pivot rod.The clevis strip acts as an extension of the lift handle and connects to the pivot rod with the spring clip.
To remove the sink stopper, you need to locate the clevis strip, pivot rod, and spring clip.
- Pop-up sink stoppers have three parts that control its movement. The clevis strip, the spring clip, and the pivot rod.The clevis strip acts as an extension of the lift handle and connects to the pivot rod with the spring clip.
- Remove the Pivot Rod
- After you’ve located the clevis strip and pivot rod, remove the spring clip. Be sure to place the spring clip somewhere you won’t forget. You’ll need to put it back again.Put a bucket under the pipes to catch any water that may fall. After you remove the clip, it’s time to remove the pivot rod.
The pivot rod has a nut at the end. First try to get the nut out with your hands. The next step will be pliers or a wrench if you can’t get it loose.
- After you’ve located the clevis strip and pivot rod, remove the spring clip. Be sure to place the spring clip somewhere you won’t forget. You’ll need to put it back again.Put a bucket under the pipes to catch any water that may fall. After you remove the clip, it’s time to remove the pivot rod.
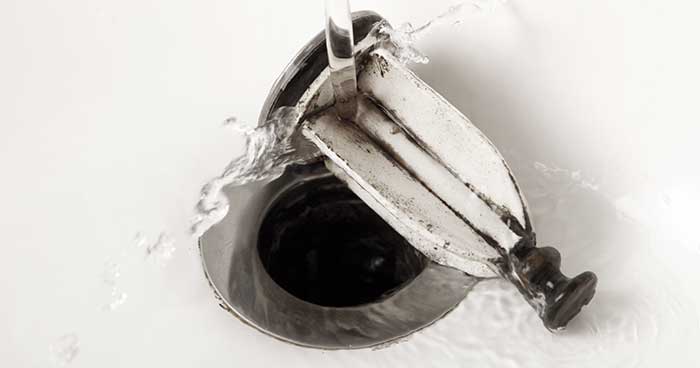
- Remove the Sink Stopper!
- With the pivot rod removed, you’ll be able to just pull the stopper out of the sink.After you remove the sink stopper, you’ll probably see it’s covered in a lot of debris. Make sure to clean all this off before putting anything back in place.
Also, now is the time to clean your drain. We have tips below for our favorite ways to clear small, manageable clogs.
- With the pivot rod removed, you’ll be able to just pull the stopper out of the sink.After you remove the sink stopper, you’ll probably see it’s covered in a lot of debris. Make sure to clean all this off before putting anything back in place.
How to Clean a Sink Stopper
When it comes to cleaning, it’s no secret one of our favorite solutions is vinegar. After removing the sink stopper simply soak it in a bowl of vinegar for 15 minutes.
After 15 minutes. Scrub the sink stopper with an old toothbrush or washcloth. Then put everything back together.
How to Put it all Back Together
The best way to put everything back together is to reverse the order in which you took everything apart.
Put the sink stopper in first then the pivot nut and pivot rod. Make sure to tighten the pivot rod. Then reattach the clevis strap to the pivot rod with the spring clip.
After you put everything together, don’t forget to run some water and make sure nothing under the sink is leaking.
Tips for Clearing a Drain
There are many reasons you may want to remove a sink stopper. For most of our homeowners, they do it because they want to clean the drain itself. We recommend doing this while your sink stopper is in its vinegar soak.
Here are some of our favorite natural ways to clear a drain:
- Baking Soda and Vinegar – This is an easy method to remove small buildups from your bathroom sink. Start by mixing 1/3 cup of baking soda and 1/3 cup of vinegar. When the two mix they will start to immediately fizz. Pour this concoction down the drain. Give it 1 hour to do its work, then flush with boiling water.
- Baking Soda and Salt – Baking soda and salt are powerful on their own, but when you mix them together magic happens. Mix ½ cup of baking soda and ½ cup of salt, then pour it down the drain. Give the mixture 15 minutes to marinate and then flush it down with boiling water.
We’ll leave you with one of our biggest headaches. Chemical drain cleaners. To put it simply, don’t use them.
Chemical drain cleaners can do serious damage to your pipes, release harmful chemicals into your home, and potentially damage the environment. They’re not worth the trouble.