How to Clean a P-Trap

Small clogs are the universal leveler. No matter how big or small the home, no matter how many people are in the home, every homeowner must deal with a clogged drain at some point or another. While big clogs should be left to the professionals, smaller ones can be handled at home. Here is our surefire way to clean a P-trap.

What is a P-Trap?

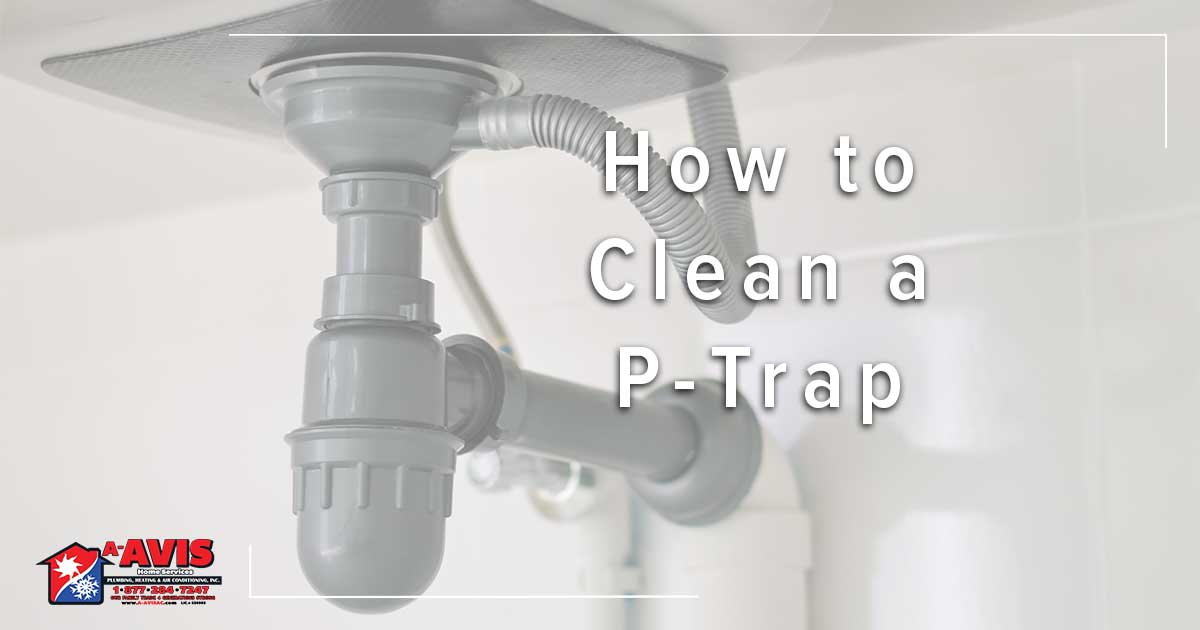
A P-trap is a bend in a plumbing pipe that acts as an air filter for your plumbing system. Any basin that collects water—a sink, toilet, shower, or bathtub—has a P-trap underneath it.

This pipe is in a u-shape and the dip at the bottom of the U creates a gravity barrier and stops noxious, and sometimes dangerous, gasses from passing through.

A gravity barrier, sometimes called a “plumbing trap,” is shaped like a P or U. The sharp drop in the pipe stops any gasses from getting through. A small caveat to this is that the pipe needs to have a small amount of standing water in it.

When someone complains of a bad smell coming from a sink that’s not used too often, chances are it’s because the P-trap dried up.

However, because so much waste goes through the P-trap, things can get stuck. This usually means there is some buildup in the bottom of the trap that’s not allowing for anything to pass through.

Step by Step Instructions: How to Clean a P-Trap

Materials Needed:

  • Bucket – To catch any water, loose materials, or drain debris
  • Wire Brush – To scrub out the pipes
  • Pliers or Adjustable Wrench – To remove the P-trap

Step 1: Turn off the Water Faucet

The first step of this process is to make sure the water faucet is turned off. Despite this step, it’s important to keep in mind that water will be present in the p-trap and this process will be somewhat wet.

This pipe always holds a small amount of water in it, so no matter how long you have the water shut off for, there will be something to drain in the pipe.

After you turn off the water faucet, make sure to put a bucket under the pipe. This will catch any loose water and debris in the trap.

Step 2: Remove the P-Trap

For this next step, you may need either pliers or a wrench. Start by unfastening the nuts that hold the piece of pipe in place.

In most cases, you can dislodge the nuts with your hands. Sometimes, they’re on a little tight and this is when you would use the pliers or wrench.

Keep in mind that water will start to fall out as you loosen the nuts. Make sure all the debris is aligned with the bucket.

When you get the trap loose, dump all excess water into the bucket and move on to step 3.

Step 3: Clean the P-Trap

Cleaning the P-trap is a pretty easy task. All you need is a flexible wire brush; similar to the one used for bottles.

Wet the wire brush and push it through the pipe until there is no more debris in the pipe or sticking to the brush. This should be enough to clean out the entire pipe.

You’ll still want to conduct a visual inspection of the P-trap to make sure everything is clean and clear.

Step 4: Put Everything Back Together

After everything is cleaned out, simply put the P-trap back on the way it came off. Make sure the long side of the pipe faces the sink drain.

Use your hands to screw the nuts back into place. Remember to pull out the pliers or wrench again if it needs some extra force to get back into place.

Don’t remove the bucket just yet. You need to make sure everything is working properly.

Test the P-trap by running water in the sink for 15 seconds. Does the water drain without leaking? Great, you can remove the bucket and clean up the area.

Does the pipe leak? You need to either tighten the nuts a little more or use Teflon tape to create a seal between the pipe and nuts.

How Often Should I Clean my P-Trap?

At Service Champions, we recommend cleaning your P-trap four times per year. Or, once every three months.

Additionally, it’s advised to clean your sink and drain every few months as well. A little bit of prevention can help keep the plumber away.

Need something more than a small P-trap cleaning? The plumbing experts at Service Champions can help.

DIY HVAC Projects You Should Never Try at Home

Being handy at home is something nearly all homeowners enjoy. However, it’s important to know when to call in the pros. It’s not pretty when our techs are called in to fix attempted DIY HVAC projects.

While there may be a ton of YouTube videos telling you exactly what to do, that will never compare to the level of experience, professional knowhow, and specialized tools a certified HVAC technician will have.

For effective AC repair and service, you need to call in a professional.

Reasons You Shouldn’t Try to DIY HVAC Repairs

Carbon Monoxide

The biggest reason the average homeowner shouldn’t try any DIY HVAC projects is because working with heating and cooling systems can be incredibly dangerous because of the potential for carbon monoxide exposure.

Any sort of badly repaired line or gas leak can cause carbon monoxide to fill your home. This could put you, and your family, at extreme risk.

Electrical Danger

Another thing that can cause gratuitous bodily harm is high voltage electricity – just like the electric work used in your HVAC system.

HVAC systems have electrical wiring that should only be handled by a professional who’s had extensive training. The last thing we want is a client hurting themselves over a tune-up or small fix.

Issues with Insurance and Warranties

Most home insurance policies and company warranties will not cover any DIY HVAC work. A badly done DIY job can void your system warranty.

Most of these polices have language saying repairs must be done by a trained and licensed professional. Doing the fixes yourself can cost money in the long run and even make it hard for your to find new homeowners insurance.

DIY HVAC Repairs that Usually Go Wrong

Changing the Thermostat

Changing the thermostat sounds easy enough, right? Unfortuantely, that answer is wrong. Especially when it comes to a smart thermostat.

We’ve seen a lot of customers purchase a smart thermostat, try to install it and realize it just doesn’t work. An easy answer for this is that their HVAC equipment might be too old and can’t properly communicate with the advanced thermostat.

Another issue we see is electric. Thermostats need to be wired correctly or they won’t work. When a professional HVAC tech comes to your home to install a thermostat, they also make sure the wiring isn’t damaged or frayed. Then the easy part if just programming your new thermostat.

Blocking Room Vents

For some reason people think that by closing the vents to a room they don’t use will help save energy and lower their bills.

This “quick fix” can actually end up costing you a lot in the long run. A closed vent means the HVAC system is still producing enough air to cool your home, but now that air has nowhere to go.

In turn, this extra air just creates more pressure in your system which can raise your utility bills and even put a hole in your ductwork.

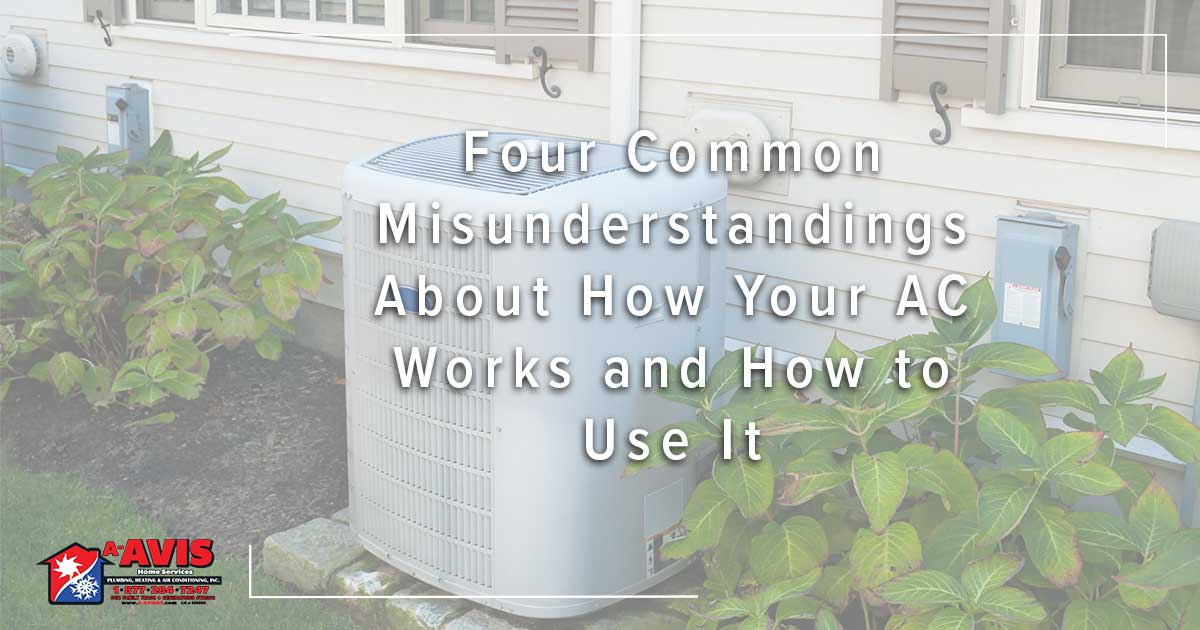
Cleaning the Outdoor Condenser

Even though your condenser looks like a big, tough piece of machinery, the coil inside is actually quite delicate.

We’ve seen homeowners think that they can just spray down the outside of the unit to get it nice and clean. Instead, when you spray a hose at it from the outside, you run the risk of twisting and bending the coils. Essentially rendering them useless.

What you Can Do

Clean Around the Condenser

Your condenser is the only part of your HVAC system that’s exposed to the elements all year long. While you don’t need to put a cover over your unit when it’s not in use. Cleaning around it is great.

At Service Champions, our technicians are constantly cleaning leaves, dirt, and other garden debris out of condensers. For a DIY HVAC project, we recommend regularly cleaning around your condenser to prevent any foreign objects from getting in.

Change the Air Filter

Changing the air filter in your HVAC system is easier than most would think. The hardest part is accessing an attic unit.

Our Service Champions techs recommend changing the air filter at least twice every year. Once in the spring before furnace season, and once in the fall before AC season.

We also recommend checking your air filter periodically if you live in a home with lots of shedding pets, live close to a construction site, and after fire season.

Battery Checks

Things like thermostats and carbon monoxide detectors are amazing safety tools and should be treated as such. One of the best things you can do for these tools is to check their batteries once every few months.

A thermostat is only good if it continues to work. The same can be said for a carbon monoxide detector.

Why the Air Conditioner May Give You a Sore Throat

Heating and air conditioning are such a part of everyday life that we usually don’t give them a second thought—until something goes wrong, or we experience discomfort of any kind. If you’re feeling a little choked up, there are three main reasons why an air conditioner can give you a sore throat.

Dry air, dirty air, allergies, and sore throats happen, and when they do, sometimes the first suspect is the air conditioning. While this isn’t true for everyone, there are times when a sore throat or other body reactions can be triggered by the air conditioner.

Improper Installation

A general reason why air conditioning may be to blame for a sore throat, or any type of discomfort, is improper installation. Faulty technical work, negligence, or accidents result not only in poor air conditioning but create areas that can foster lower sanitation and overall health.

When an air conditioner is installed in a bad location, it can degrade faster. This damage can be attributed to an excessive amount of UV rays, low amount of insulation, or improper air circulation.

A professional HVAC technician and installer makes sure the system is in a place that receives proper air flow.

Leaky Ductwork

Over time and with use, small leaks and punctures can appear in your ductwork. Ductwork is responsible for transporting air to the HVAC system, then distributing temperature-treated air to the home. These small leaks can lead to contaminates, such as dust and allergens, getting into your HVAC System.

Leaks and punctures within the central air system, duct work, and filter allow for dirt, dust and other irritants to contaminate the internal anatomy of the furnace and air conditioner as well as the indoor air supply. The dirt continues to build up over time, hurting the system efficiency and degrading air quality.

Lack of AC Maintenance

The air supply inside of the home is recycled again and again with each air conditioning cycle, traveling through the central air system and throughout the house. Homeowners who tend to skip out on AC maintenance can forfeit the benefits that come with a regular tune-up.

One of the biggest contributors to an AC induced sore throat is a dirty air filter. Air filters serve two important roles. First, they keep dust from clogging important components of your HVAC system. And second, they trap indoor air pollutants.

Air filters that are too full or haven’t been changed force your HVAC system to work harder to push air through the clogged filter. Additionally, your indoor air will stay polluted because the filter can’t pull dust, dander, allergens, and other contaminates from your air.

For those particularly sensitive to indoor air quality, several air-cleaning systems are available with the help of your HVAC contractor.

Closed Vent Control

Closed vents prohibit the interaction between indoor and outdoor air. This seals the house from the outside and the same air cycles around the home. Air that has been trapped indoors for prolonged periods of time grow stagnant, breed bacteria and collect dust.

Try opening the vents of the central air system to allow the exchange of outdoor air with indoor air. This allows for a new supply of healthier air for central air conditioning.

It’s also a good idea to open your windows from time to time and let fresh air in. This will help with keeping your air from getting stale.

What You Can do to Combat an AC Induced Sore Throat

Fortunately, there are a few things you can do when the air conditioner starts to give you a sore throat. Our tried and true methods for combating this are:

  • Schedule Regular Tune-Ups: The best thing you can do for your home and HVAC system is to schedule two tune-ups per year. Once in the spring before you start using the AC and once in the fall before it’s time to turn on the furnace.

    During a tune-up, our techs will clean everything in your system, making sure there is no buildup of dust or other debris.

  • Routinely Check the Air Filter: The air filter is responsible for trapping indoor air contaminates. When it’s too full, you could be breathing dirty air.
  • Keep Yourself Hydrated: Central air conditioners can dry out your air. Make sure you’re staying hydrated any time you’re home.
  • Frequently Dust and Vacuum: Some homes have more dust than others. A great way to keep that dust at bay is to routinely dust and vacuum your home.

When the Air Conditioner Isn’t to Blame

If your HVAC contractor cannot find any faults within the central air system, you can adjust some personal habits to help alleviate pain and discomfort.

Consider adding a humidifier to restore moisture in the air supply. When the central air system runs for great lengths of time, water is zapped out of the air. Your HVAC contractor can help you find the right humidifier for your home and lifestyle needs.

Always remember to keep hydrated to help wash out irritants breathed in.

Four Common Misunderstandings About How Your AC Works and How to Use It

Common Misunderstandings About How Your AC Works

At A-Avis, our techs help so many homeowners they have a trained eye for detecting problems common to Southern California air conditioning systems.

Far too often we see problems left unattended for so long they pose a greater threat later down the line. This compromises the system’s performance altogether or even the health of people living in the home.

We believe in empowering clients to make the right choices for their home and central air system. Because of this we’re sharing common misunderstandings about how your AC works.

Problem #1: Homeowners let the heat load get too high

It’s a common habit in Southern California to close the windows and doors for more than three to four hours at a time during peak heat periods. However, this results in no home ventilation.

While homeowners are out, the indoor home temperature can rise considerably. For example, it can be 95° outside and by the time you arrive home the indoor temperature has risen to 88°.

This is an uncomfortable temperature for most families. Turning on the air conditioner is the logical solution, most people set it in between 73° and 75°. Unfortunately, even if the air conditioning never turns off, it may take hours to lower indoor room temperature (as a whole) from 88° to 75°.

When the home gets too hot and the AC must work overtime, the system:

When the home gets too hot and the AC has to work overtime, it:

  • Stresses out the air conditioning system, adding strainItemized Image of a Central Air Conditioning System
  • Expends extra energy
  • Costs more to cool the home now and maintain later

Solution:

When you know you’ll be out of the house during peak heat hours, leave the air conditioner on to a reasonable temperature (78° to 80°). This allows your AC to run at a sustainable level so that you can adjust the thermostat to a comfortable 75 without stressing out your air conditioner.

Another solution would be to invest in a smart thermostat. This way you can control the temperature from your phone. Leaving the house? Set a higher temperature! On your way home from the store? Lower your temperature from your phone so you’re walking in to a nice, cool home.

Problem #2: A lower number on the thermostat does not mean cooler air

Central air systems work by cooling air 15° to 20° at a time. For example, if the indoor air temperature is 80°, the AC system takes that supply of air and subtracts 15° to 20° of heat before releasing it back into the home air supply. Because it mixes with the other 80° air that has not been conditioned yet, the air is somewhat cooler, but not necessarily the temperature that was set on your thermostat. It takes time for the indoor air to reach temperature equilibrium.


However, if you believe the mixing of temperature treated air and the indoor air supply is not the reason for poorly conditioned air there, may be a greater issue. Though air is still conditioned, it is less efficient, forcing the system to work twice as hard to cool the same amount of air.

Solution:

If your air is not cooling air in 15° to 20° increments, a maintenance call is required to restore proper function and efficiency levels.

Problem #3: Homeowners ignore filter maintenance

A regularly scheduled maintenance call usually eliminates issues with poor or dirty air filtration. From stuffed filters to debris buildup over the evaporator coils, keeping your central air system clean benefits the system itself and the cleanliness of the air inside of your home.

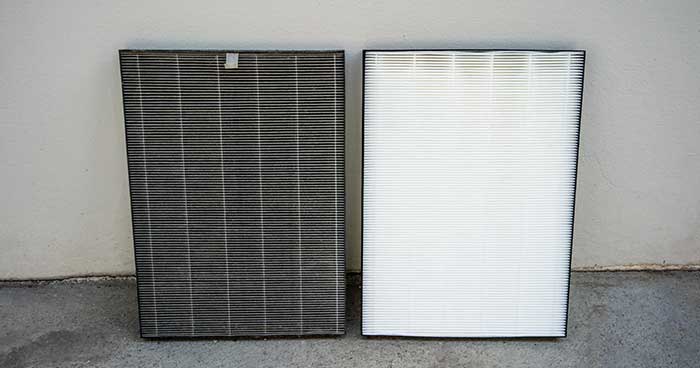
How Often Should I Change my HEPA Filter

When air filters are not cleaned or replaced it adds excess strain to the AC. This happens because less air gets through the filter and less air is conditioned. This can also cause the evaporator coils to ice up while the system overheats.

Refrigerant, an essential part of the cooling process, flows through the evaporator coil. This coil is made of hollow tubes that are cooled by the refrigerant. This colder temperature triggers the heat transfer process. Meaning any heat from the indoor air is transferred to the evaporator coil and refrigerant.

Something as simple as a dirty filter can stop this process because less room temperature air passes over the coils which in turn ice up.

Likewise, poor air flow due to dirty filters can result in the system overheating and shutting down. This is because a central air system needs a heat source to function, and restricted air flow means the same amount of energy is used for less and less air.

Dirty or overfull air filters are the number one reason a system shuts down.

Solution:

Have your preferred HVAC technician visit to service your AC system. Be sure to replace filters and have the evaporator coils and drip pans cleaned. These areas collect water and are prone to microbiological growth.

Problem #4: The AC system is not an open system

Most homeowners tend to think their air conditioning system is an open system. This is not the case. Contrary to popular belief, there is no need to refill your refrigerant supply.

In a perfect world, a properly installed system would incur no damage and would never need to be refilled. The idea being that refrigerant is recycled with every use.

Unfortunately, we don’t live in a perfect world and refrigerant leaks happen.

Refrigerant is a harmful substance and should only be handled by an HVAC professional. It can also damage the ozone layer.

Because of these two issues, it’s important you call someone immediately if you suspect a refrigerant leak.

When there is a leak in your refrigerant supply, the system is less efficient because it does not have enough cooling power to work with. If your AC system previously cooled indoor air in 20° increments, it now may be cooling in 10° increments; the air conditioner works harder to treat the same amount of air.

Solution:

Have your preferred HVAC technician repair the leak, refill refrigerant and recalibrate.