What Temperature Should I Set My AC During the Summer?

It’s somewhat common knowledge that when the summer hits, utility bills can go way up. We blame increased AC use. While there are myths about how to lower your utility bills, we’re here to share the truth. There is an optimal thermostat setting for the summer months. And the temperature setting may surprise you. If you’re wondering, what temperature should I set my AC during the summer, we have the answer.

What’s the Best Temperature?

This is probably going to come as a shock to you. For a balance between comfort and budget, the best temperature to set your thermostat to is 78°.

Before you disregard this and say we’ve let the heat get to our heads, there’s actual science to back this up. Your AC is engineered to detect the outside temperature and create a cooler temperature inside. No matter what setting is on the thermostat, your HVAC system is doing the same amount of work.

To save on bills, and be the most energy efficient, let the AC run at a higher setting. This will cool your home over time.

We know how easy it is to come home on a hot day and just blast your AC at the lowest temperature. However, as we mentioned above this is actually a bad idea.

By setting your thermostat to 78°, you’re allowing the HVAC system to efficiently find a temperature balance that balances the temperature inside with the temperature outside.

Set the Thermostat Higher when You’re Gone.

To really make a dent in your monthly bills, set the thermostat higher while you’re out. We’re talking up to 88°. This advice comes directly from HVAC manufacturers and engineers.

You want to set your thermostat to a temperature that’s closer to the air outside. This setting ensures your home won’t be a sauna or a freezer when you return home.

The process of continually shutting down your system then turning it back on puts unnecessary strain on everything—including your wallet.

Instead, running your system at a higher temperature allows it to run at a lower level, preserving its functions and maintaining it while you’re out of the house.  What’s the point of keeping a house cool if no one is home?

The best way to maintain this cycle is with a programmable thermostat. Set it to raise the temperature when you’re out of the house and lower it when you are home.

Best AC Setting for Sleep?

One question we hear time and time again is how should I adjust my thermostat for sleep? Just like waking hours, there is an optimal temperature your home should be at while you’re sleeping.

Finding the optimal temperature for sleep can be tricky. For example, The Sleep Foundation recommends your bedroom temperature to be between 60° and 67° for the best sleep. However, this can still change from person to person.

You can program your thermostat to start lowering the temperature of your home around bedtime. Or try opening some windows in your bedroom. Fresh air is important for overall health and wellness, and nighttime air will help keep the overall temperature down.

The 60° to 67° recommendation is for adults. Infants and children have different sleep needs and may need a warmer room.

Keep the Humidity in Check

Humidity can make a hot day so much worse. It’s because of how humidity works with your sweat. When you sweat in a dry climate the sweat quickly evaporates. This keeps you cooler.

When you sweat in a humid climate the sweat has a harder time evaporating. Therefore, you’re stuck in a hot, sticky mess.

An air conditioner does more than keep your house cool, it also controls humidity. If your humidity feels off the wall, it may be time to schedule a tune-up. Or it could be time to look into a dehumidifier. Either way, to keep yourself cool, take care of your humidity levels.

Natural Solutions to Keep Cool

In addition to adjusting your thermostat, there are a few natural solutions to keeping your home cooler during the summer months.

If you’re still asking what temperature should I set my AC during the summer, these ideas don’t add to any utility bills and are completely natural and sustainable.

  • Dress for the Temperature – A pair of joggers and a sweatshirt are always cozy. But when it’s summer, time to switch to short sleeves and short pants. You’ll truly feel the benefit of your AC system when you’re dressed for the season.
  • Put Up Blackout Curtains – Get a pair of blackout curtains and make sure they’re drawn when the sun is at its peak. This will help keep cool air in and block the sun’s hot rays.
  • Strategically Open Windows – Open your windows when you first wake up and when you’re settling down for bed. This allows for the circulation of fresh air into your home and brings in the cooler nigh and morning air.
  • Run the Fan – When you turn on your AC for the first time in a season, don’t forget to reverse your ceiling fans. During the summer, ceiling fans should be turning counterclockwise. This creates a refreshing downdraft.
  • Make sure to Weather Seal Your Home – All those little openings around your doors and windows can add up when the weather hits the high 80s. Every summer, take the time to inspect the seals around your windows and doors. Patch up any gaps between the windows or doors and wall.
  • Schedule Regular Tune-Ups – Routine tune-ups are the best way to ensure the longevity and efficiency of your HVAC system. At Service Champions, we recommend two tune-ups a year. Once in the spring and once in the fall.

Want the Best Temperature Solutions? Service Champions is Here

Still wondering what temperature should I set my AC during the summer? The HVAC experts at Service Champions have all the answers you’re looking for. Simply schedule an AC tune-up to and let us peek under the hood of your HVAC system.

Service Champions is the only Diamond Certified plumbing and HVAC provider in Southern California. We serve parts of Los Angeles, Orange, Riverside, and San Bernardino communities. Call the number at the top of the screen or click here to request an appointment online.

My Air Conditioner is Not Turning On

There are number of problems that could contribute to why your air conditioner is not turning on. If you find any of the problems listed below with your central air, contact your local HVAC contractor for additional help.

With warmer weather quickly approaching, more and more people are starting up their central air systems. Homeowners who opt to skip out on air conditioner maintenance may find that their central air is not what they remembered.

The AC unit won’t turn on

Usually when the outdoor unit doesn’t turn on, it is because something tripped the circuit breaker. When this happens, you can easily reset it after locating the circuit breaker panel.

If you find that the AC unit still does not work, the next place to look is the thermostat. A non-responsive thermostat will fail to communicate with the rest of the central air system. Your HVAC contractor can fix this for you.

Oftentimes, something as simple as power can solve the issue right then and there. If not, there may be a bigger problem relating to the thermostat and wiring.

The AC doesn’t cool evenly

Ducts, or ductwork, are used to transport conditioned air throughout the home, and are sized to match each room of the home. However, other variables that need to be considered, such as how much sun comes in through the windows. To manage natural heat sources and even out air conditioning, we install dampers within the air duct system to control the flow of air.

Your AC contractor will work with you to assess your home environment and customize the air conditioning to each room or area.

The AC doesn’t cool at all

When the air conditioning doesn’t feel cool, the problem could lie within the control board. Otherwise, the refrigerant may be to blame. In either case, the attention and care of your air conditioner contractor is needed to restore service.

Refrigerant can be hazardous to handle yourself. For your safety, wait for your trusted air conditioning contractor, who is EPA certified, to deliver proper care.

The Condenser Unit Turns on and Off Repeatedly

The outdoor condenser unit contains safety controls that automatically shut down the system when the pressure drops below a certain level. Once pressure rises again, the system starts up. Pressure can change with general temperature as well as refrigerant levels contained inside the central air.

If your condenser continues to turn on and off, your AC contractor can assess the safety controls ensure correct performance.

Another reason your AC system could be repeatedly turning on and off is if it’s short cycling. It happens when your AC can’t reach the temperature on the thermostat or reaches that temperature too soon. The machine will constantly turn on and off while never completing a full cycle.

Common Causes of AC Problems

With age and use, even the best central air system experience changes. There are common air conditioner problems that no central air system can fully escape without the help of an HVAC contractor. These include:

  • Wiring – There are several networks of wires that connect one part of the central air system to the next. Some of these wires are exposed above ground, other are hidden behind walls. When these wires break, erode or are damaged in any way, air conditioner service is impaired.
  • Refrigerant Shortages – Refrigerant in the central air system runs through a closed circuit of tubes. Though refrigerant does not need to be refilled, some central air systems do accumulate leaks. When this happens, refrigerant drips out, contaminating the air supply. Your HVAC contractor repairs this for you, restoring the health of your home air and system.
  • Icy Build Up – Ice can build up around the evaporator coils, pipes or even outside the unit. This usually happens when the air filter has not been replaced. A dirty air filter means that the central air system has to work twice as hard to push air through a clogged filter. This results in exceptionally cold air circulating inside the central air before it makes it way through the duct system, freezing out internal parts.
  • Short Cycling – Short cycling is when your system constantly turns on and off and never completes a full cycle. If your AC is unable to reach the temperature set on the thermostat, it will short cycle to reach that setting. When your system is never allowed to take a break, it’ll wear out much faster. It takes the attention and precision of a professional to clean out the icy build up without damaging the delicate parts that make up the internal structure of the air conditioner.
  • Dirty Evaporator Coils, Filters and Condensers – Changing the air filter of your central air is something homeowners can do themselves. The air filter is the first line of defense against bothersome airborne particles and pathogens that plague the air and the air conditioner unit. It’s a simple way to keep the air quality in your home high while protecting the efficiency and cleanliness of the central air system.
  • Faulty Motors – When any of the blower motors run at half speed or freeze over, the central air system experiences unnecessary stress. Choosing to replace these motors help the furnace and air conditioner perform efficiently while lasting long.
  • Faulty Compressors – Compressors are responsible for pumping compressed refrigerant throughout the air conditioner system, cooling air. When the compressor goes bad, amperage skyrockets in order to keep up with the demands signaled from the thermostat. Your air conditioner contractor needs to replace the condenser, either in part or whole, so that air conditioning in your home is restored.
  • Faulty Thermostats – Homes outfitted with faulty thermostats usually have analog thermostats, which cannot keep up with high efficiency models. Today’s thermostats are digital, touch screen and less likely to have problems communicating with the rest of the system. In addition, older thermostats contain mercury, which pose a health hazard inside the home. Any HVAC contractor will recommend having old thermostats replaced with higher efficiency models to save time, money and trouble.

Choose A-Avis for Superior Air Conditioning Care

A-Avis is the preferred HVAC provider for Southern California. We excel in delivering positive results, combining genuine customer service with expert technical care.

To experience the difference that comes with superior heating and air conditioning, contact one of our helpful representatives in our call center or click here to schedule an AC tune-up online at your convenience.

How to Prevent Bugs from Coming Through the Air Conditioner

When it heats up in Southern California, humans aren’t the only ones seeking refuge from the heat. Bugs are also looking to keep cool. Many times, this won’t be a problem, but we get questions from customers about how to prevent bugs from coming through the air conditioner.

Here are our favorite ways to stop bugs from getting into your cool, cozy home.

Can Bugs Get into my HVAC System?

Unfortunately, the answer to this question is a resounding yes. It is very easy for insects, and other creatures, to find their way into your HVAC system and then your home.

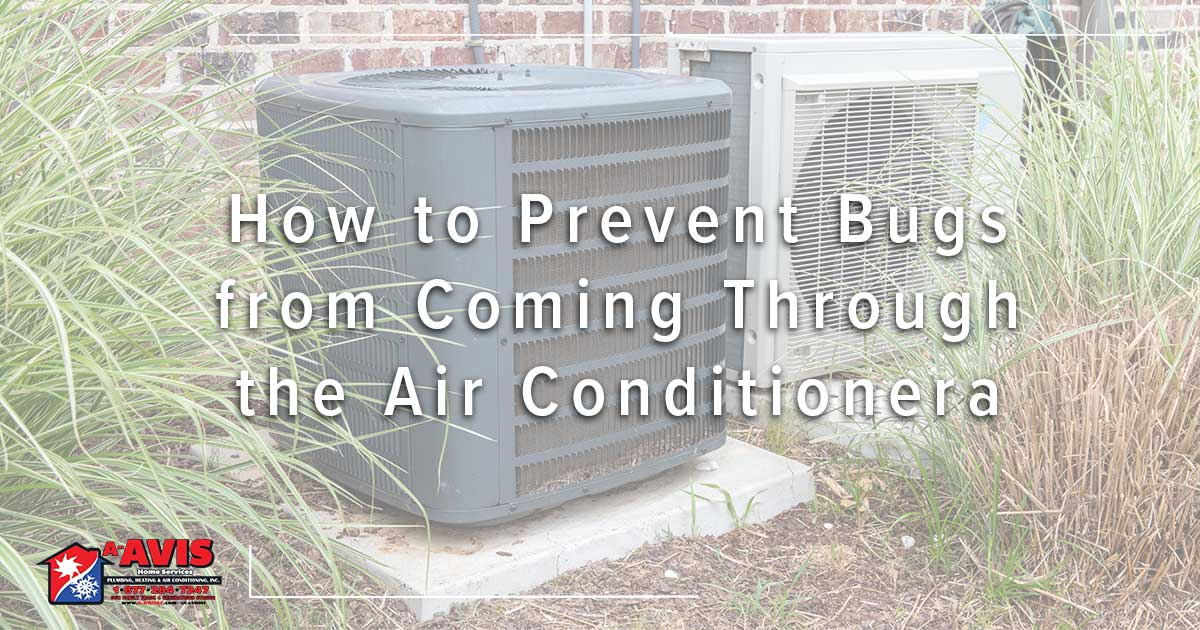
Most HVAC systems offer a nice home for critters. Oftentimes there’s protection in the condenser’s grill. There’s almost always a fresh water supply from the condensation, and the whirring of the machine can be a toasty place to stay warm at night.

Another reason bugs like your HVAC system? It can grant total access to your home. They get in through ductwork, return vents, and small holes in the walls.

The good news is that there are a number of things you can do to keep bugs from coming in through the air conditioner.

What Kind of Bugs Get In?

Bugs seek out the same basic shelter we do. They are attracted to the lights inside your home, cool temperature, and availability of food. Your air conditioner can offer easy access to the inside of your home.

The bugs most commonly found in your AC system are flies, cockroaches, mosquitoes, ants, and spiders. I don’t know about you, but we sure don’t want these critters running around inside our home.

Fill in the Holes

Go outside and look at the area around your condenser. Are there any cracks or holes? Simply fill them up with caulk or concrete.

Though the holes may be small, they’re a great way for bugs to come through the air conditioner and in your home. You can purchase caulk and concrete at your local Ace Hardware, Home Depot, or Lowes.

Keep up With the Landscaping

Landscaping matters, especially when it comes to your condenser. There are basic rules all homeowners should follow when it comes to AC and foliage.

First, any plants, trees, or fences should be 2-3 feet away from the condenser. Just like most other things in this world, it needs room to breathe. Make sure any tree branches are not too low. Also, clean any debris from around the condenser. Leaf piles are a great starter home for bugs.

Second, move anything that could attract bugs away from your condenser. This includes wood piles, trash cans, and grass clippings.

By clearing away any gathering places for pests, you’re minimizing the risk of bugs coming in through the air conditioner.

Consider a Rock Garden

If cleaning up shrubbery seems like a total buzzkill, why not put in a rock garden?

These stone gardens are gaining popularity because they’re easy to maintain and drought resistant. Also, they will deter bugs from making their nests around your condenser.

A rock garden can be anything from aesthetically pleasing gravel to bricks, or even large river rocks. Also, tall plants can potentially block airflow and clog your condenser’s coil. A rock garden would entirely alleviate this problem.

Clean Your Gutters and Downspouts

Over the summer dust, leaves, and other debris can easily buildup in your home’s gutters and downspouts. This buildup is an incredibly inviting home for pests and critters.

Routinely cleaning your gutters and downspouts is not only a good thing to do, but it also keeps away bugs.

Stop Water Leaks

Cockroaches are always looking for water. A damp place could provide a wonderful home for a family of roaches. That’s why you’ll want to inspect for any water leaks and patch them up as soon as possible.

Check your hose spigots and make sure they close nice and tight. If you notice any water leaking from your condenser it’s more than a beacon for roach families, it could be an indicator that something is wrong with your AC

Schedule an AC tune-up

Want to prevent bugs from coming through the air conditioner? Schedule an appointment with the HVAC experts at A-Avis. Our techs will perform an AC tune-up and professional cleaning to ensure there are no critters in or around your system.

Call the number at the top of the screen or click here to request an appointment online.

How to Change a Showerhead

Want to make a meaningful change to your bathroom without a lot of heavy lifting? You can’t go wrong with the showerhead! It’s an easy thing to fix that can make a big impact on both the form and the function of your bathroom. Don’t feel intimidated, it’s a relatively task. Below are the step by step instructions for how to change a showerhead.

Materials

The first thing you’ll need is a small set of materials, they’re not too expensive and easy to find:

  • New Showerhead
  • Plumbers of Teflon Tape
  • Old Toothbrush
  • Adjustable Wrench
  • Stepstool
  • Washcloth

Step 1 – Remove the Existing Showerhead

Removing the showerhead depends on how long it’s been in your shower. An older showerhead may have some rust and corrosion. For these, we recommend using a wrench to unscrew it.

For newer showerheads, a simple hand screw is enough to get it off.

To start, turn the showerhead itself in a counterclockwise direction until it comes off. If necessary, hold the pipe that connects to the wall with a washcloth. You do not want this pipe to rotate or move.

Step 2 – Clean the Extension Pipe

There’s a big chance the last showerhead has a bunch of buildup underneath it. This is where you use the old toothbrush and washcloth.

Use the toothbrush to breakup any buildup on the inside of the pipe. Then, wipe the inside of the pipe with your washcloth.

Wet the toothbrush and scrub the threading on the outside of the pipe. Remove any existing Teflon tape and scrub underneath it.

Step 3 – Apply the Teflon Tape

Believe it or not, applying Teflon tape is something a lot of homeowners get wrong. Here are the basic steps to using Teflon tape:

  1. Make sure the tape lays flat. You don’t want it to be bunched at all. Start by laying the tape at the end of the pipe. Hold it in place with a finger or thumb.
  2. Wrap the tape counterclockwise around the pipe threads.
  3. Make sure to keep the tape tight and flat.
  4. From start to finish, you should wrap the tape around the pipe end 4 to 6 times.
  5. When you’re at the other end of the pipe, break the tape by pulling it apart. Smooth the loose end over the threads.

You are now ready to move on to step four, installing the new showerhead.

Step 4 – Install the New Showerhead

Before you do anything, read the instructions that come with the showerhead. Some heads do not require a wrench.

When you’re ready, screw the showerhead clockwise in place. When it’s fully secure, hand tighten it one quarter turn.

After it’s on there, tighten the showerhead one last time with your hand. Anything more could result in a cracked connecting nut.

Step 5 – Test and Inspect for Leaks

Next, step back and turn on the shower. It’s common to have a leak or two. Just take off the shower head, readjust the Teflon tape, put the showerhead back on and you should be good to go.

Sometimes, the showerhead can be too tight and that will cause leaks that can’t be fixed.

Now that you know how to change a showerhead, making a change to your bathroom should be easy.

Need Help Changing Your Showerhead? Call A-Avis

Feeling like this is a job left to the pros? Have any questions about your plumbing system? Call the experts at A-Avis!

We offer top of the line service, including our plumbing safety inspection that’s essentially a tune-up for your pipes. Dial the number at the top of the screen or click here to request an appointment online.
What do We Check During a Plumbing Safety Inspection?

A plumbing safety inspection isn’t top of mind for most Southern California homeowners. Most people schedule a plumbing inspection while they’re going through the house purchasing process, or they wait until something has gone wrong. At A-Avis, we like to say an ounce of prevention is worth a pound of cure. That’s why we started doing plumbing safety inspections. Below we outline everything we check during the 11-points of this safety inspection.

Our 11-Point Plumbing Safety Inspection Includes:

Water Heater Safety and Visual Inspection

  • Your water heater is truly the MVP of your household. It helps you bathe, clean, and stay safe. Our plumbers take special care to test and inspect your water heater. First, they’ll conduct a visual inspection to see if there is anything wrong with the outside of the appliance, this includes checking the safety straps and looking for any obvious leaking or sanding water.

    The plumber will then inspect any electrical or gas components. There are serious fire hazards if those are not working. We check for stripped wiring and for mineral buildup from hard water. At A-Avis, we recommend a water heater flush for appliances that are 5-years-old or younger.

Toilet Inspection

  • There are a few things we look for when we inspect your toilets. First, is your toilet stable? When toilets rock from side to side it could be an indicator of a broken or failing seal. When the seal breaks or cracks it can flood your bathroom.

    We’ll then check the toilet handle and flapper. Is the handle working as it should? The flapper is what stops water from constantly running in your toilet. The other thing we check in the toilet tank is the fill valve. A faulty fill valve will lead to water that’s constantly running. A true drain to the environment and your wallet.

    The last things we check during the toilet inspection are the supply line and angle stop. Many toilets’ supply lines are connected to the tank with a plastic nut, which is the angle stop. We check to make sure that the angle stop isn’t cracked or broken.

Main Sewer Line Inspection

  • When our plumbers ask about your home’s cleanout? They’re doing this to check your main sewer line. Our plumbers will first conduct a visual inspection of the cleanout. Next, the plumber will ask you to start running water from taps in the home. This allows us to see how the water is flowing. Next, we’ll feed a camera through the main sewer line to check for any buildup or cracks in your pipes.

Verify Proper Clean Out

  • This one goes along with the main sewer line inspection. We’ll look to see if there are proper vents that lead from your home appliances to the sewer. Without those vents, we can’t properly snake the drain and give it the cleaning it deserves.

Drain Line Inspection

  • During the main sewer line inspection, our plumbers will also run a camera into your drain lines to see if there are any issues that need to be addressed.

Check for Pressurized Plumbing

  • Next on our list is to check the water pressure. All we need is a hose bib. Our plumbers will connect a pressure gage to the hose bib, turn on the water, and get a reading of the pressure. Your water pressure should be between 65 and 75. Anything over 75 can lead to major problems.

Inspect for Proper Ventilation

  • Did you know that any sink, tub, or toilet in your home needs a vent? It’s ok, a lot of unlicensed contractors don’t know this either. Fumes go down the drain with any debris and they need a place to go. Without the proper ventilation, the fumes are just stuck there and will waft back into your home.

Inspect for Proper Plumbing Insulation

  • Any plumbing pipes that are on the outside of your home need to be insulated. Temperatures can be very different from the inside of your home to the outside of your home. We want to make sure any heat treated water stays nice and toasty on its journey from water heater to tap.

Inspect for Gas Leaks

  • Many of the appliances in your home use gas to create heat. The stove, clothing dryer, and water heater are a few examples. Our plumbers will test the gas lines going into the appliances and see if there are any leaks.

Quality Test Tap Water

  • Each one of the plumbers at A-Avis is outfitted with a tap water test kit. They take a sample of water directly from one of your sinks and check it for water hardness and chlorine. There will always be a trace level of chlorine in your water—that’s how the city purifies it—but you just don’t want too much.

Inspect All Shutoff Valves

  • The water shutoff valve is an important safety tool in your home. IF you’re dealing with a leak or flood somewhere, all you need to do is stop the water. Older homes are equipped with a gate valve. This valve works by essentially raising and lowering a gate to stop or start the flow of water. Older ones can be ineffective. Our plumbers will not check a gate valve because of how testy they can be.

Schedule a Plumbing Safety Inspection with A-Avis

Our expert plumbers are trained to look at your plumbing system and see if there are any problems. They will go over every step of this inspection with a fine tooth comb, so you receive an accurate assessment. We proudly serve parts of Riverside and San Bernardino counties. Call the number at the top of of the screen or click here to request an appointment online.
Signs it’s Time for an AC Tune-Up

We’re feeling the first bits of warm, spring air which means one thing. Summer is right around the corner. We all know how bad a summer scorcher can feel. This is why we recommend staying one step ahead of the weather and scheduling an AC tune-up as soon as possible. However, some homeowners kick on their AC at the start of spring and think nothing of regular maintenance. Here are some signs it’s time for an AC tune-up.

You Feel Warm Air

Did you turn on your AC for the first time in a season and feel warm air flowing out? We don’t need to tell you this is not normal. Not only will this add unnecessary expense onto your utility bill, but it also adds extra stress to your HVAC system. And to top it all off, your home isn’t getting any cooler.

There are more than a few reasons why your AC might be blowing warm air. They range from the simple, thermostat problems or a dirty HVAC filter. To the more complex issues, think frozen evaporator coils or a refrigerant leak. Either way, it’s best to schedule a tune-up ASAP if you feel warm air coming from your vents. An HVAC professional will be able to diagnose the problem and let you know next steps.

Hearing Any Strange Sounds?

The only sound you should be hearing from your HVAC system is well, nothing beyond a slight whoosh or hum. Most modern systems are engineered to not make a lot of racket. While most noises are a flash in the pan, they go away after one or two instances. Lingering sounds are not something you should let go on for too long.

Screeching could be an indicator of a refrigerant leak, while squealing could just be from a loose belt. As with most other things, sounds can run the gamut from no big deal to major danger.

See a Sudden Spike in Utility Bills?

Most homeowners know what to expect during their yearly billing cycle. When something goes up without warning, that’s a sure sign it’s time for an AC tune-up. Yearly maintenance ensures AC efficiency. Even small things—like an overfull HVAC air filter—can cause your system to work twice as hard to produce the same amount of air. Which could make your utility bills go through the room.

There’s too Much Humidity and Moisture

Regulating humidity is an important role for any central cooling system. Your AC is built to detect and control how much humidity is in your home. It’s time to call the HVAC experts for a tune-up when your home feels a little more moist than usual.

When moisture is in your home be on the lookout for a refrigerant leak. Your AC’s evaporator coils need refrigerant to properly cool air. When they don’t receive enough refrigerant, the air will come out as only slightly cool, but very humid. A quick way to see if you may be dealing with a refrigerant leak is to look for any pooling water around your condenser.

The Airflow is Weak

Your home can’t stay cool without consistent airflow. Weak airflow happens when your air filter is too full or there are issues with your air ducts. We’ve talked about the problems that arise when you don’t regularly change your air filter. In addition to diminished air quality and higher utility bills, weak air flow is one of them. During an A-Avis tune-up, one of our HVAC experts will be sure to change your air filter and get everything working as it should.

Call A-Avis for the Best AC Tune-Up

At A-Avis, we promise the best service to our customers, no matter what. This means so much to us we have our happy money guarantee. Meaning you don’t pay until you’re completely happy. We proudly serve parts of Riverside and San Bernardino counties. Call the number at the top of the screen or click here to request an appointment online.
Why Do Plumbers Use a Camera to Inspect Pipes?

Before the development of sewer cameras, there were a lot of ripped up lawns. Without a camera, the only way a plumber could really know what was going on in your pipes was to dig through your yard and inspect the pipe that way. Now, we have cameras.

We Need to Get to the Root of the Problem

Instead of tearing through your lawn, modern plumbers snake a camera through your pipes. Now, your plumber will insert a camera directly into your pipes and can show you exactly where and what the problem is.

The traditional way of looking for a problem in pipes used to take days. Now, our skilled plumbers can find the root of your problem in a matter of minutes. They can also record the inspection and keep footage on hand if you ever want to take a look for yourself. It’s easy to see why plumbers use a camera to inspect pipes.

What Can I Expect During a Camera Inspection?

One of our favorite things about a camera inspection is that it’s quick. As we mentioned above, it used to take hours, even days, to figure out what was clogging your pipes. Now we can do it in a matter of minutes.

When a plumber comes to conduct a camera inspection, the first thing they will ask is where they can find your main sewer line cleanout. Once this is located, the plumber will open the cap and then insert the camera into the pipe. The camera itself is very small and at the end of a flexible cable. That flexible cable can move through the tight bends and curves in your plumbing system.

As the plumber feeds the camera cable through your pipes, they can see everything on a video screen. This allows them to conduct an inspection in real time. Which will give you answers and options in minutes. Also, if you think something is lost in the drain, it could be found with a camera inspection.

Signs Your Plumbing Needs a Camera Inspection

Your plumbing system is a complex maze of pipes. Without a camera, it’s incredibly hard to understand what’s going on in there. Because the average person can’t just pop open their plumbing and take a look, here are some signs you should schedule a camera inspection:

  • More than one sink is slowly draining – It’s very easy to figure out the problem when only one sink in your home is backed up. However, this changes when two or more drains are backing up at the same time. This could be an indicator of problems in your main sewer line.
  • The smell of sewage is coming from your pipes – The smell of sewage coming from your drain can be an issue specific to that line. The difference is when you smell sewage in your yard or coming from multiple drains at once. This could indicate something is broken in your main sewer line.
  • There’s a patch of lush, green grass – Is there a spot in your lawn that looks brighter and greener than the rest? Unfortunately, that’s not your green thumb talking. Chances are your pipes are broken and leaking water in a specific spot.
  • Your water pressure is inconsistent – Leaks in your plumbing or sewer lines can cause a significant drop in your water pressure. You should call a plumber and schedule an inspection when your water pressure takes a surprising dip.

For the Best Inspection in Southern California, Call A-Avis

At A-Avis, we take the health and safety of your home very seriously. When we conduct a plumbing safety inspection, we make sure to run a camera through your drains and main sewer line. Since an ounce of prevention is better than a pound of cure, we want to catch any small problem before it becomes a big headache. We proudly serve parts of Riverside and San Bernardino counites. Dial the number at the top of the screen to speak with our friendly call center representatives or click here to book an appointment online.

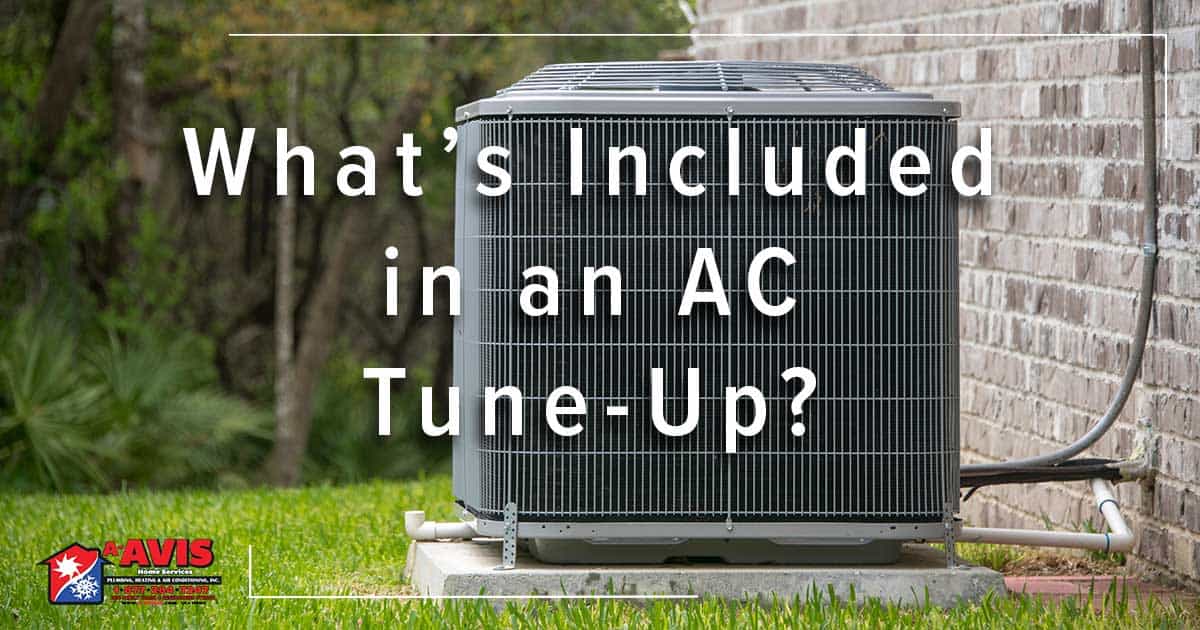
What’s Included in an AC Tune-Up?

When you bring someone in your home to check your AC, you only expect the best, right? Your air conditioner is a complex system made up of two parts, the outdoor condenser and inside furnace. Believe it or not, your furnace does double duty all year. That’s why two inspections per year are critical for HVAC maintenance.

Just like our furnace tune-ups, there are 3 key parts of an AC tune-up: inspection, cleaning, and testing. Our HVAC experts conduct these in-depth tests to ensure the safety of the unit and to make sure your HVAC system is running at peak efficiency. If there are any problems with your AC system, the tech will let you know what’s going on and any suggested next steps.

Inspect:

Fan Blade for Balance

  • The fan blade is an essential part of our AC condenser. It creates air motion and is responsible for any cool air making it into your home.Anything that spins or rotates needs to be balanced. Without that balance the fan blade can’t operate properly and could potentially do serious damage to your system. For example, a fan blade that’s off balance can potentially hit and break the refrigerant line, damage aluminum parts, or fall off completely.The fan blade has weights in it. During an AC tune-up, your HVAC tech will adjust the weights as necessary to make sure the fan blade is balanced and spinning as it should.

Duct Supply and Return

  • All the air in your home needs an entry and exit point. This is where the supply and return ducts come in. Your HVAC system will pull air from the home, essentially supply the system with more air. The supply duct will guide that air to the HVAC system. After temperature treating your air, the HVAC system then returns that air to your home. This journey is made through the return vent.During a tune-up, a tech will make sure air can flow freely in the supply and return ducts.

Indoor Coil and Blower Assembly

  • Most homeowners don’t know that their furnace does a lot of work during AC season. The same system that heats your home is also responsible for cooling it. Central heating and cooling systems have two coils, one indoor and one outdoor.The indoor coil is above the furnace. Our techs will take extra care to check your indoor coil for issues and give it a nice, professional cleaning. They will also check the blower motor in your furnace.The blower motor that propels warm air through your furnace and into your home is also responsible for distributing cool air into your home. It gets checked twice per year because it’s always in use.

Bearings for Wear

  • Bearings are an important tool for keeping the fan blade balanced. These small devices allow fans and wheels to spin smoothly. Bearings essentially bear the pressure. However, they need to be checked every year. Over time and with enough use, bearings can get dirty and will need to be cleaned, oiled, and sometimes even replaced.

Electrical Connection

  • The rotating of the fan and the air compressor can cause a lot of vibrating. Over time and with enough use, this can dislodge some critical wiring. A-Avis techs are trained to fix that wiring on the spot. They will also make sure to secure electric connections and conduct a thermostat evaluation to make sure everything is working correctly.

Refrigerant line

  • You wouldn’t have cool air without refrigerant. It’s an important part of the whole system, and it’s all delivered to your condenser through one single line. During an AC tune-up, our techs will inspect the refrigerant line for any cracks or damage.

Heat Exchanger

  • Technically the heat exchanger is part of your furnace, but our techs still make sure to look it over during an AC tune-up. Our techs do this because they want to make sure the heat exchanger made it through a season of use and it’s ready for the next fall and winter. We also want to see how your heat exchanged held up during the winter. It’s something you should fix or replace long before the fall.

Clean:

Condenser Coil

  • After the initial inspections, it’s time for cleaning. Your outdoor condenser coil is open to the elements. We advise against keeping it covered, so there will be some dirt and debris hiding in there. Our techs will take out the condenser coil and give it a professional cleaning.

HVAC Air Filter

  • The biggest reason we change the air filter twice per year is because both warm and cool air go through it. Just like your furnace, it’s used throughout the entire year. After a season of use, your air filter can be full of dust, dander, dirt, and any other indoor air contaminates. For your safety, it’s important to be changed twice per year. The HVAC air filer also needs to be changed because a full filter can restrict airflow and cause unnecessary wear and tear to your system.

Condensate Drain

  • The process of taking warm air and making it cool creates a lot of condensation. Your condenser is designed to flush that condensation through a drain. Southern California winds also kick a bunch of dust and dirt into your condenser. That debris can be flushed down the condensate drain with any lingering condensation.This mixture can clog the line like a backed up sink. And just like a backed up sink, it can spill over and leak. These leaks can cause drywall and property damage. We want to do everything we can to avoid these issues.

Outside Condenser

  • One of our biggest cleaning jobs of an AC tune-up is the outside condenser. Your condenser tends to look a little worse for the wear after a season of rain and wind. During a tune-up, an A-Avis technician will use a hose to spray out and clean your entire condenser. After everything is washed down, they will apply a wax sealant. Think of it as a wash and wax you get for your car, but for your condenser.

Test and Measure:

Electrical Wiring

  • After all electrical wiring is put back into place, our techs will conduct tests to make sure everything works. As we mentioned above, if something is out of place, our techs will fix it right away.

Thermostat Evaluation

  • After checking all the wiring, the next thing our techs do is make sure the thermostat is properly communicating with the rest of your HVAC system. Think of the thermostat as the remote control of your HVAC system.Our techs will take a baseline reading of the thermostat, make sure it’s communicating correctly and make sure it’s in proper working order. We make sure all our techs have batteries so your thermostat can get some fresh juice.

Metering Services/TXV

  • TXV stands for thermal expansion belt, a small name for a small part that has a big job. The TXV, sometimes called a metering service or device, regulates how much liquid refrigerant is coming into the system at any given time.This is important because sometimes you don’t want the AC on at full blast. You’ll want a moderate temperature. The TXV will make sure your system is only getting what it needs. This saves you a lot in operation costs and it helps prolong the lifespan of your equipment. During a tune-up, our techs will make sure to test the metering service/TXV and make sure it works to our high standards.

Service Valve Operation

  • Are you familiar with the valve that’s used to test your tire’s pressure? AC units are equipped with a similar valve. Our techs test this valve because refrigerant could come leaking out of it if the valve is corroded or broken.Our techs are all equipped with electronic sniffers and soap bubbles to test the service valve. They’re looking to see if any refrigerant or gas is leaking from said valve. Fortunately, if something is wrong, our techs are outfitted with replacement valves and they will change yours on the spot, free of charge.

Safety Devices Operation

  • Over the years, HVAC systems are outfitted with new safety devices to make sure nothing goes wrong with your equipment or does harm to your home or family. One of the safety devices we check is related to the condensate drain mentioned above.Up to 5 gallons of condensation can be flushed through that line. When the line is clogged, and that condensation has nowhere to go it can just build up in your system. If there is too much water in your condenser, the system will shut itself off to prevent damage to the condenser and damage to your home. We’ll test and make sure that safety device is working.

Refrigerant Charge Evaluation

  • This evaluation makes sure the proper amount of refrigerant is being piped into the condenser. We like to compare this to blood pressure. High blood pressure can put someone at risk for a heart attack. While low blood pressure can weaken the system. We test to make sure your condenser receives the right amount of refrigerant.

Primary Motor Control Operation

  • As with most other machines, your condenser has a motor that keeps it running. And just like most other machines, that motor has a lifespan. Fortunately, it’s easy for our techs to conduct a visual inspection of the motor to see how it’s holding up.
    They look for charred surfaces and soot remnants. These are telltale signs the motor is on its way out and should be replaced. We check things like this because catching a faulty motor early in the season could potentially save someone from investing in a whole new condenser.

Fan Motor Amperage and Voltage

  • Every fan is engineered to have a specific amp and voltage average. We like to make sure everything is at the correct setting. When a fan motor is running too fast it means an equipment failure is on the horizon. Our techs are outfitted with special meters that will let them know the exact amperage and voltage of your fan motor.

Secondary Motor Control Operation

  • The secondary motor control is responsible for the electric that’s released into your condenser. It stores electricity and releases it in specific intervals. It releases the electricity in spurts to keep the fan motor spinning at a specific rate.
    If the secondary motor control isn’t working correctly, it could negatively impact the compressor and the fan. While the fan and compressor are not cheap to fix, the secondary motor control operation is. We check this because we would rather catch and fix a small problem than a have it turn into a huge issue.

Compressor Amperage Draw and Voltage

  • This is very similar to the fan motor. The compressor has specific, manufacturer provided numbers its amperage and voltage should be at. The amperage needs to be at a certain level because the electric company will charge you more when its too high. When the compressor is running more than it needs to be, it’s using a lot more energy and it’s sustaining a lot of unnecessary wear and tear.

Temperature Difference at Supply and Return

  • Finally, when everything is checked, we go start the AC system and go into the home. Our techs take temperature readings at the supply and the return vents. There is a specific temperature ratio where each of these should be. Checking the temperatures is the last step of our AC tune-up.

Want the Best AC Tune-Up in SoCal?

At A-Avis we proudly serve our Riverside and San Bernardino communities. To schedule your own AC tune-up, dial the number at the top of the screen or click here to request an appointment online.
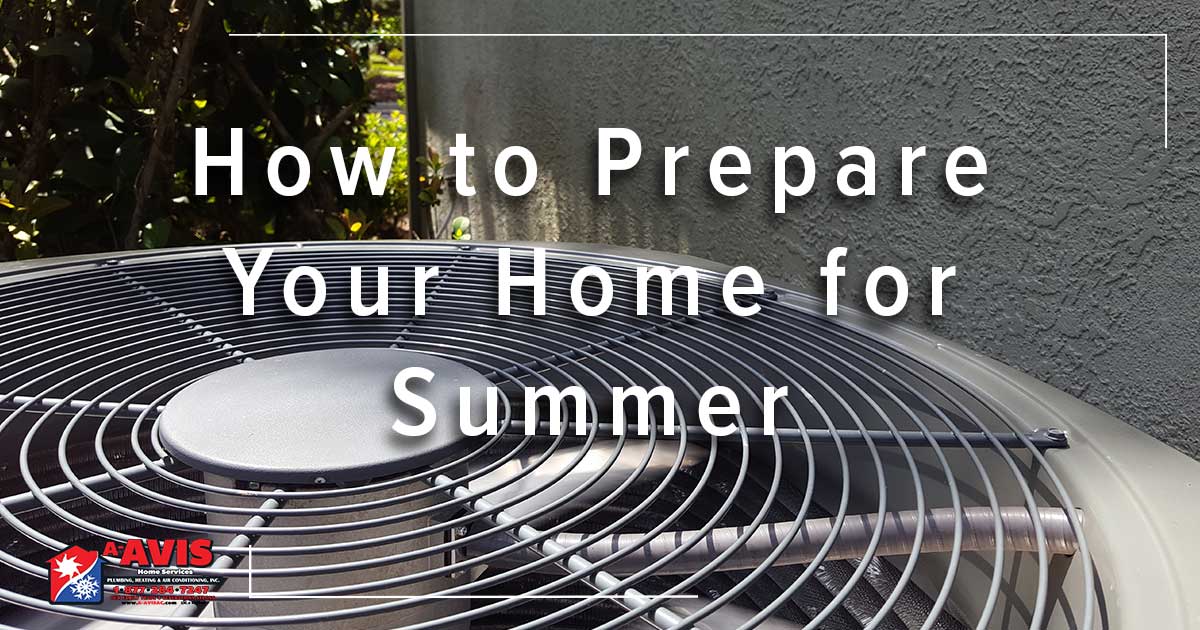
How to Prepare Your Home for Summer

There’s nothing better than a long, warm Southern California summer. We’re already gearing up for warm summer nights even though the actual season is a few months off. You should also be getting your home ready for summer. Southern California summers can do a number to your home and garden, here are some great ways to prepare your home for summer.

Prepare Your Windows and Screens

It’s easy to lose a good amount of your treated air through small cracks in your windows. These cracks will let the heat in (or let cool air out) and drive up your utility bill. One of the best ways to prepare your home for summer is to inspect the outside of your windows. Look for small cracks that can be filled. This is also a great time to check your screens. Look for any holes or damage. Summer is a season for open windows and functional screens keep bugs out.

You’ll also want to check your windows from the inside. Open and close them a few times to make sure all parts are in good working order. Also, don’t forget to give the windows a good cleaning. You’ll want a streak-free view of summer.

Inspect Your Roof

Checking your roof is very important after the winter. Southern California winters are mild. However, they shouldn’t be dismissed. Check your roof before it gets too hot to be up there. First and foremost, make sure you feel safe scaling your roof. Call a roofing company to take a look if you are unable to do so.

Keep an eye out for any loose or missing tiles when you’re either on your roof or conducting a visual inspection from a ladder. Any holes or obvious spaces are things you’ll want to have fixed as soon as possible.

Clean out the Gutters

The rainy season down here may be short, but it sure is windy. That wind can knock lots of branches, leaves and other debris loose. Oftentimes, this mess can find its way into your gutters and downspouts.

It’s important to clean out your gutters and downspouts before the start of summer because clumps of wayward leaves and debris can be a very appealing home for bugs and other critters. Mice, squirrels, and rats can get into your attic and chew holes in your ductwork. Bugs like termites, mosquitoes, and even roaches can make a home in your gutter. Both these reasons are why you should clean your gutters before summer hits.

Keep the Bugs Out

Your gutters aren’t the only way bugs can get into your home during the summer. The three most common insects to come out during the SoCal summer are bees, wasps, ants, and mosquitoes.

One of the best ways you can prepare your home for summer is to conduct a visual inspection around the perimeter of your home. Look for any cracks or holes where bugs can get it and seal it. Also check for any areas that collect standing water. Mosquitos lay their eggs in standing water.

Another thing you can do is landscape with plants that repel bugs. Herbs like rosemary and lavender can keep bugs away from your home. They also smell great and can add some homegrown flair to your cooking.

Tune-Up Your AC

It gets so hot in parts of Southern California that a working AC system is essential to daily life. One of the most important things you can do to prepare your home for summer is to schedule an AC tune-up. Regular maintenance is essential for your HVAC system and home comfort levels.

During an AC tune-up, our certified technicians will disassemble every part of your outdoor condenser and give it a professional cleaning. They will also conduct maintenance checks on every part of your system, ensuring a summer full of cool air and reliable HVAC.

One of the best ways to always be prepared for tune-ups is to join our CHAMP-Rewards program. Our club service representatives will call you when it’s time for a tune-up, not the other way around. It takes the guesswork out of scheduling, and you can save a little money as well.

Prepare Your Home Ready for Summer with A-Avis

Make sure your home stays cool all summer long with A-Avis! We offer our unparalleled AC tune-ups to clients in Riverside and San Bernardino counties. Meeting your HVAC expert is as simple as dialing the number at the top of the screen. Or click here to request an appointment online.

Signs It’s Time for a New Water Heater

A household heating system may not do much work over a winter in Southern California, and that’s how most of us like it! But there is a heating system in your house that does an immense amount of labor in winter—as well a spring, summer, and fall. It’s your water heater, and it runs almost every day of the year to keep your household supplied with the hot water necessary for so many basic tasks.

All that work means a water heater eventually runs down and reaches a point where all the best repairs won’t do much but drain money while the water heater becomes less efficient and effective. By all means, have your water heater repaired if those repairs are worth it. But be ready to accept when the better investment is to purchase a new water heater.
Continue reading “Signs It’s Time for a New Water Heater”