How an Earthquake can Damage Your Plumbing

How an Earthquake can Damage Your Plumbing

Living in Southern California can be a dream. However, that dream comes with a price. They’re called earthquakes. Though Californians are constantly on alert for the big quake, there are things you can do to protect your home before the ground begins to shake. Learn how an earthquake can damage your plumbing and what you can do to protect it.

How An Earthquake Can Affect Your Plumbing

An earthquake literally moves the earth under our feet. This can cause great damage not only to your home, but any underground pipes as well.

Earthquakes can break your main sewer line.

When the ground shifts, it can cause your plumbing pipes to crack or even break. This will cause a lot of damage to your main sewer line, home plumbing system, and even appliances that use water like your sinks, tubs, and washing machines.

Another appliance that can be affected by an earthquake is your water heater. Without proper earthquake straps, you could face the threat of fire, a gas leak, and damaged from a falling water heater.

Making sure the earthquake straps are up to code and ready for any disaster is an easy task that can prevent major damages during and after an earthquake.

After the Quake: Check for Water Leaks

First and foremost, be sure to turn off your main water supply at the first sign of any leaking or flooding water. This simple action can save a lot of time, effort, and money in potential repairs.

One of the signs of broken plumbing is a flood or leak in your home.

There are pipes that run throughout the walls of your home. If your home has no visible damage and you feel safe staying inside, here are a few things to look for:

  • Search for any wet spots on your walls or floor. This is a sign a pipe is burst or broken.
  • Listen for sounds of running or dripping water.
  • A sudden change in water pressure can indicate a broken pipe and a subsequent water leak.

After the Quake: Check for Gas Leaks

Gas leaks should be taken seriously. The have the potential to be harmful, even deadly, to anyone in your home.

Natural gas is made to have a harsh smell so you can know when it's leaking.

To look for a gas leak, start with your nose. Natural gas has no smell, but companies add a strong odor to it, similar to rotten eggs, that can alert you if any gas is leaking in your home.

Another way to look for a gas leak is with your ears. Sometimes a gas leak will sound like a long hiss.

After the Quake: Check Sewer Line for Damage

Your sewer line has an important job. It takes all the waste from your home and transports it to a processing facility. A break in the sewer line is not only gross, but it can also be dangerous.

A damaged main sewer line can result in flooded parts of your lawn.

Sewage waste can lead to major health issues like bacterial infections. The gas can also be incredibly toxic.

The best way to check for any post-earthquake sewer line damage is also with your nose. The distinct odor of waste is almost always a surefire sign there’s a leak or break in the pipe.

Keep an eye out for unusual wet spot in the yard and any sewage or wastewater backup in your sinks or tubs.

How to Minimize the Risk

Your plumbing system is incredibly different from your car, other major appliances, and even your HVAC system. You can’t pop the hood or take off a panel and see what’s going on inside. You need to have the help of professional plumber to even see what’s going on down there.

Despite this, there are some easy things you can do to minimize the ways an earthquake can damage your plumbing. They are:

  • Check any leaks before they become too big
    • Even the smallest leaks can be an indicator of a larger problem. The best way to mitigate risk is to have even small leaks checked by a professional.
  • Know where your water shut-off valve is and how to use it.
    • In the case of a large quake and any visible leaks or flooding, you will need to turn off your water. Locate your shut-off valve and ask a professional how to use it. This could mean the difference between a small fix and a huge case of water damage.
  • Have a plumber come out every year to clear your drains of any potentially damaging debris.
    • Having a plumber inspect your pipes with a camera and clear away any existing clogs or debris is a great way to keep your plumbing system in shape.

Earthquake Safety Tips

It’s more important to make sure you and your family are safe during an earthquake. Though your home is important, the well being of your family should come first. Here are a few of our favorite earthquake safety tips:

Before the quake:

  • Work with your family to put together an earthquake plan. Map out a meeting area and locate any exits in your home. Don’t forget to include your pets in this plan.
  • Put together an emergency supply kit with water, food, emergency phone numbers, medical information, and identification.
  • Make sure your home, and the contents inside of it, are earthquake safe.
  • Download any apps that will give real time updates of happenings in your area.

During the Quake:

  • If you are driving, pull the car over, engage the parking brake, and wait out the quake.
  • Caught in bed? Cover your head and neck with pillows and turn face down.
  • Outside? Stay away from any large buildings. Find an empty spot and wait it out.
  • Inside? Stay there. Don’t try to run outside. Avoid doorways and remember to drop, cover, and hold on.

During an earthquake drop to the ground, cover yourself with a table or desk, hold on to said table or desk.

After the Quake:

  • First, make sure you are not hurt. Then go check on everyone else in your home.
  • Expect at least one aftershock if not more.
  • If there is visible damage to your home, get everyone outside as fast as possible.
  • Use text messages to check in with others. Texts are more reliable than phone calls.

Keep your pipes in tip-top condition with the experts at Service Champions! Schedule an appointment today.

Prepare Your Home for Fall in 7 Steps

Prepare Your Home for Fall in 7 Steps.

Summer is coming to a close. We’re starting to see some gray skies and feel the cooler weather. As the weather changes, there are a few seasonal tasks you need to take care of to ensure your home is well-equipped to handle the colder, and sometimes wetter, months ahead.

Here are our 7 best tips to prepare your home for fall, so you can stay cozy and comfortable this fall and winter.

1.    Clean Your Gutters and Downspouts

Water that isn’t properly diverted can lead to rot, mold, and mildew. This damage will lead to costly repairs.

Our best advice is to try and clean your gutters and downspouts or call someone out to do it for you. If you feel safe doing this, get a stable ladder and wear protective gloves to scoop out any leaves and other waste materials.

Try to clean your gutter at the start of every season. Dried out debris can be a great home for critters, and not mention a fire hazard, during the summer.

2.    Repair and Replace any Missing Shingles or Tiles

Speaking of your roof, when’s the last time you checked on the condition of your shingles or tiles?

During the summer months, the sun causes roof tiles to expand and contract, making them very susceptible to breaking.

Because of this, it’s important to visually inspect your roof before the rainy and chilly seasons.

Check your roof tiles before every season.

3.    Take Care of That Yard Work!

A clean yard is a happy yard. Take the time to clear any leafy debris, trim your bushes, and get around to any yard work done that you’ve been avoiding all summer.

Clear any leaves, cut down any branches that might be at risk for falling during rain and high winds. Additionally, prune overgrown and dead foliage from plants and bushes to avoid the spread of plant diseases and to keep everything looking fresh for the fall.

Make sure to rake all leaves and keep your yard free of debris during the fall season.

4.    Test Your Weatherstripping & Windows

To save on your energy bills, check your windows and doors for any cracks or holes that may be letting in drafts. In fact, up to 35% of heat-treated air can be lost through drafty windows. This is one reason why it’s important to check the seal around your doors and windows for drafts.

Should you find any cracks or holes, it’s time to add some new weatherstripping. Choose the best type of weatherstrip material by taking into consideration friction, temperature, and other factors unique to each location.

5.    Program Your Home’s Thermostat

Depending on the temperature outside, set your programmable thermostat to roughly 68 degrees during the fall.

This temperature setting is cost-efficient and keeps your home’s indoor environment comfortable. Another way to take control of the weather in your home is to reset the thermostat before sleeping and leaving the house. This will help to save on your energy bill in the upcoming months.

Also, dress for the season. Fall and winter means it’s time to pull out the cute joggers and hoodies that are probably now shoved into the back of your closet.

Programming your thermostat for the season can help lower your utility bills.

6.    Clean or Replace Your HVAC Filter

To keep your indoor air quality safe during the upcoming months, be sure to regularly check and change your HVAC air filter. One of the best things you can do for the health of your home and your HVAC system is to replace the air filter whenever it gets full.

This small action has a big impact. Dirty and overfull air filters force your HVAC system to work twice as hard to produce the same amount of treated air.

Regularly replacing the air filter is something that's very important for the health of your HVAC system and your family.

7.    Schedule a Furnace Tune-Up

Last but certainly not least, schedule a furnace tune-up. At Service Champions, we recommend two tune-ups every year. Once before the spring, and once before the fall.

Your furnace is a crucial part of your home’s heating and cooling systems. Since it works all year round, it’s best to tune it up and make sure it’s ready for the season ahead.

Always Be Prepared!

We hope these tips give you a clear path to follow in order to help you prepare your home for the fall. Don’t hesitate to book an appointment to let us know how we can help at any step of the way towards getting your home in the best condition possible for the upcoming months.

How to Prevent a Sewage Back-Up

How to Prevent a Sewage Back-Up

Let’s face it. Clogged and slow-running drains can be extremely frustrating. Even worse, they could be an indicator of a sewage backup. Unfortunately, your favorite drain de-clogging method won’t work for a sewer line. So, what should you do? In this blog post, we’re highlighting the telltale signs of sewer leaks, main causes of said leaks, and how to prevent a sewage back-up from reoccurring in the future.

What is a sewage back up?

A sewage backup occurs when some sort of damage or a backup inhibits the natural outward flow of waste from the source, in this case your home.

When your sewer line is backed up, the waste contents are reversed towards the direction of the original source, also your house. In this case, you know you have a sewage back-up when there’s wastewater in your tubs or sinks.

What causes a sewage backup?

Clogs

A clog in the main line is a common culprit of sewage backups. When this happens, many homeowners attempt to grab whatever they have on hand to “DIY” the solution. We’re asking you to please not do this.

At Service Champions we’ve seen homeowners use plungers, harsh chemical drain cleaners that can corrode pipes, or even makeshift “tools” like coat hangers to fix a sewer clog.

To prevent the risk of careless drain clogs, simply avoid dumping fats, oils, or melted butter down the kitchen sink. Be sure to not flus menstrual products, thick wipes, paper towels, or diapers down the toilet. And please refrain from washing excess hair, hardened toothpaste, soap fragments, or solid makeup products down the bathroom sink.

We recommend getting your drains cleared and conducting sewage line maintenance every couple of years by contacting a plumbing expert.

During a drain clearing, one of our plumbers can examine the current state of sewage pipes and detect slab leaks, flooding faucets and toilets, pressurized plumbing, tap water, etc. and recommend how to avoid sewage backups from occurring in the future.

Tree Roots

A serious sewage backup can result when the roots and branches of plants or grow into the gaps of cracked sewage pipes. You can easily prevent the overgrowth of tree roots by having them professionally trimmed. Lastly, to take extra precautions, you may want to consider clearing all plants around the sewage line to prevent any further root issues.

Tree roots are a main reason for your Sewage Back-Up.

Heavy Rainfall

Although it does not occur often, heavy rainfalls can break through and crack aging pipes that are already deteriorating. Be sure to check your basement after a downpour and look for any signs of a burst pipe, leak, or flood.

Heavy rainfall can damage pipes.

Damaged Sewer Line

The average age of sewage pipes in America is 30-years-old, according to data from the American Society of Civil Engineers. Over time and with use, pipes can begin to corrode and break down, which will cause a sewage back-up.

All the drains in your home rely on the main sewer line in order to function properly. One way to know you’re having issues with the main sewer line is if two sinks are clogged at the same time.

4 Ways to Tell You Have a Sewage Leak

1.   There’s a Bad Smell Coming from Your Drain

A foul smell is a clear sign you may have a crack and/or leak coming from your main sewer line. It’s best to contact a plumbing professional at the first scent of wastewater. If left unhandled, mold can grow in your home. Also, waste fumes are so toxic they can cause major health concerns.

2.   More than One Drain in your Home is Clogged

As we mentioned above, when more than one drain is clogged, it’s a surefire sign something is wrong with your main sewer line. However, if only one drain is clogged, such as the toilet, the problem is most likely unique to that pipe.

3.   Some Grass Spots are Growing Better than Others

Most homeowners are excited about new growth in their yard; however, this is usually not a good sign. Cracked or broken sewer lines will leak water which will make spots of your grass lusher than others.

Keep an eye out for weakening surrounding soil that may dip from liquid over-saturation. Any stand-out patches of grass or elevation changes around your underground sewer line may be cause to contact a professional for further inspection.

A damaged main sewer line can result in flooded parts of your lawn.

4.   New Mold Growth

Sewer line cracks can lead to wastewater leakages, which if left untreated, can be a great environment for new mold growth. Don’t just walk by leaks near faucets, toilets, walls, ceilings, and drains, investigate them. If you spot mold forming, do not try to clean-up the problem yourself – contact a plumbing repair expert immediately.

5 Benefits of Smart Thermostats

5 Benefits of A Smart Thermostat

Once you’ve had one, you’ll never turn back. Or, at least that’s what most of our Southern California homeowners say after they’ve invested in in a smart thermostat.

In fact, with 33 million North American houses using newer thermostats for temperature control, it’s quickly becoming the latest ‘must-have’ in the home owning space.

While there are many advantages of having a smart thermostat, we’re going to dive into the top 5 benefits of making the switch.

1.  A Smart Thermostat Can Lower Your Energy Bills

Your energy bill can fluctuate throughout the year depending on how you use your HVAC system.  You can now take control of that usage.

One of the best things these thermostats can do is track your energy usage. With this tracking, you can flex the way you use your HVAC system. This change in behavior will show on your next, hopefully lower, energy bill.

With a smart thermostat, you can grab all your detailed energy reports that tell you exactly how much you’ve been using with a tap of your finger.

These reports are created in real-time, meaning you’ll have no out-of-date data.

On average, you could see a saving of  $140 per year on energy bills. Of course, this figure could be higher or lower, depending on how you use your HVAC system. That said, you’ll be in a far better position to adjust your energy habits, as you’ll be given clear access to instant data.

Infographic from achrnews.com

2.  Control Your Home Temperature from Your Smartphone

Having a big, bulky thermostat attached to the wall, losing your handheld thermostat, or running out of batteries and braving a chilly evening are things of the past.

Before, you had to be in the same room to crank up the change the temperature. Now, don’t even have to be in the same building.

You can use your smart thermostat anywhere. Whether you’re turning on the heating for when you arrive home from work, turning on the air conditioning after hitting the beach, or warming the house for your pets while you’re away, you have the freedom to control the temperature from anywhere.

Plus, it’s handy to have temperature control on your smartphone. You can connect it to your voice control via your phone and command it verbally. But, more on that later.

Infographic from achrnews.com

3.  Automatically Adjust Your Home Temperature to The Weather Outside

A smart thermostat will analyze data based on your home heating and cooling habits. It then automatically adjusts its settings to accommodate for the outside weather.

For example, the temperature outside has dropped considerably. Your thermostat will automatically know what temperature your family prefers in the home and makes sure your home stays in that temperature range. No matter what the weather is like outside.

4.  Lower Your Carbon Footprint

We have more and more homeowners asking how they can “go green.” Being environmentally conscious has gone from a trend to a movement.

By using a smart thermostat, your household will consume less energy, which significantly reduces the number of fossil fuels and the demand for electricity from power plants. In short, your carbon footprint will be a whole lot smaller.

5.  Your Smart Thermostat Works with Voice Control

Ease of use is becoming more, and more important. We have voice control on smart phones and now smart thermostats.

You can easily synchronize your smart thermostat with your Amazon Alexa, Google Home, or Apple HomeKit. When your phone battery is low, or you left your device in the kitchen, you can change the temperature with voice control instead.

Another plus is that some smart thermostats even play music and handle calls. This isn’t the case for all of them, but some are genuinely all-singing, all-dancing, and even all-controlling.

Interested in Making the Switch?

Making the switch to a smart thermostat can drastically lower your energy usage, snipping through the figure on your energy bills while simultaneously lightening your family’s carbon footprint. Schedule an appointment to learn more.

Answers to Home Heating Not Working

Answers to Home Heating Not Working

Home Heating Not Working

Before calling your HVAC technician, try a few simple remedies to fix your home heating not working. While your furnace contractor is needed for more serious conditions, a small change might do the trick.

Home Heating Not Working to Clean Air

If your furnace isn't producing clean air, check the air filter.

First, examine the air filter in your furnace. When the air feels unclean, the cause generally lies within filtration. The air filter should be replaced regularly. Once every few months should suffice for most homes.

When the air filter is overused, it creates resistance, blocking air from entering the furnace. In turn, this leads to several other problems. Energy expenditure rises. The system experiences unneeded stress. Home heating and air conditioning quality dips.

To keep your home air clean:

  • Replace the air filter
  • Have the furnace and air conditioner maintained
  • Wipe down registers and vents

These changes should cure home heating not working to clean air.

Home Heating Not Working to Heat Air

If your furnace isn't working, it's best to call an HVAC professional.

When the home heating fails to heat air, the problem lies within a critical part. This may include the fire exchanger, compressor or even gas lines. However, most contractors who find the home heating not working also discover simpler explanations.

To fix your home heating not working to heat air, try:

  • Setting the thermostat five degrees higher than the room temperature.
  • Open all vents and clear furniture away from registers. Clear pathways ensure maximum airflow.
  • Reset the power breaker. Sometimes, kinks in energy routes can cause hiccups.
  • Check that the gas valves are open and functioning.

If none of these solutions fix your home heating not working to heat air, contact your furnace contractor. The issue may be more technical

Home Heating Not Working At All

Wondering why your home heating not working? Call the experts at Service Champions.

When home heating fails to work at all, there is a broad spectrum of what could have gone wrong.

Start with the simplest answers:

  • Has someone touched the thermostat? Check to see if it is set at the desired temperature.
  • Has there been a power outage? When either gas or electricity is unavailable, homeowners find the home heating not working.

For more serious issues, it is possible that:

  • A safety switch has tripped. When the central air system encounters a potential safety hazard, it automatically shuts down to prevent accidents.
  • The fire exchanger has been disabled. If the fire exchanger has been clogged with buildup, it is unable to house a fire, which means no heating.
  • Condenser unit has failed.

A professional should manage these issues for home heating not working. Your HVAC contractor is your best resource for safe operation.

Restore Your Home Heating with Service Champions

Service Champions Heating & Air Conditioning is a Diamond Certified HVAC provider. Each year, we serve thousands of homes in Los Angeles and Orange Counties.

As the leading heating technician, we restore all home heating not working. You can rely on our genuine customer service and expert technical care for exceptional heating service.

To fix your home heating, contact one of our friendly representatives in our call center at your convenience.

Protect Your HVAC from an Earthquake in Southern California

When it comes to living in SoCal, earthquakes become a commonplace occurrence, not just a random act of nature. Seismic activity can do some serious damage to your home. This also includes any heavy equipment in your home, like a furnace and condenser. Here is what to expect and how to protect your HVAC from an earthquake in Southern California.

How an Earthquake Can Damage Your HVAC System

Most homeowners focus on how to protect the things inside their home from an earthquake. Many don’t even consider something like their HVAC system.

Here are the most common ways an earthquake in Southern California can hurt your HVAC:

  • Movement – An earthquake can knock even the heaviest of all condensers off its concrete pad. During this movement, several things can break inside the unit. This includes the fan, fan motor, coils, and any electrical wiring. The same theory applies to your furnace. Even though its in your attic, it can move from its set location.
  • Exterior Damage – Most exterior damage happens from debris falling onto the gas line, electrical wiring, or refrigerant line. It’s important to take exterior damage seriously because it could pose a health risk to you and your family.

What to Look for After an Earthquake in Southern California

No matter how big or how small the quake is, you need to check it out and assess the damage. Even small quakes can cause a significant break in a fuel or refrigerant line.

The first thing you should do is look at the outside of your unit. Are there any visible scrapes or dents? This could indicate that something fell on your system and damaged a part inside.

Now it’s time to check the water and condensate drain lines. You run the risk of major water damage if those lines are cracked or broken.

You’ll also want to look at any visible ductwork. Ducts are flexible metal tubes that are unfortunately a little delicate. Even with proper restraints and belting, the shaking can cause cracks and breaks.

Be Mindful of Potential Gas Leaks

Next, look at the gas line. This is perhaps the most important thing to look at. If you notice any visible damage to the gas line, immediately turn off the gas in your home.

Even the smallest of leaks can cause your home to fill with carbon monoxide. When your home filles with this noxious substance, it can have major health complications for your entire family.

Carbon monoxide is colorless and odorless. It cannot be detected with the naked eye. Instead, inspect the gas line for any cracks or tears and make sure the batteries in your carbon monoxide detector are up to date.

An Ounce of Prevention is Better Than a Pound of Cure

The good thing is that there are actions you can take to help minimize the likelihood of damage to your HVAC system. Some of our favorites are:

  • Vibration Isolators – During earthquakes, condensers and furnaces experience the most damage from shaking. Vibration isolators are small springs that can be installed under the condenser. The springs absorb some of the vibration and shock so that it’s not all concentrated on your system. Vibration isolators can also be installed in the fan if your unit it large enough.
  • Restraint Brackets – These are brackets that go on the corners of your condenser and furnace. They help absorb some of the shock of a quake and help support the vibration isolators.
  • Flex-Line Piping – Oftentimes, the lines that transport gas and refrigerant are stiff. This makes it easier for them to break during a quake. Flex-line piping is a pipe insert that absorbs some of the shock from an earthquake. Just like the vibration isolators, this will help stop some of the damage caused by a quake.

Protect Your Home, Protect Yourself

While most homeowner’s policies cover HVAC damages after a storm, many don’t cover earthquakes.

When it’s time to renew your policy, take some time to go over your earthquake coverage options. Either ask your insurance agent if they can offer you any earthquake coverage or check out the California Department of Insurance.

There are three things you’ll want to look for in an earthquake insurance plan.

  1. Dwelling Coverage – This coverage is usually for your main house only but will cover your HVAC system and any damages made to the home itself.
  2. Personal Property Coverage – This coverage goes to any belongings in the home. Negotiate how much you can have covered with an insurance agent.
  3. Additional Living Expenses – If your home needs to undergo repairs and you need to rent a hotel, this clause will help pay for those expenses.

Need someone to look at your system after a quake? Call the experts at A-Avis.

How to Clean a P-Trap

Small clogs are the universal leveler. No matter how big or small the home, no matter how many people are in the home, every homeowner must deal with a clogged drain at some point or another. While big clogs should be left to the professionals, smaller ones can be handled at home. Here is our surefire way to clean a P-trap.

What is a P-Trap?

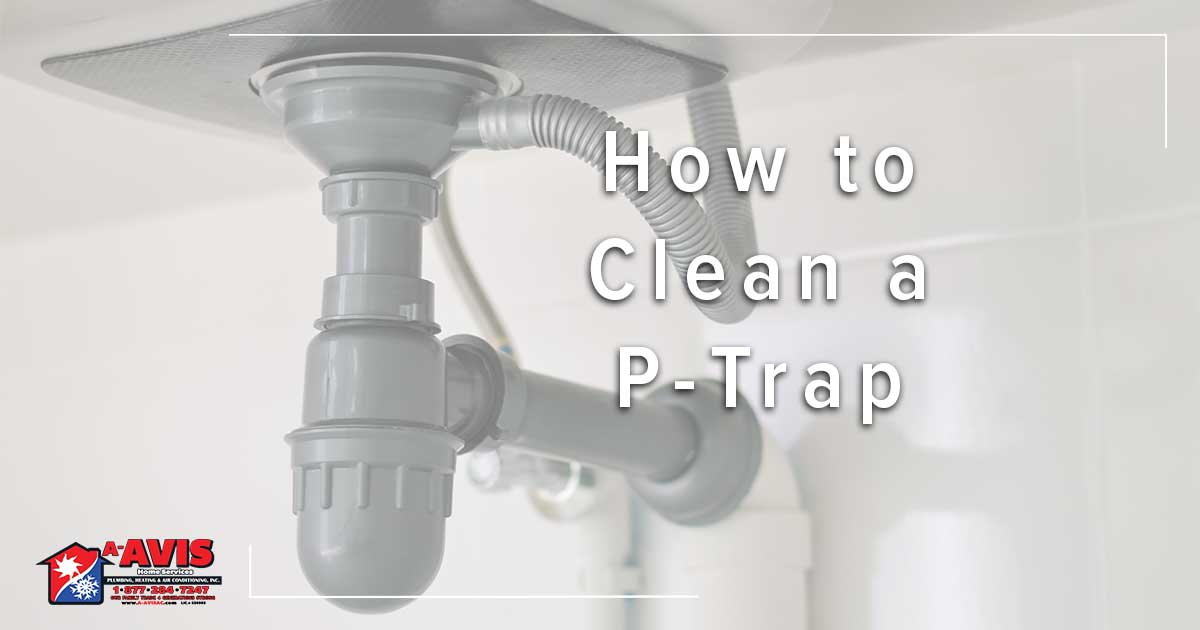
A P-trap is a bend in a plumbing pipe that acts as an air filter for your plumbing system. Any basin that collects water—a sink, toilet, shower, or bathtub—has a P-trap underneath it.

This pipe is in a u-shape and the dip at the bottom of the U creates a gravity barrier and stops noxious, and sometimes dangerous, gasses from passing through.

A gravity barrier, sometimes called a “plumbing trap,” is shaped like a P or U. The sharp drop in the pipe stops any gasses from getting through. A small caveat to this is that the pipe needs to have a small amount of standing water in it.

When someone complains of a bad smell coming from a sink that’s not used too often, chances are it’s because the P-trap dried up.

However, because so much waste goes through the P-trap, things can get stuck. This usually means there is some buildup in the bottom of the trap that’s not allowing for anything to pass through.

Step by Step Instructions: How to Clean a P-Trap

Materials Needed:

  • Bucket – To catch any water, loose materials, or drain debris
  • Wire Brush – To scrub out the pipes
  • Pliers or Adjustable Wrench – To remove the P-trap

Step 1: Turn off the Water Faucet

The first step of this process is to make sure the water faucet is turned off. Despite this step, it’s important to keep in mind that water will be present in the p-trap and this process will be somewhat wet.

This pipe always holds a small amount of water in it, so no matter how long you have the water shut off for, there will be something to drain in the pipe.

After you turn off the water faucet, make sure to put a bucket under the pipe. This will catch any loose water and debris in the trap.

Step 2: Remove the P-Trap

For this next step, you may need either pliers or a wrench. Start by unfastening the nuts that hold the piece of pipe in place.

In most cases, you can dislodge the nuts with your hands. Sometimes, they’re on a little tight and this is when you would use the pliers or wrench.

Keep in mind that water will start to fall out as you loosen the nuts. Make sure all the debris is aligned with the bucket.

When you get the trap loose, dump all excess water into the bucket and move on to step 3.

Step 3: Clean the P-Trap

Cleaning the P-trap is a pretty easy task. All you need is a flexible wire brush; similar to the one used for bottles.

Wet the wire brush and push it through the pipe until there is no more debris in the pipe or sticking to the brush. This should be enough to clean out the entire pipe.

You’ll still want to conduct a visual inspection of the P-trap to make sure everything is clean and clear.

Step 4: Put Everything Back Together

After everything is cleaned out, simply put the P-trap back on the way it came off. Make sure the long side of the pipe faces the sink drain.

Use your hands to screw the nuts back into place. Remember to pull out the pliers or wrench again if it needs some extra force to get back into place.

Don’t remove the bucket just yet. You need to make sure everything is working properly.

Test the P-trap by running water in the sink for 15 seconds. Does the water drain without leaking? Great, you can remove the bucket and clean up the area.

Does the pipe leak? You need to either tighten the nuts a little more or use Teflon tape to create a seal between the pipe and nuts.

How Often Should I Clean my P-Trap?

At Service Champions, we recommend cleaning your P-trap four times per year. Or, once every three months.

Additionally, it’s advised to clean your sink and drain every few months as well. A little bit of prevention can help keep the plumber away.

Need something more than a small P-trap cleaning? The plumbing experts at Service Champions can help.

DIY HVAC Projects You Should Never Try at Home

Being handy at home is something nearly all homeowners enjoy. However, it’s important to know when to call in the pros. It’s not pretty when our techs are called in to fix attempted DIY HVAC projects.

While there may be a ton of YouTube videos telling you exactly what to do, that will never compare to the level of experience, professional knowhow, and specialized tools a certified HVAC technician will have.

For effective AC repair and service, you need to call in a professional.

Reasons You Shouldn’t Try to DIY HVAC Repairs

Carbon Monoxide

The biggest reason the average homeowner shouldn’t try any DIY HVAC projects is because working with heating and cooling systems can be incredibly dangerous because of the potential for carbon monoxide exposure.

Any sort of badly repaired line or gas leak can cause carbon monoxide to fill your home. This could put you, and your family, at extreme risk.

Electrical Danger

Another thing that can cause gratuitous bodily harm is high voltage electricity – just like the electric work used in your HVAC system.

HVAC systems have electrical wiring that should only be handled by a professional who’s had extensive training. The last thing we want is a client hurting themselves over a tune-up or small fix.

Issues with Insurance and Warranties

Most home insurance policies and company warranties will not cover any DIY HVAC work. A badly done DIY job can void your system warranty.

Most of these polices have language saying repairs must be done by a trained and licensed professional. Doing the fixes yourself can cost money in the long run and even make it hard for your to find new homeowners insurance.

DIY HVAC Repairs that Usually Go Wrong

Changing the Thermostat

Changing the thermostat sounds easy enough, right? Unfortuantely, that answer is wrong. Especially when it comes to a smart thermostat.

We’ve seen a lot of customers purchase a smart thermostat, try to install it and realize it just doesn’t work. An easy answer for this is that their HVAC equipment might be too old and can’t properly communicate with the advanced thermostat.

Another issue we see is electric. Thermostats need to be wired correctly or they won’t work. When a professional HVAC tech comes to your home to install a thermostat, they also make sure the wiring isn’t damaged or frayed. Then the easy part if just programming your new thermostat.

Blocking Room Vents

For some reason people think that by closing the vents to a room they don’t use will help save energy and lower their bills.

This “quick fix” can actually end up costing you a lot in the long run. A closed vent means the HVAC system is still producing enough air to cool your home, but now that air has nowhere to go.

In turn, this extra air just creates more pressure in your system which can raise your utility bills and even put a hole in your ductwork.

Cleaning the Outdoor Condenser

Even though your condenser looks like a big, tough piece of machinery, the coil inside is actually quite delicate.

We’ve seen homeowners think that they can just spray down the outside of the unit to get it nice and clean. Instead, when you spray a hose at it from the outside, you run the risk of twisting and bending the coils. Essentially rendering them useless.

What you Can Do

Clean Around the Condenser

Your condenser is the only part of your HVAC system that’s exposed to the elements all year long. While you don’t need to put a cover over your unit when it’s not in use. Cleaning around it is great.

At Service Champions, our technicians are constantly cleaning leaves, dirt, and other garden debris out of condensers. For a DIY HVAC project, we recommend regularly cleaning around your condenser to prevent any foreign objects from getting in.

Change the Air Filter

Changing the air filter in your HVAC system is easier than most would think. The hardest part is accessing an attic unit.

Our Service Champions techs recommend changing the air filter at least twice every year. Once in the spring before furnace season, and once in the fall before AC season.

We also recommend checking your air filter periodically if you live in a home with lots of shedding pets, live close to a construction site, and after fire season.

Battery Checks

Things like thermostats and carbon monoxide detectors are amazing safety tools and should be treated as such. One of the best things you can do for these tools is to check their batteries once every few months.

A thermostat is only good if it continues to work. The same can be said for a carbon monoxide detector.

Why the Air Conditioner May Give You a Sore Throat

Heating and air conditioning are such a part of everyday life that we usually don’t give them a second thought—until something goes wrong, or we experience discomfort of any kind. If you’re feeling a little choked up, there are three main reasons why an air conditioner can give you a sore throat.

Dry air, dirty air, allergies, and sore throats happen, and when they do, sometimes the first suspect is the air conditioning. While this isn’t true for everyone, there are times when a sore throat or other body reactions can be triggered by the air conditioner.

Improper Installation

A general reason why air conditioning may be to blame for a sore throat, or any type of discomfort, is improper installation. Faulty technical work, negligence, or accidents result not only in poor air conditioning but create areas that can foster lower sanitation and overall health.

When an air conditioner is installed in a bad location, it can degrade faster. This damage can be attributed to an excessive amount of UV rays, low amount of insulation, or improper air circulation.

A professional HVAC technician and installer makes sure the system is in a place that receives proper air flow.

Leaky Ductwork

Over time and with use, small leaks and punctures can appear in your ductwork. Ductwork is responsible for transporting air to the HVAC system, then distributing temperature-treated air to the home. These small leaks can lead to contaminates, such as dust and allergens, getting into your HVAC System.

Leaks and punctures within the central air system, duct work, and filter allow for dirt, dust and other irritants to contaminate the internal anatomy of the furnace and air conditioner as well as the indoor air supply. The dirt continues to build up over time, hurting the system efficiency and degrading air quality.

Lack of AC Maintenance

The air supply inside of the home is recycled again and again with each air conditioning cycle, traveling through the central air system and throughout the house. Homeowners who tend to skip out on AC maintenance can forfeit the benefits that come with a regular tune-up.

One of the biggest contributors to an AC induced sore throat is a dirty air filter. Air filters serve two important roles. First, they keep dust from clogging important components of your HVAC system. And second, they trap indoor air pollutants.

Air filters that are too full or haven’t been changed force your HVAC system to work harder to push air through the clogged filter. Additionally, your indoor air will stay polluted because the filter can’t pull dust, dander, allergens, and other contaminates from your air.

For those particularly sensitive to indoor air quality, several air-cleaning systems are available with the help of your HVAC contractor.

Closed Vent Control

Closed vents prohibit the interaction between indoor and outdoor air. This seals the house from the outside and the same air cycles around the home. Air that has been trapped indoors for prolonged periods of time grow stagnant, breed bacteria and collect dust.

Try opening the vents of the central air system to allow the exchange of outdoor air with indoor air. This allows for a new supply of healthier air for central air conditioning.

It’s also a good idea to open your windows from time to time and let fresh air in. This will help with keeping your air from getting stale.

What You Can do to Combat an AC Induced Sore Throat

Fortunately, there are a few things you can do when the air conditioner starts to give you a sore throat. Our tried and true methods for combating this are:

  • Schedule Regular Tune-Ups: The best thing you can do for your home and HVAC system is to schedule two tune-ups per year. Once in the spring before you start using the AC and once in the fall before it’s time to turn on the furnace.

    During a tune-up, our techs will clean everything in your system, making sure there is no buildup of dust or other debris.

  • Routinely Check the Air Filter: The air filter is responsible for trapping indoor air contaminates. When it’s too full, you could be breathing dirty air.
  • Keep Yourself Hydrated: Central air conditioners can dry out your air. Make sure you’re staying hydrated any time you’re home.
  • Frequently Dust and Vacuum: Some homes have more dust than others. A great way to keep that dust at bay is to routinely dust and vacuum your home.

When the Air Conditioner Isn’t to Blame

If your HVAC contractor cannot find any faults within the central air system, you can adjust some personal habits to help alleviate pain and discomfort.

Consider adding a humidifier to restore moisture in the air supply. When the central air system runs for great lengths of time, water is zapped out of the air. Your HVAC contractor can help you find the right humidifier for your home and lifestyle needs.

Always remember to keep hydrated to help wash out irritants breathed in.

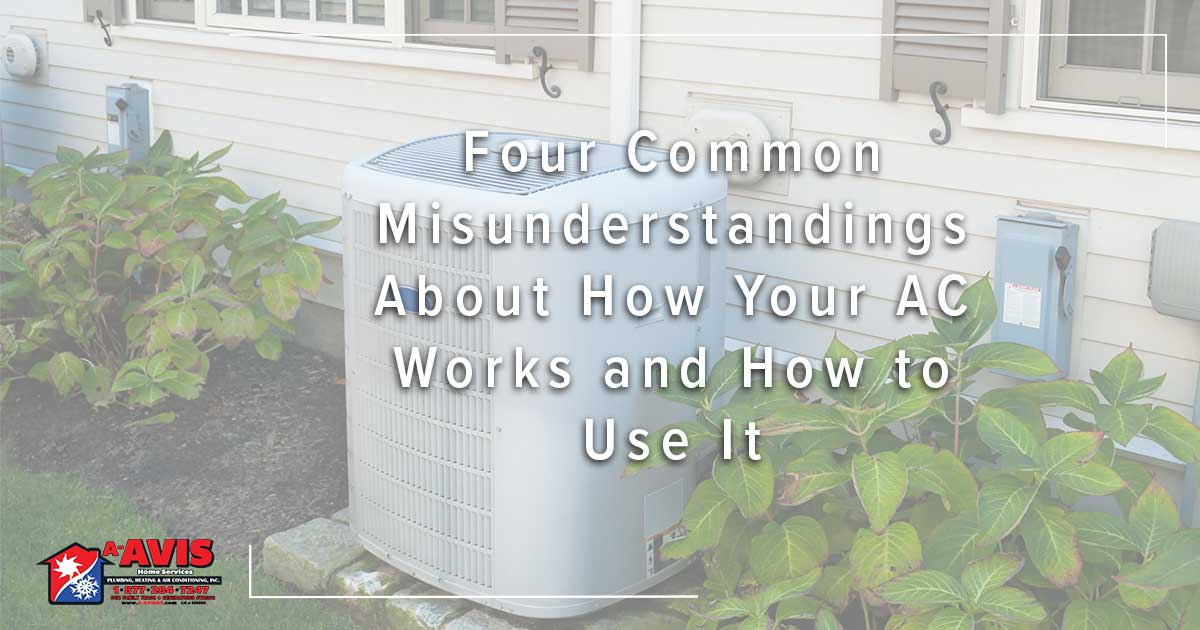
Four Common Misunderstandings About How Your AC Works and How to Use It

Common Misunderstandings About How Your AC Works

At A-Avis, our techs help so many homeowners they have a trained eye for detecting problems common to Southern California air conditioning systems.

Far too often we see problems left unattended for so long they pose a greater threat later down the line. This compromises the system’s performance altogether or even the health of people living in the home.

We believe in empowering clients to make the right choices for their home and central air system. Because of this we’re sharing common misunderstandings about how your AC works.

Problem #1: Homeowners let the heat load get too high

It’s a common habit in Southern California to close the windows and doors for more than three to four hours at a time during peak heat periods. However, this results in no home ventilation.

While homeowners are out, the indoor home temperature can rise considerably. For example, it can be 95° outside and by the time you arrive home the indoor temperature has risen to 88°.

This is an uncomfortable temperature for most families. Turning on the air conditioner is the logical solution, most people set it in between 73° and 75°. Unfortunately, even if the air conditioning never turns off, it may take hours to lower indoor room temperature (as a whole) from 88° to 75°.

When the home gets too hot and the AC must work overtime, the system:

When the home gets too hot and the AC has to work overtime, it:

  • Stresses out the air conditioning system, adding strainItemized Image of a Central Air Conditioning System
  • Expends extra energy
  • Costs more to cool the home now and maintain later

Solution:

When you know you’ll be out of the house during peak heat hours, leave the air conditioner on to a reasonable temperature (78° to 80°). This allows your AC to run at a sustainable level so that you can adjust the thermostat to a comfortable 75 without stressing out your air conditioner.

Another solution would be to invest in a smart thermostat. This way you can control the temperature from your phone. Leaving the house? Set a higher temperature! On your way home from the store? Lower your temperature from your phone so you’re walking in to a nice, cool home.

Problem #2: A lower number on the thermostat does not mean cooler air

Central air systems work by cooling air 15° to 20° at a time. For example, if the indoor air temperature is 80°, the AC system takes that supply of air and subtracts 15° to 20° of heat before releasing it back into the home air supply. Because it mixes with the other 80° air that has not been conditioned yet, the air is somewhat cooler, but not necessarily the temperature that was set on your thermostat. It takes time for the indoor air to reach temperature equilibrium.


However, if you believe the mixing of temperature treated air and the indoor air supply is not the reason for poorly conditioned air there, may be a greater issue. Though air is still conditioned, it is less efficient, forcing the system to work twice as hard to cool the same amount of air.

Solution:

If your air is not cooling air in 15° to 20° increments, a maintenance call is required to restore proper function and efficiency levels.

Problem #3: Homeowners ignore filter maintenance

A regularly scheduled maintenance call usually eliminates issues with poor or dirty air filtration. From stuffed filters to debris buildup over the evaporator coils, keeping your central air system clean benefits the system itself and the cleanliness of the air inside of your home.

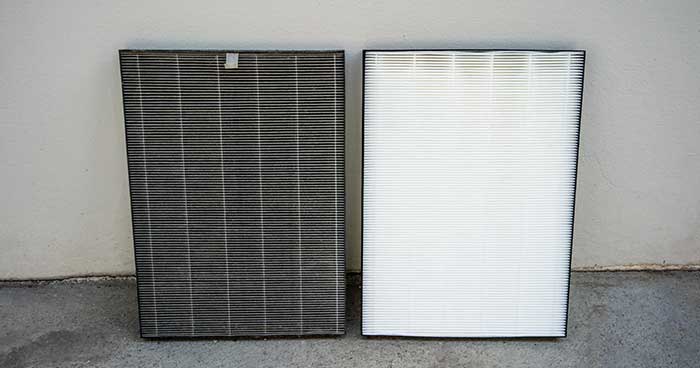
How Often Should I Change my HEPA Filter

When air filters are not cleaned or replaced it adds excess strain to the AC. This happens because less air gets through the filter and less air is conditioned. This can also cause the evaporator coils to ice up while the system overheats.

Refrigerant, an essential part of the cooling process, flows through the evaporator coil. This coil is made of hollow tubes that are cooled by the refrigerant. This colder temperature triggers the heat transfer process. Meaning any heat from the indoor air is transferred to the evaporator coil and refrigerant.

Something as simple as a dirty filter can stop this process because less room temperature air passes over the coils which in turn ice up.

Likewise, poor air flow due to dirty filters can result in the system overheating and shutting down. This is because a central air system needs a heat source to function, and restricted air flow means the same amount of energy is used for less and less air.

Dirty or overfull air filters are the number one reason a system shuts down.

Solution:

Have your preferred HVAC technician visit to service your AC system. Be sure to replace filters and have the evaporator coils and drip pans cleaned. These areas collect water and are prone to microbiological growth.

Problem #4: The AC system is not an open system

Most homeowners tend to think their air conditioning system is an open system. This is not the case. Contrary to popular belief, there is no need to refill your refrigerant supply.

In a perfect world, a properly installed system would incur no damage and would never need to be refilled. The idea being that refrigerant is recycled with every use.

Unfortunately, we don’t live in a perfect world and refrigerant leaks happen.

Refrigerant is a harmful substance and should only be handled by an HVAC professional. It can also damage the ozone layer.

Because of these two issues, it’s important you call someone immediately if you suspect a refrigerant leak.

When there is a leak in your refrigerant supply, the system is less efficient because it does not have enough cooling power to work with. If your AC system previously cooled indoor air in 20° increments, it now may be cooling in 10° increments; the air conditioner works harder to treat the same amount of air.

Solution:

Have your preferred HVAC technician repair the leak, refill refrigerant and recalibrate.